Learn about all the shop configuration options in the BidClips Provider Portal.
Shop configuration settings play an important foundational role in the BidClips Provider Portal. These settings are used to: dictate the shop contact and terms and conditions information that is displayed to your customers in their bids; provide the logo that is displayed in email correspondences to your customers; define your travel surcharge calculation rules; set up your shop and mobile service schedules; establish your default pricing values, set up your credit card payment gateway credentials; store your default widget landing page and Google review URLs; and more.
This article outlines all of the general shop settings you can configure in your BidClips Provider Portal. Click one of the links below to navigate to a specific setting you are interested in. There are also smaller, more focused articles about these individual components in our Knowledge Base:
- General Information
- Service Area
- Service Timing
- Pricing
- Shop Notes
- Terms
- Default Shop Widget Page
- Google Reviews
- Franchisor Information
- Automatic Part Creation
Important! You must click the 'SAVE' button at the very bottom of the Add/Edit Shop Information page before leaving the page. Failure to click the 'SAVE' button before navigating away from the Add/Edit Shop Information page will result in lost work.

General Information
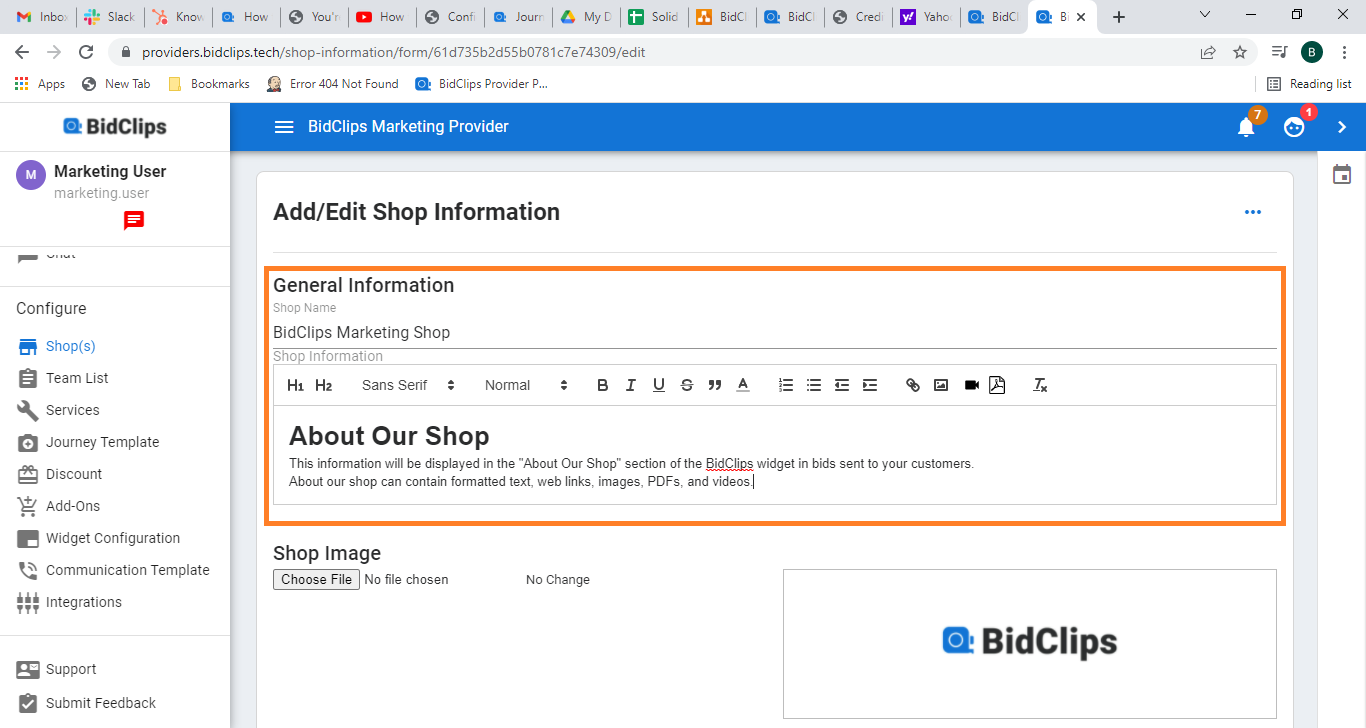
In the 'General Information' section, you will customize the information that will be displayed publicly to your customers in the BidClips widget. The general information that is entered here includes your shop name (required), the shop information, a shop image, contact information, and the shop address.
Shop Name & Information
This example shows a simple text-based message, but you have the ability here, as is the case with all message editors in BidClips, to utilize formatting options such as adding hyperlinks, images, and videos.
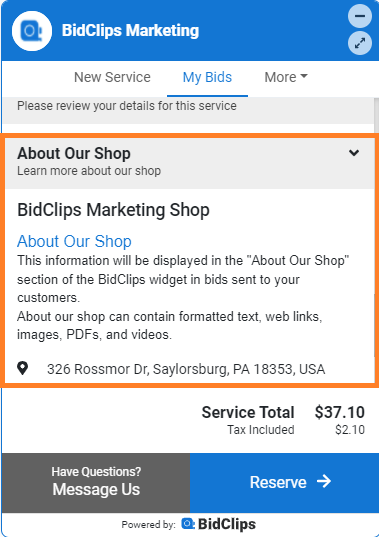
Example of shop name and shop information message displayed in the BidClips widget.
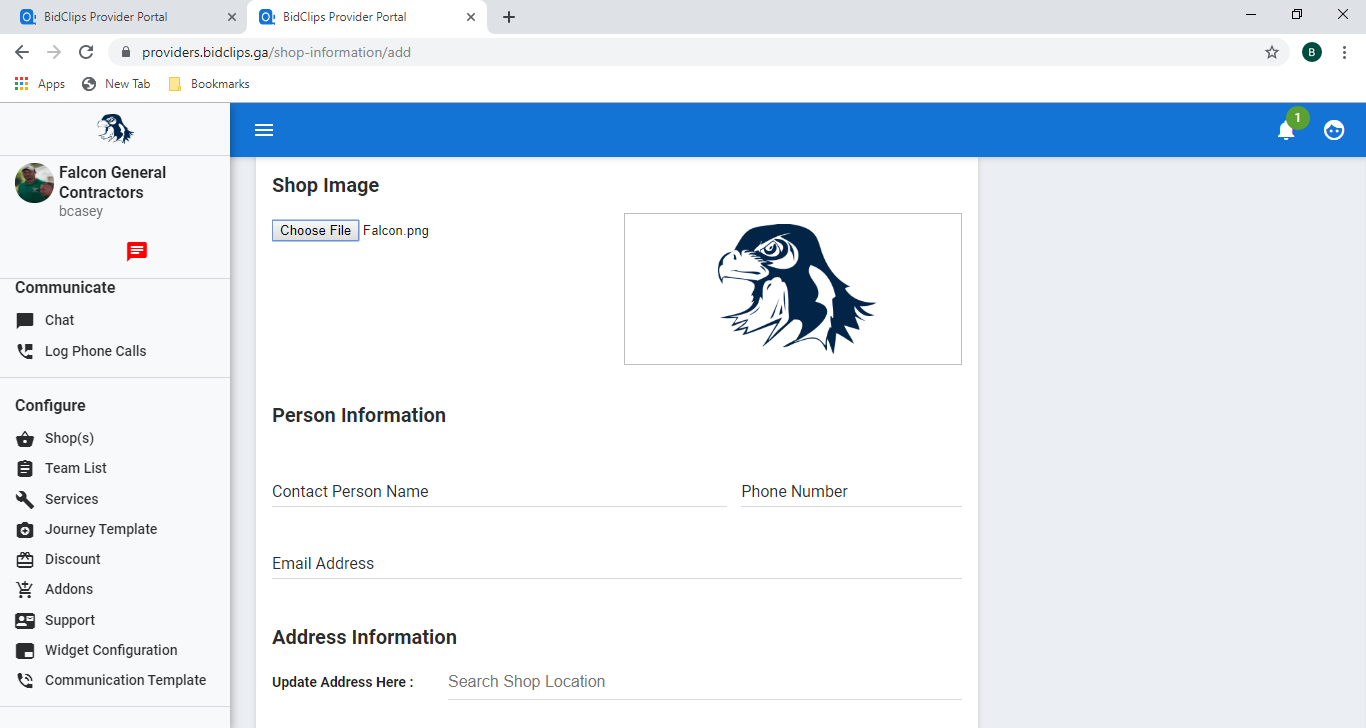
Shop Image
To add a shop image click on the 'Choose File' button and select a logo from your local device.
Contact & Address Information
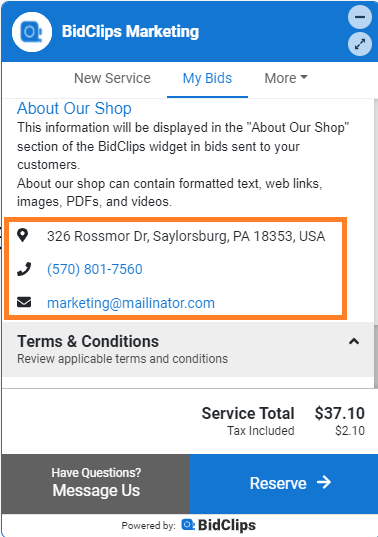
The Contact and Address Information you enter here will be displayed in the shop information section of the BidClips widget. The address entered here will also be used to determine your time zone, your address settings (State/Zip for US customers and Province/Postal Code for Canadian customers) and travel distance units (Miles for US customers and Kilometers for Canadian customers).
You will also notice two read-only values: Shop Email for Automated Communication and SMS Number for Automated Communication. These are the unique, system-assigned email address and texting numbers that will be used to deliver automated emails and text messages to your customers.
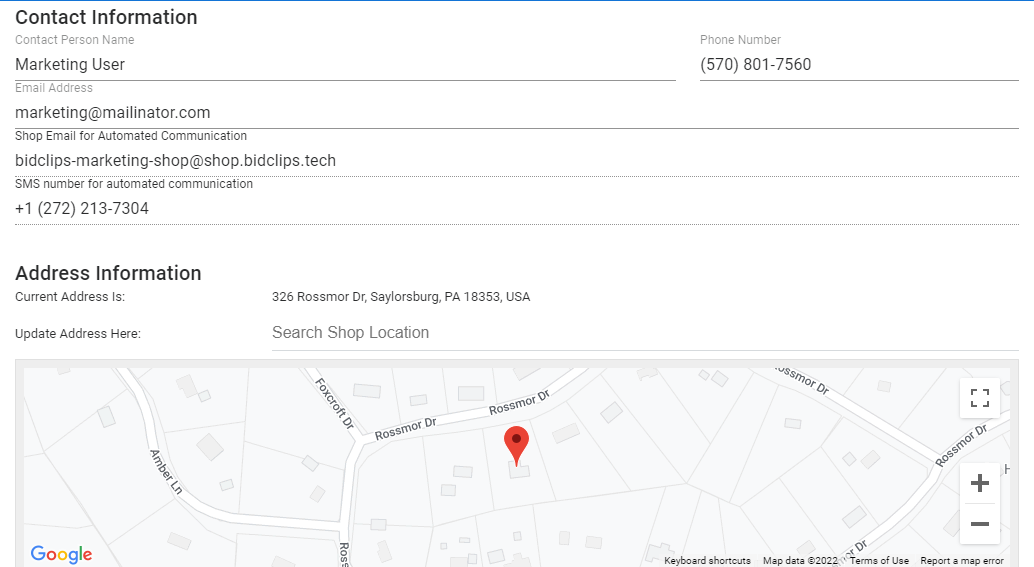
Example of the contact information and shop address settings as viewed in the BidClips widget:
Service Area
The 'Service Area' section is where you will enter the zip codes that your shop services and set up mobile servicing zones.
Zip/Postal Codes Served
You can add each zip/postal code that your organization will service. You can add multiple zip/postal codes separated by a comma (",").
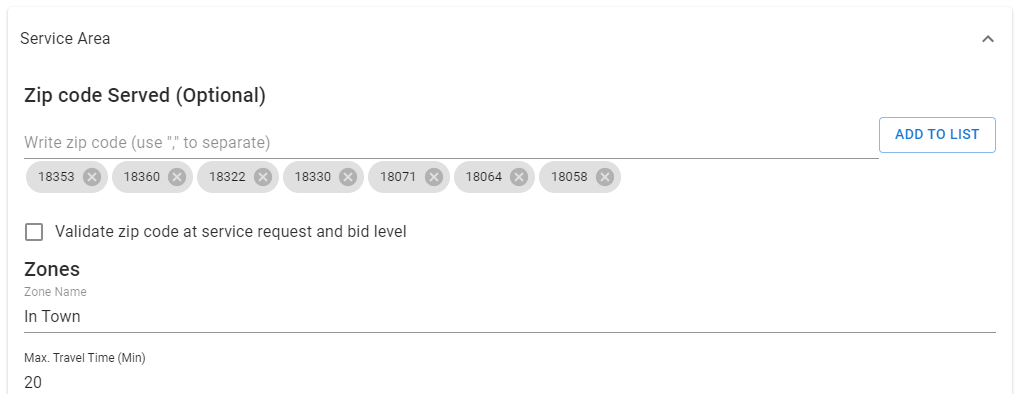
Once you have added the zip/postal codes, click the 'Add to List' button to apply the changes.
If you need to remove a zip/postal code from this list, you can click on the "x" next to the zip/postal code in the list that you would like to eliminate.
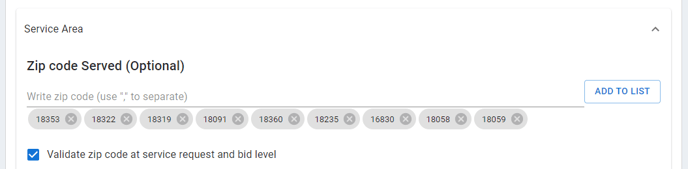
Zip Code Serviceability Validation
You can configure a zip code serviceability validation in your BidClips platform. This feature will validate a customer's service address against your list of serviceable zip codes. If the service address zip code fails this validation, you will see a warning message in several places:
- During service request creation
- Displayed under the service address in the Contacts section of the Service Request details page
- Within the travel surcharge calculation section while creating a bid
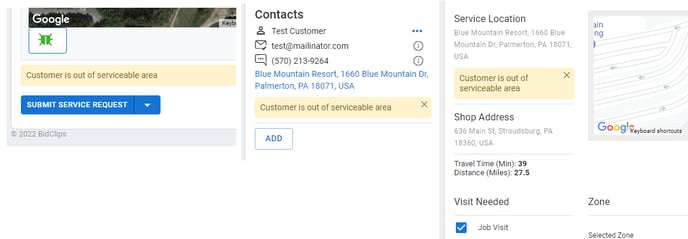
This warning message does not preclude you from creating a service request or a bid, but is designed to help qualify the lead. To enable this feature check the validation box.
Zones
The zone settings enable you to apply travel surcharge rules to your bids. BidClips gives you the ability to use a percentage of the bid (estimate), a flat rate, or the higher of distance vs. labor rates when establishing travel surcharge pricing.
You can create multiple travel zones for your shop and may also combine any of the three options, outlined below, when you establish your mobile service surcharging strategy. You may delete a travel zone at any time, provided you have at least one travel zone established.
To create a 'Percentage of the Bid' rule:
- Click the '+Add' button
- Enter a zone name
- Enter a maximum travel time (in minutes)
- Enter a maximum travel distance (miles or kilometers will be applied automatically based upon your shop address)
- Click on the down arrow in the "Calculate Surcharge" field to use the drop-down menu
- Select "% of Bill Value"
- Enter a value in the "Surcharge Amount" field
To create a 'Higher of per-mile rate vs labor rate' rule:
- Repeat steps 1-5 above
- Select "Higher of Distance/Labor Total"
- Enter a value in the "Per Mile/Kilometer $" field
- Enter a value in the "Hourly Labor Rate $" field
To create a 'Flat rate' rule:
- Repeat steps 1-5 above
- Select "Fix $ Amount"
- Enter a value in the "Surcharge Amount" field
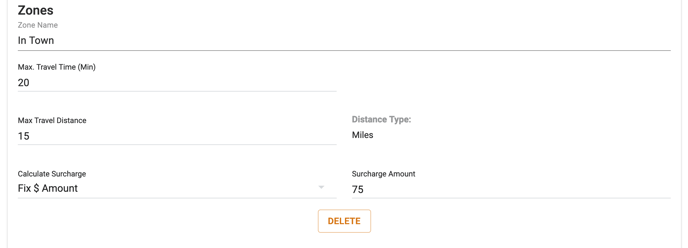
Tip: If you do not want to apply any travel surcharge in your shop, you may use a zone with a fixed $0 surcharge. You can also utilize a $0 fixed surcharge travel zone, in conjunction with other zones, to give yourself the flexibility to override travel surcharge rules on a bid-by-bid basis.
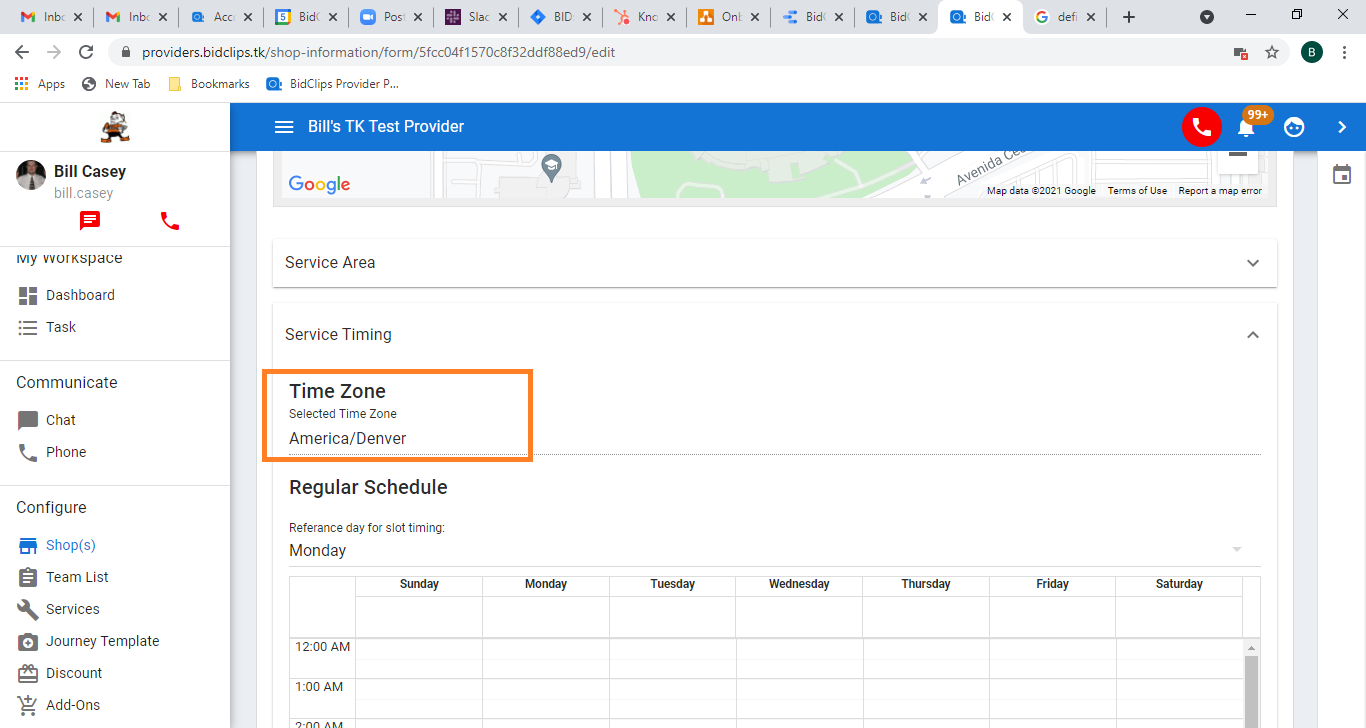
Service Timing
The Service Timing section is where you will set up your shop's local time zone and establish service slots that will be used to schedule services performed at both your shop and mobile service locations.
Time Zone
Your shop time zone settings are automatically applied by virtue of your shop's physical address which is stored in the Address Information section of the configuration settings. You will see your shop's time zone setting here, but it will be read-only. Should you change your shop's physical address, the time zone would be automatically updated.
- Examples:
- US & Canada Eastern Daylight Time Zone:
- America/New York
- America/Toronto
- US & Canada Central Daylight Time Zone:
- America/Chicago
- America/Winnipeg
- US & Canada Mountain Daylight Time Zone:
- America./Denver
- America/Edmonton
- US & Canada Mountain Standard Time Zone:
- America/Phoenix
- America/Regina
- US & Canada Pacific Daylight Time Zone:
- America/Los Angeles
- America/Vancouver
- Etc.
- US & Canada Eastern Daylight Time Zone:
Regular Schedule
The BidClips Provider Portal gives you the ability to create multiple shop/mobile service slots for a given day and apply the desired number of parallel work streams in those slots. To create a service slot:
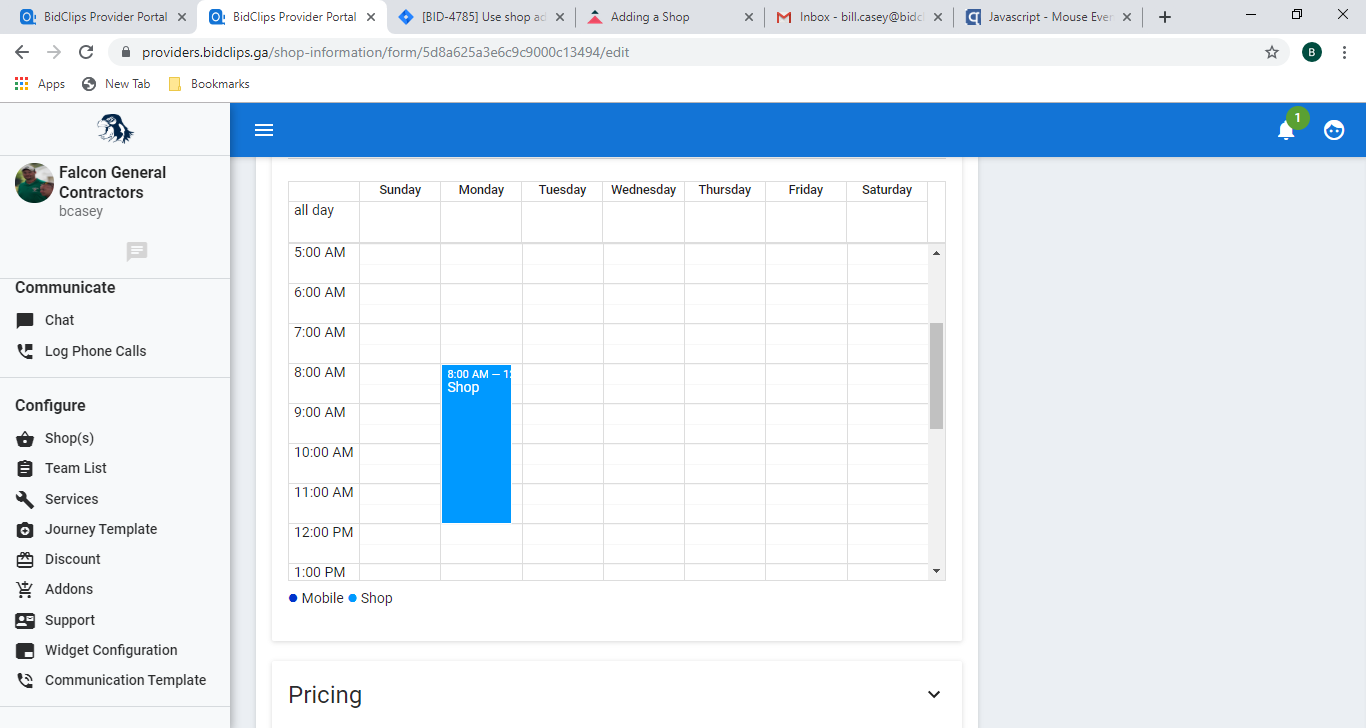
- The example described here will show the steps necessary for setting a shop service slot on a Monday from 8 am to 12 pm that has three (3) parallel work streams.
- Double-click on the day and time you want your service slot to begin.
- An 'Add Regular Slot' panel will appear.
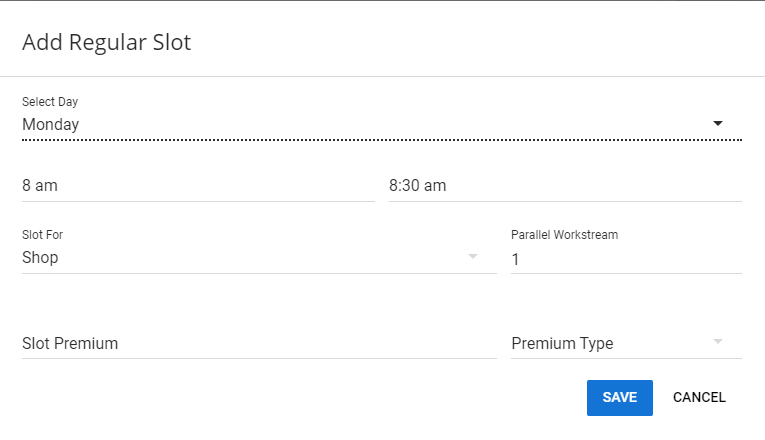
- Click in the end time field; shown here as 8:30 am.
- When you click in the end time field, a time editor panel will appear.
- Click and hold on the blue dot and rotate to the hour you want the slot to end.
- Unclick. You have now set the ending hour and can set the minutes of the hour you want the slot to end.
- Click and hold on the blue dot and rotate to the minutes of the hour you want the slot to end.
- Unclick. You have now set the ending minutes of the hour you want the slot to end.
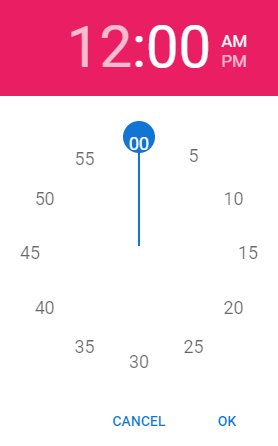
- Click on AM or PM if that needs to be changed.
- Click 'OK'.
- You are taken back to the 'Add Regular Slot' panel with your previously chosen slot beginning and end time values populated as desired.
- Click on the down arrow button in the "Slot For" field to get a choice of setting a Shop or Mobile slot.
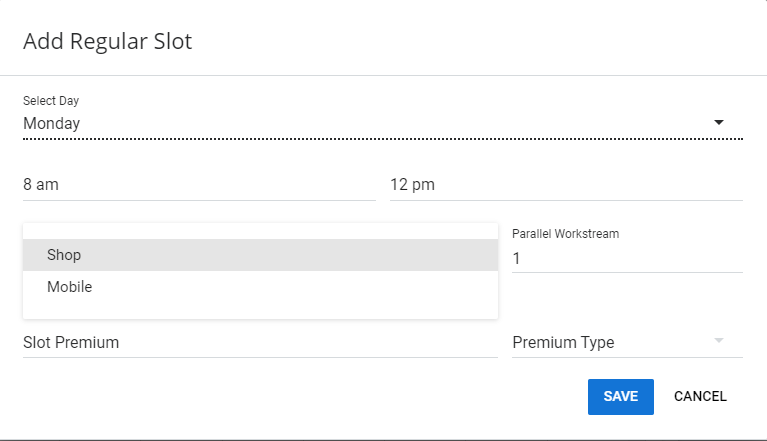
- Click in the "Parallel Workstream" field and enter the number of parallel work streams you wish to operate during this service slot.
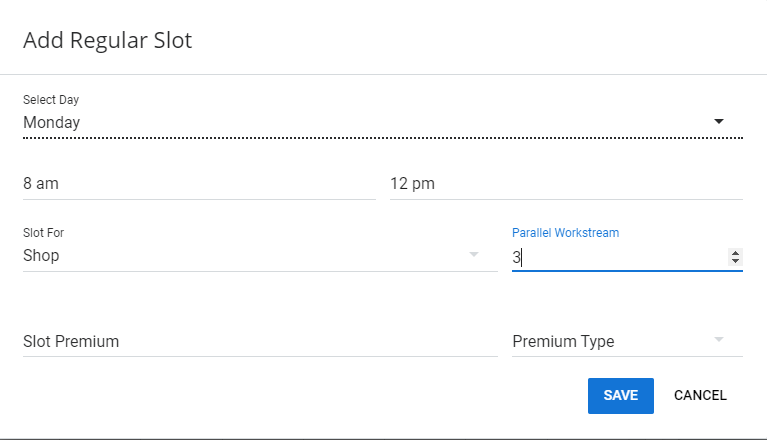
- Click 'SAVE'.
- You can now see the Monday 8 am to 12 pm shop service slot has been created.
- Repeat these steps for all of the shop/mobile service slots you wish to operate.
Please note that "Slot Premium" and "Premium Type" do not currently have any functionality within the BidClips platform.
Pricing
Labor Rate, Tax Rates, Gross Profit %, Part/Labor Cost Distribution
The Pricing section of the page is where you will set your pricing guidelines. Here you can enter a shop-wide labor rate, tax rates for parts and labor, gross profit settings, and part/labor cost distribution rules. Currently, you must enter your applicable tax rates here and can have differing part and labor tax rates.
It is important to note that BidClips uses a margin pricing model when calculating bid pricing. That is, you will enter your part/labor costs when creating bids and BidClips will calculate item prices based upon the gross profit percentage established in the shop pricing settings.
BidClips also gives you the ability, within the Pricing section settings, to configure a default part/labor cost distribution percentage for all bids created for your shop. If you utilize the part/labor cost distribution option, BidClips will automatically calculate item prices so that part and labor prices comprise the desired distribution percentages.
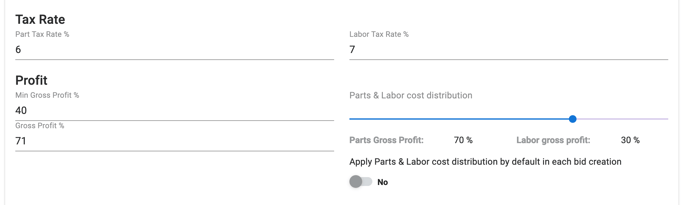
The example shown below used the following settings:
- 6% Parts Tax Rate
- 7% Labor Tax Rate
- 40% Minimum Gross Profit
- 71% Gross Profit
- Set a default usage of a 70% / 30% parts/labor distribution on all bids to "No"
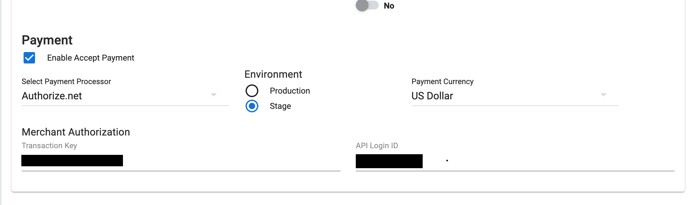
Payment
The BidClips platform allows you to accept payment for jobs using an interface with Authorize.net, Intellipay, or Stripe.
To enable payments for your shop in BidClips:
- Check the "Enable Accept Payment" box.
- Click the "Select Payment Processor" down arrow and select your processor.
- Select either the "Production" or "Stage" option.
- Enter your API Authorization information
- Transaction Key (Authorize.net & Intellipay)
- API Login ID (Authorize.net & Intellipay)
- Secret Key (Stripe)
Note: If you do not use Authorize.net, Intellipay, or Stripe please reach out to our team for assistance. Contact Us
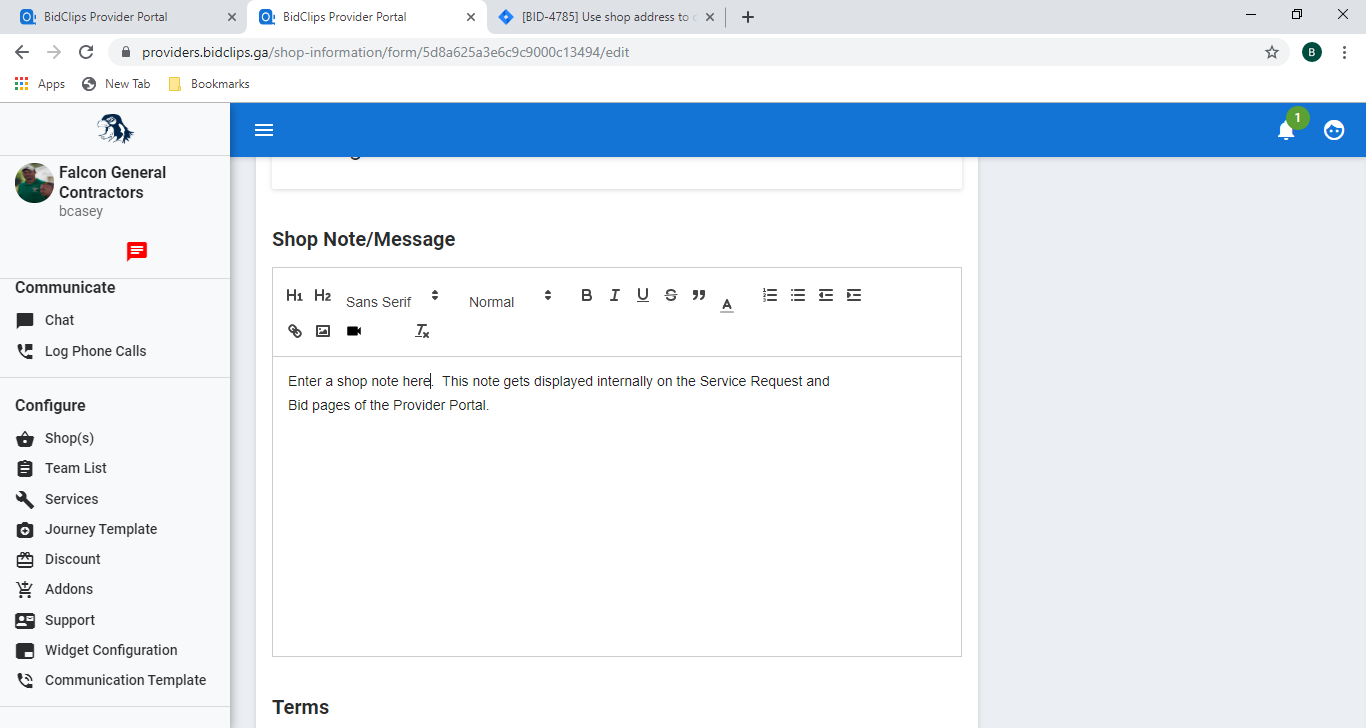
Shop Notes
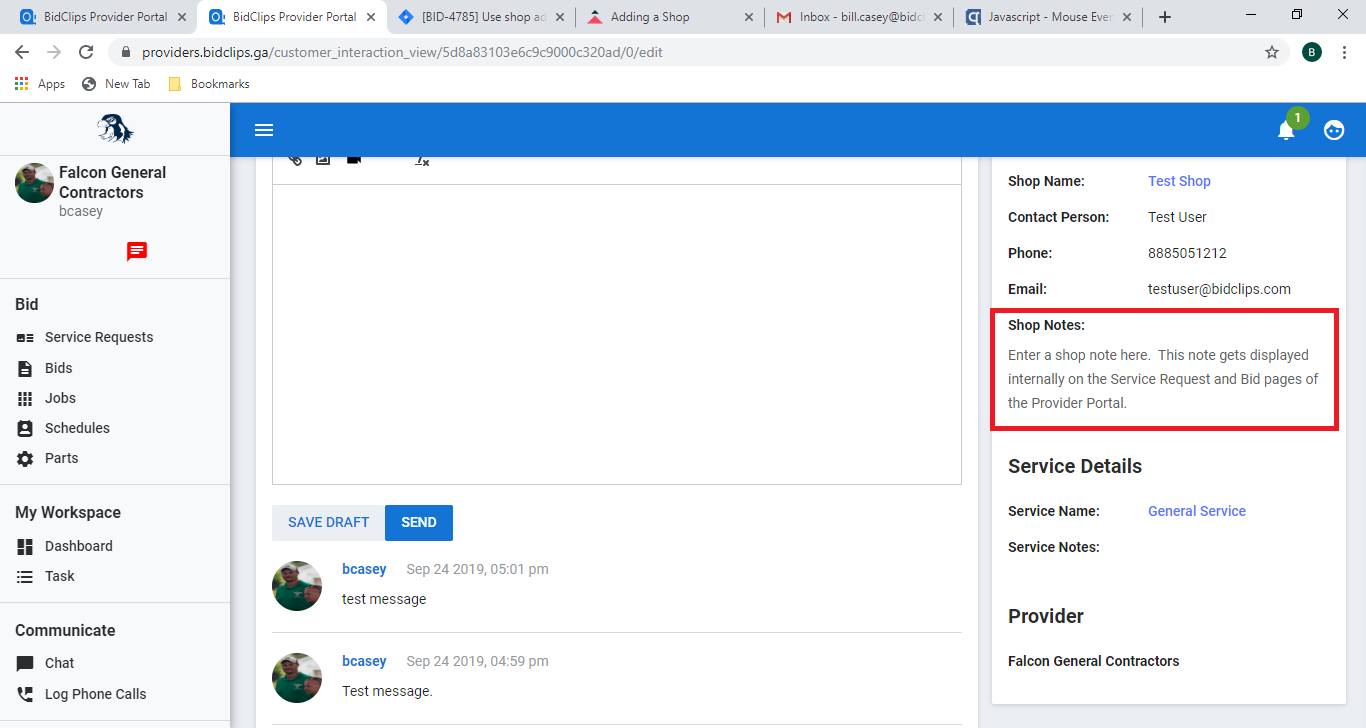
You have the ability to create internal shop notes. The notes entered here are displayed to Provider Portal users in the Service Request and Bid pages of the portal but not displayed to your customers.
Example of Shop Notes set in the 'Add/Edit Shop Information' page:
Example of Shop Notes settings as they appear on Service Request and Bid pages:
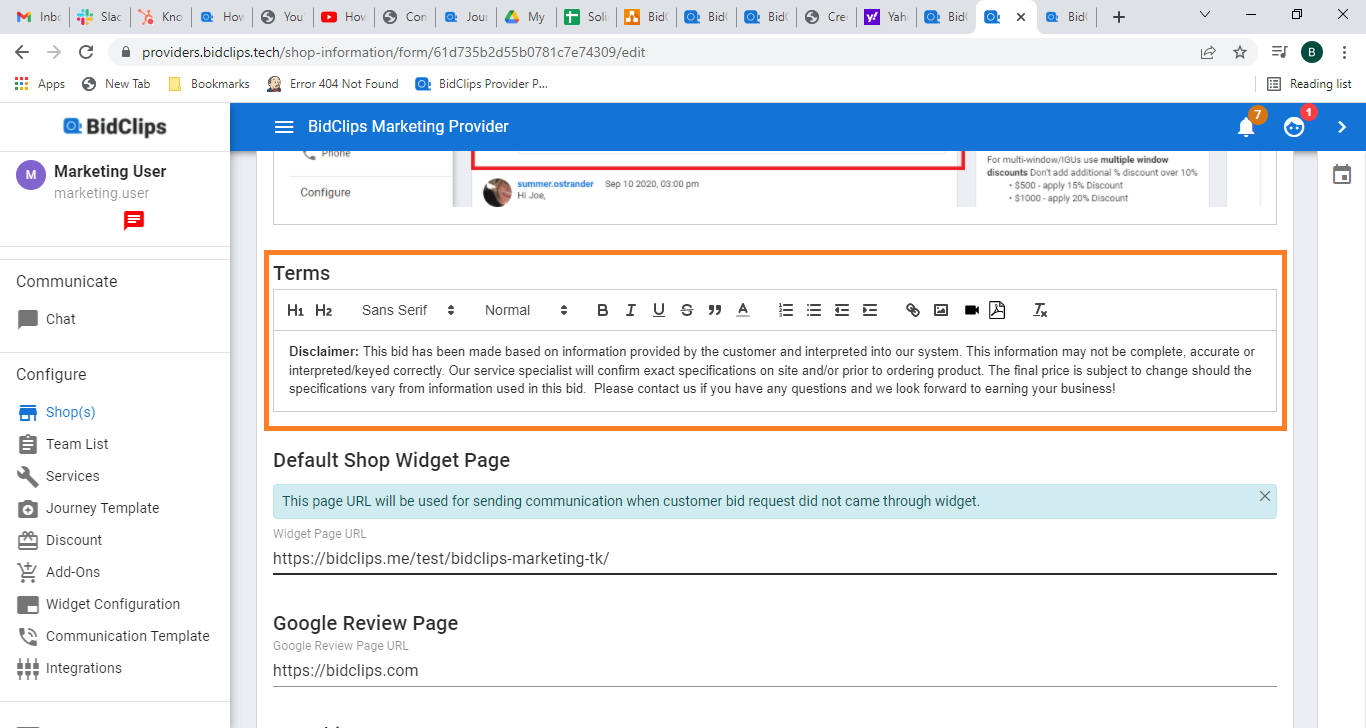
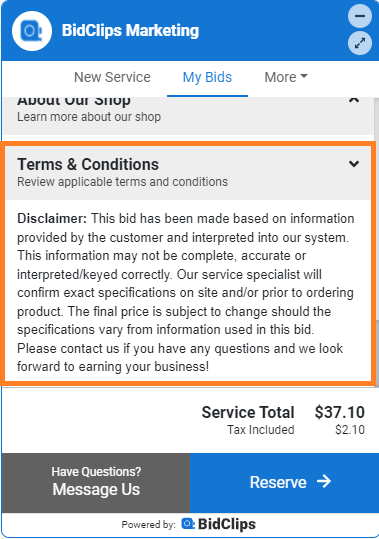
Terms
The Terms section is where you add a 'Terms and Conditions' disclaimer to be displayed to your customers within the BidClips widget. You can use the BidClips text editor to enrich your terms and conditions message with image, video, or pdf components.
Example of Terms text set in the Add/Edit Shop Information page:
Example of Terms & Conditions disclaimer as it would be displayed to the customer in the BidClips widget:
Default Shop Widget Page
The URL setting you apply here will be used for sending communication when a customer bid request did not originate through the BidClips widget. This value will be the URL that the BidClips widget is integrated with and will likely be set to your organization's main web page. An example of this setting is shown below.

If you are unclear as to what this setting should be, please submit a support request and a member of the BidClips support team will assist you.
Google Review Page
Here you can add your Google My Business review URL to ask for ratings after a job has been set to complete. Read this article for more details.
Franchisor Information
If you are a franchisee and your franchisor has been set up in BidClips, you can add that information here. To add a franchisor value in the Add/Edit Shop Information page, click in the "Select Franchisor" field and start typing the name of your franchisor. Suggestions will appear, if applicable, as you continue typing.
The franchisor information entered here does not currently have any functionality in the BidClips platform, so if you are unclear if this value is needed leave it empty.
Automatic Part Creation
When creating a bid you can automatically create parts based on part inputs by your team. You can turn this setting on & off here for 'Provider Users' or 'TPS Users' if you have a TPS team log in to BidClips.
Important! You must click the 'SAVE' button at the very bottom of the Add/Edit Shop Information page before leaving the page. Failure to click the 'SAVE' button before navigating away from the Add/Edit Shop Information page will result in lost work.