Learn how to make and use pre-made messages to send to customers
This feature will save you time not having to type long messages to customers. With just a click, you can present professional messages in seconds.
BidClips gives you the ability to create canned messages to quickly generate pre-defined messages for your customers. The canned messages you create can be applied to only specified services or to all services for a particular shop.
You will start the process of adding a canned message by clicking on the "Shop(s)" link in the Configure section of the Provider Portal navigation bar that is located on the left side of the screen.
This will bring you to the Shop Information page of the Provider Portal as shown below.
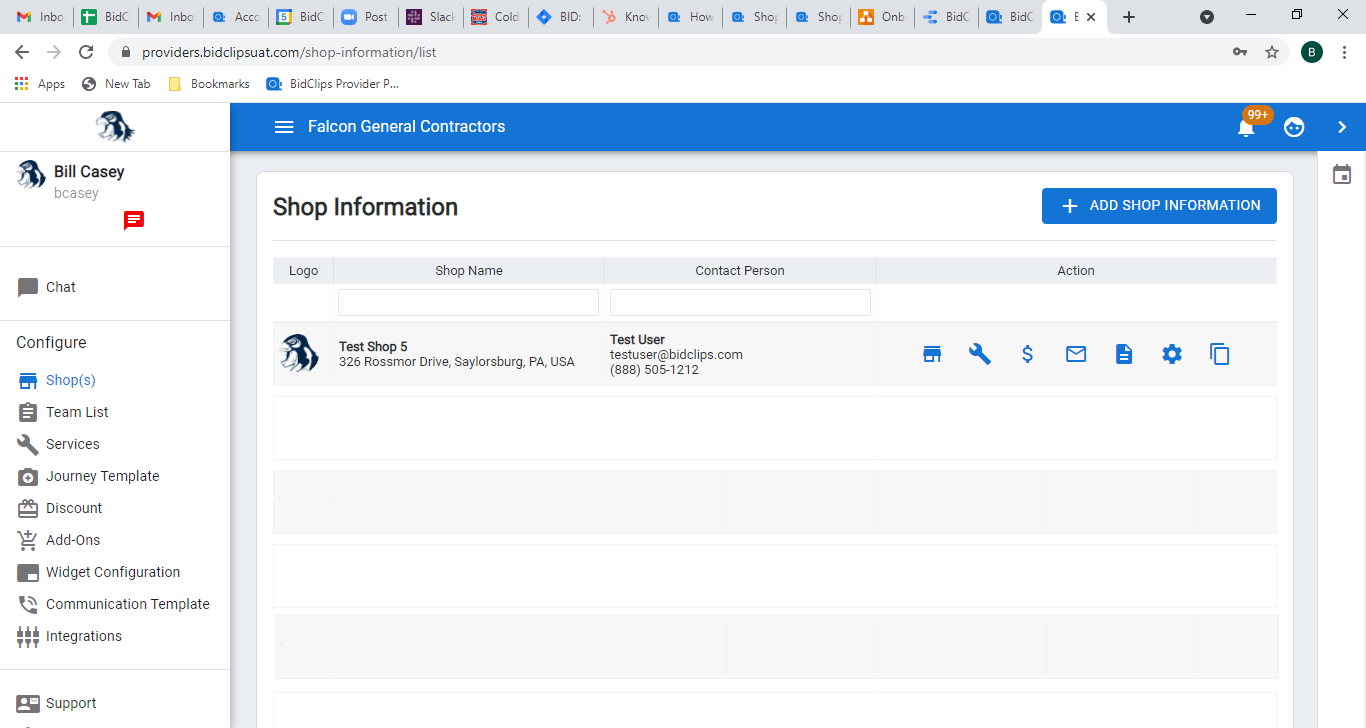
Next, you will click on the message ( ) icon in the 'Shop Information' page and will be redirected to the 'Canned Message' page:

Click the '+ ADD MESSAGE' button to create a new canned message.
Click in the 'Canned Message Name' field and give your new canned message a descriptive name.
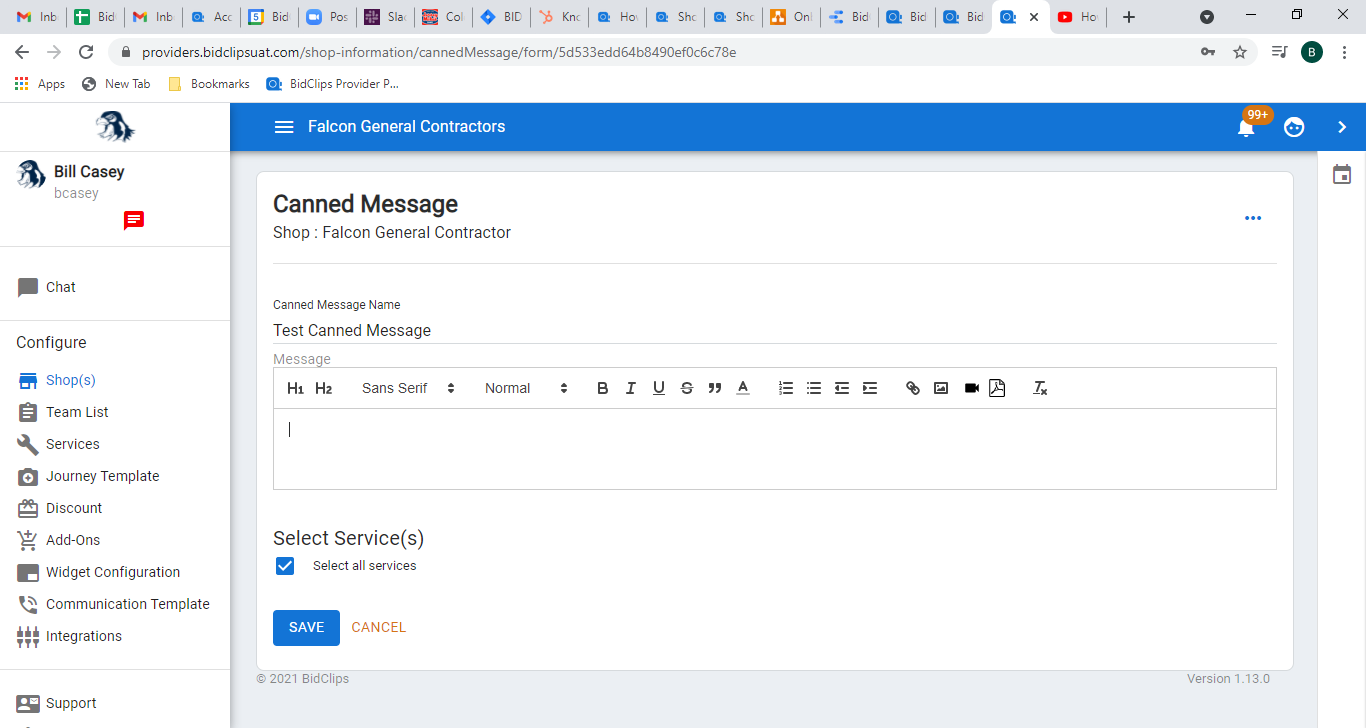
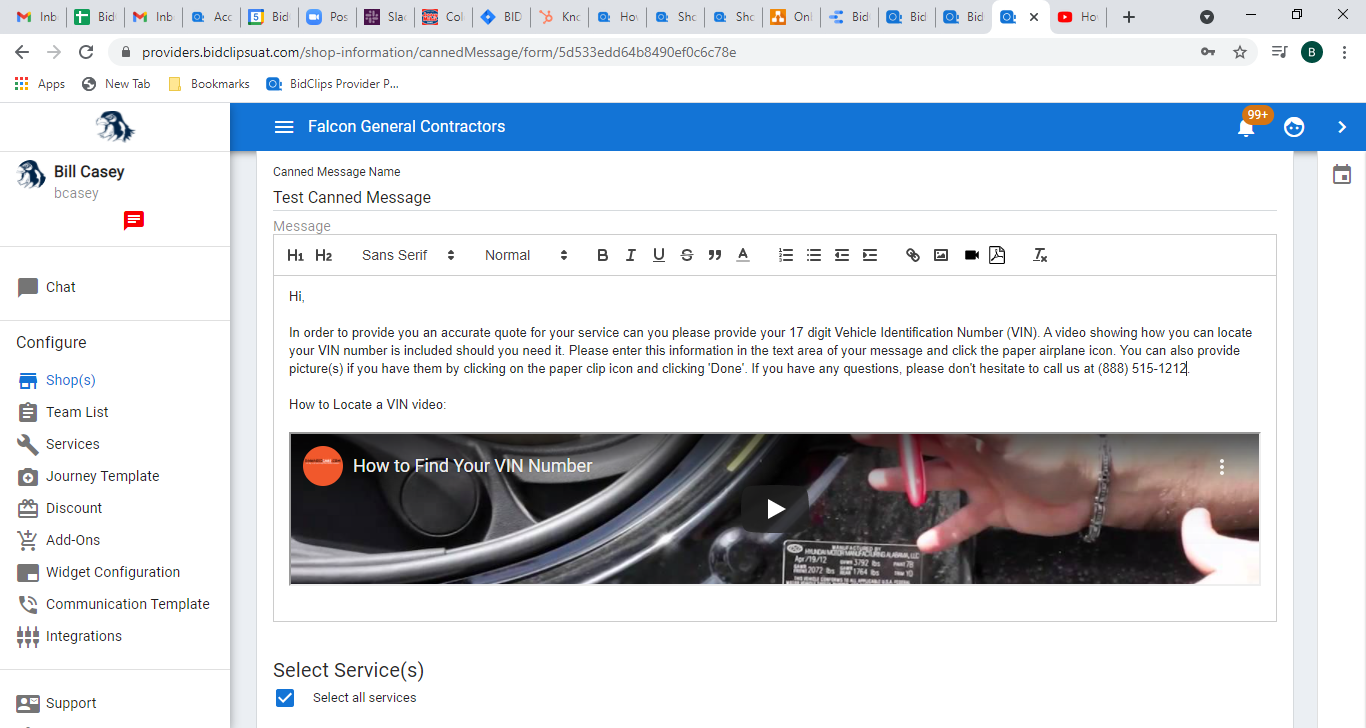
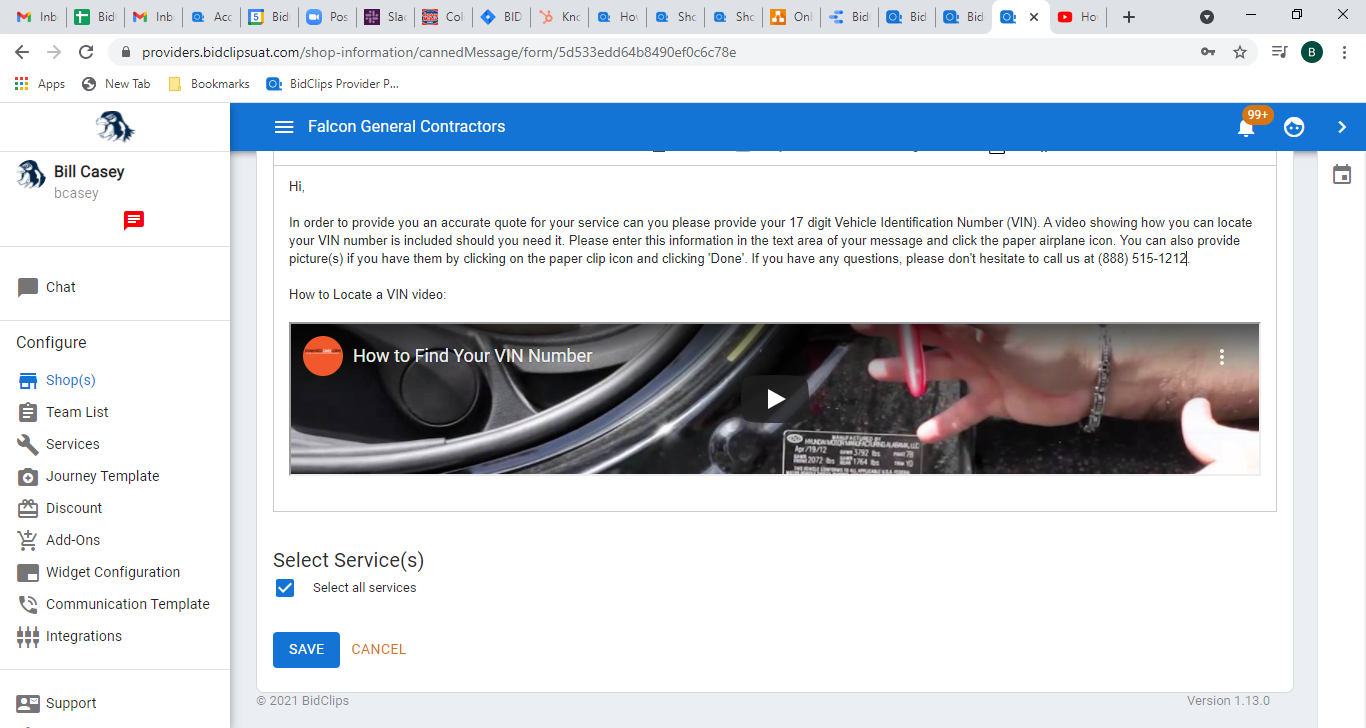
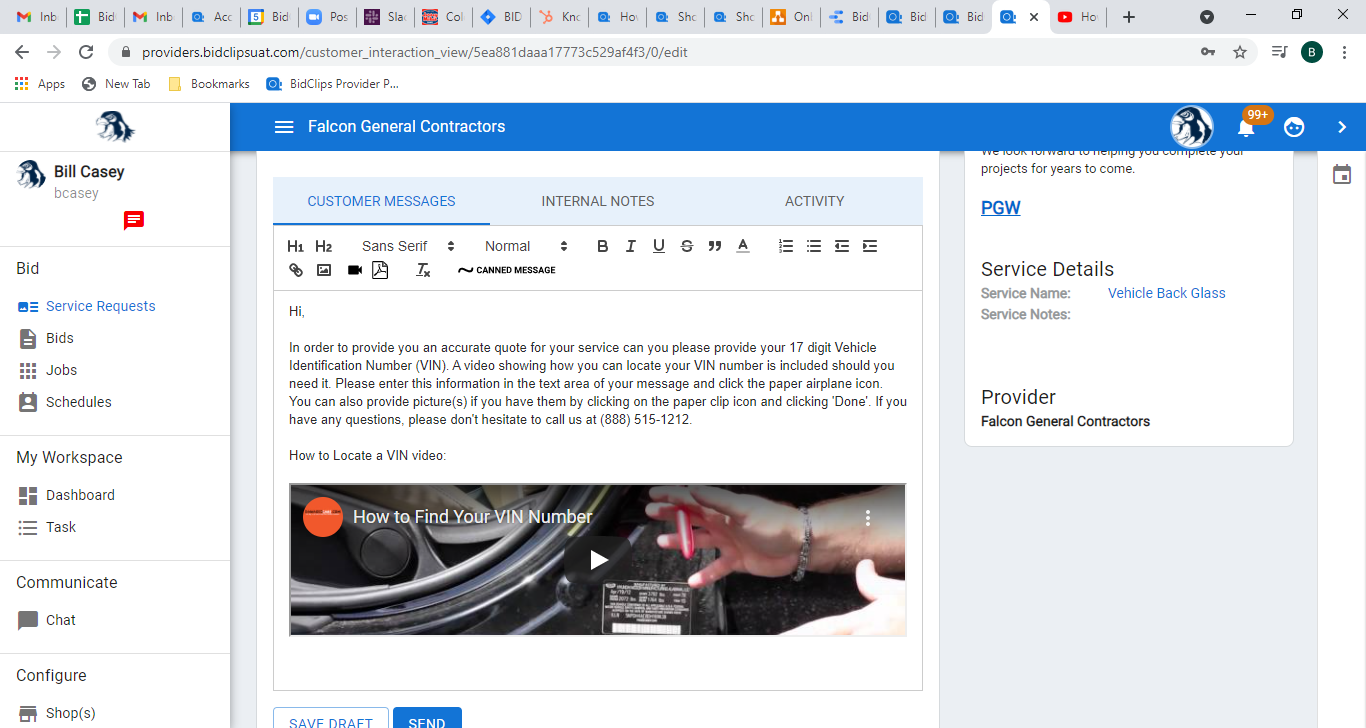
Click into the 'Messages' section and create your message.
You can use a combination of text, web links, images videos, and pdf objects in this message editor. The example shows a mix of text formatting, the use of a web link, and the inclusion of a video that helps a customer locate a VIN.
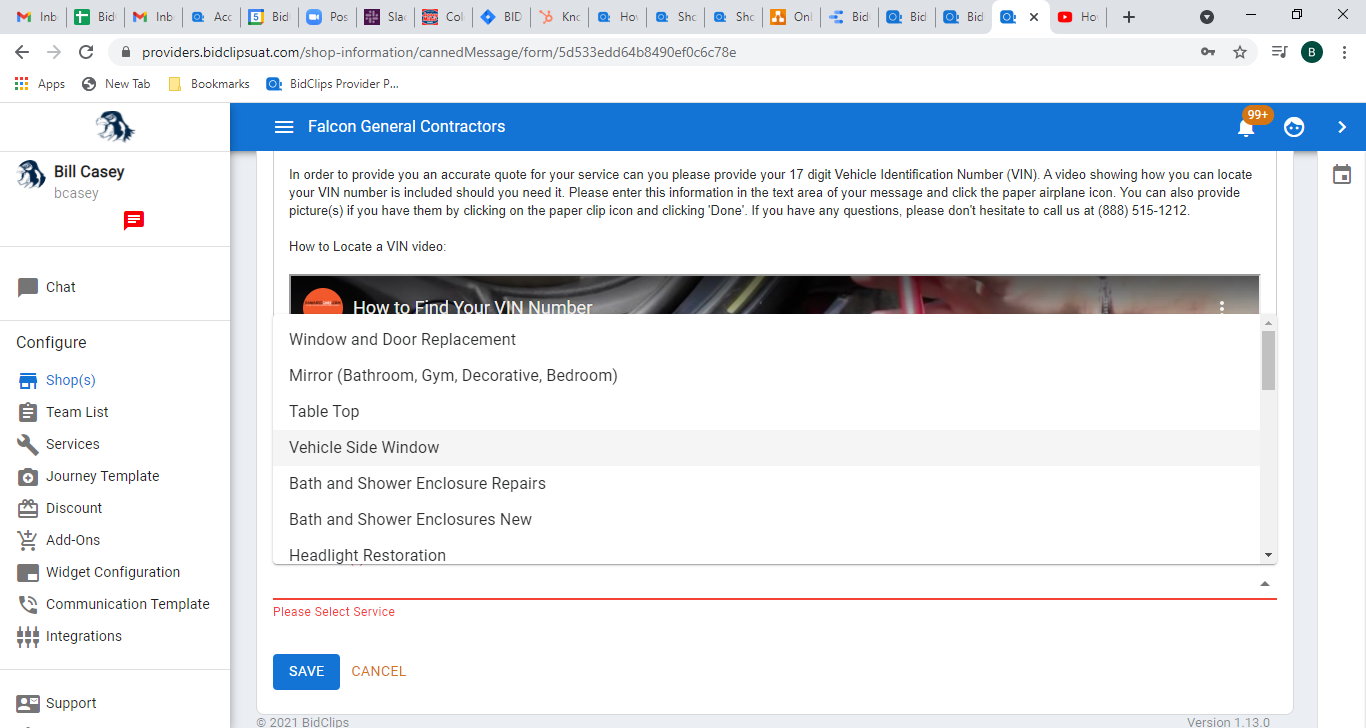
Scroll down to the bottom of the page and you will see the 'Select Service(s)' check box. The default value is set to 'All Services'; this will make the canned messages available to include in customer messages for all services provided for a given shop.
Since the example shows a message designed to help a customer locate their vehicle's VIN, you might want to apply the message to the Windshield Replacement, Vehicle Back Glass, and Vehicle Door Glass services. To make this canned message available for only selected services, you would deselect the 'Select all services' check box and add services individually.
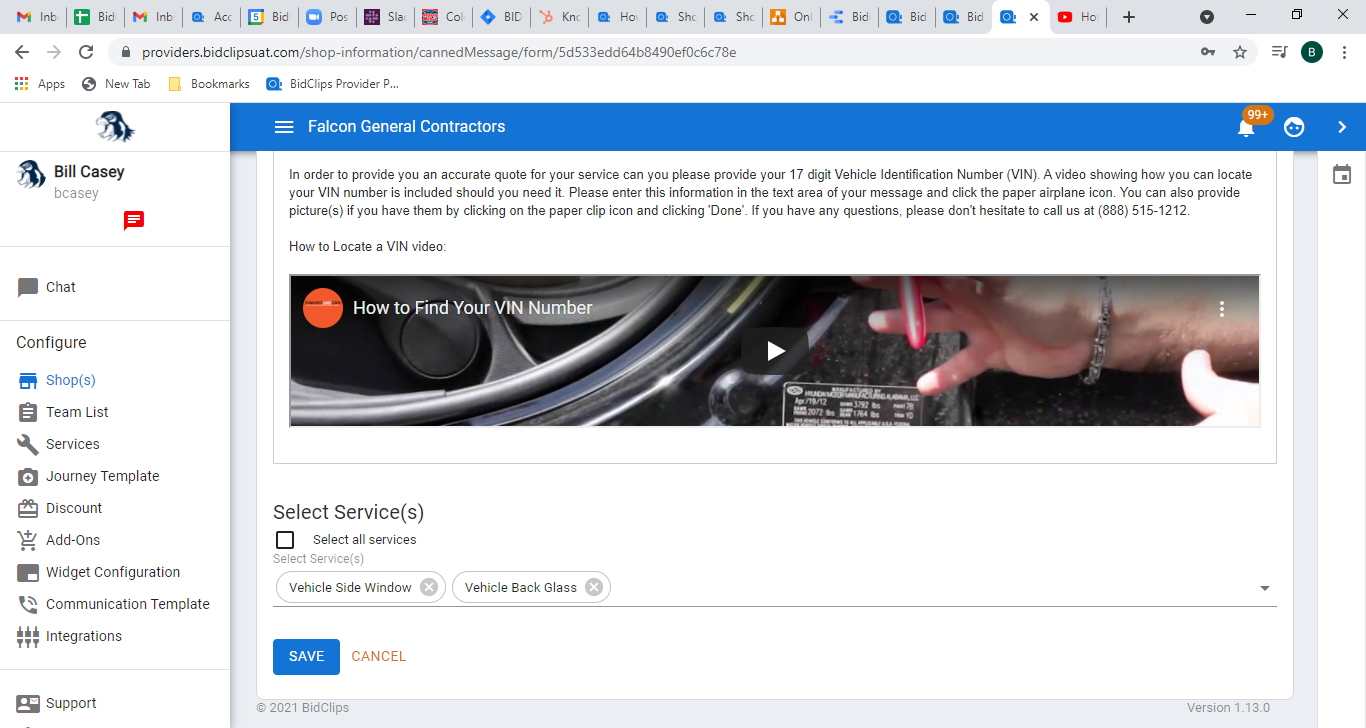
Click the 'X' next to the service name value if you would like to clear any of the previously selected value(s).
Save Your Settings
Important!: Please remember, you must click the 'SAVE' button at the very bottom of the Canned Message page before leaving the page. Failure to click the 'SAVE' button before navigating away from the Canned Message page will result in lost work.
Once you click 'SAVE' you should see the following 'Canned Message Created' message appear in the upper right-hand corner of your screen. You have now successfully saved the Canned Message settings for your shop and will see the newly created Canned Message.

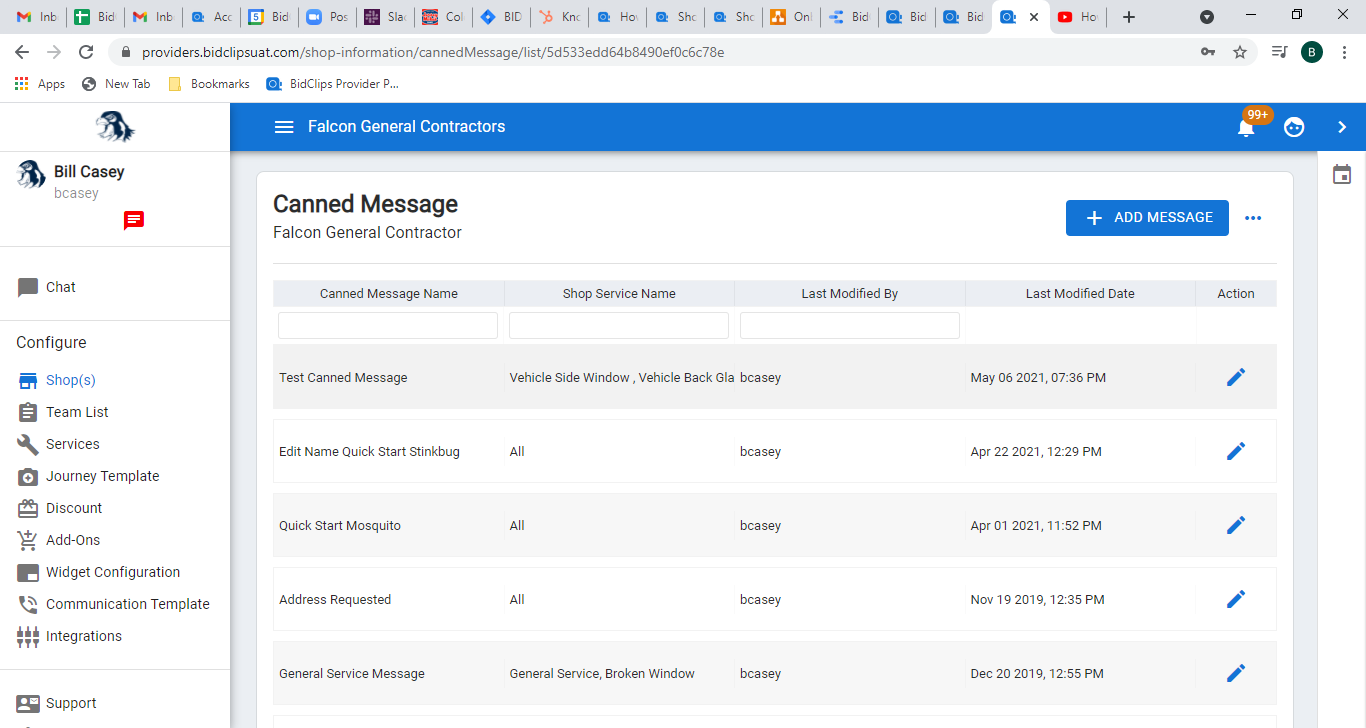
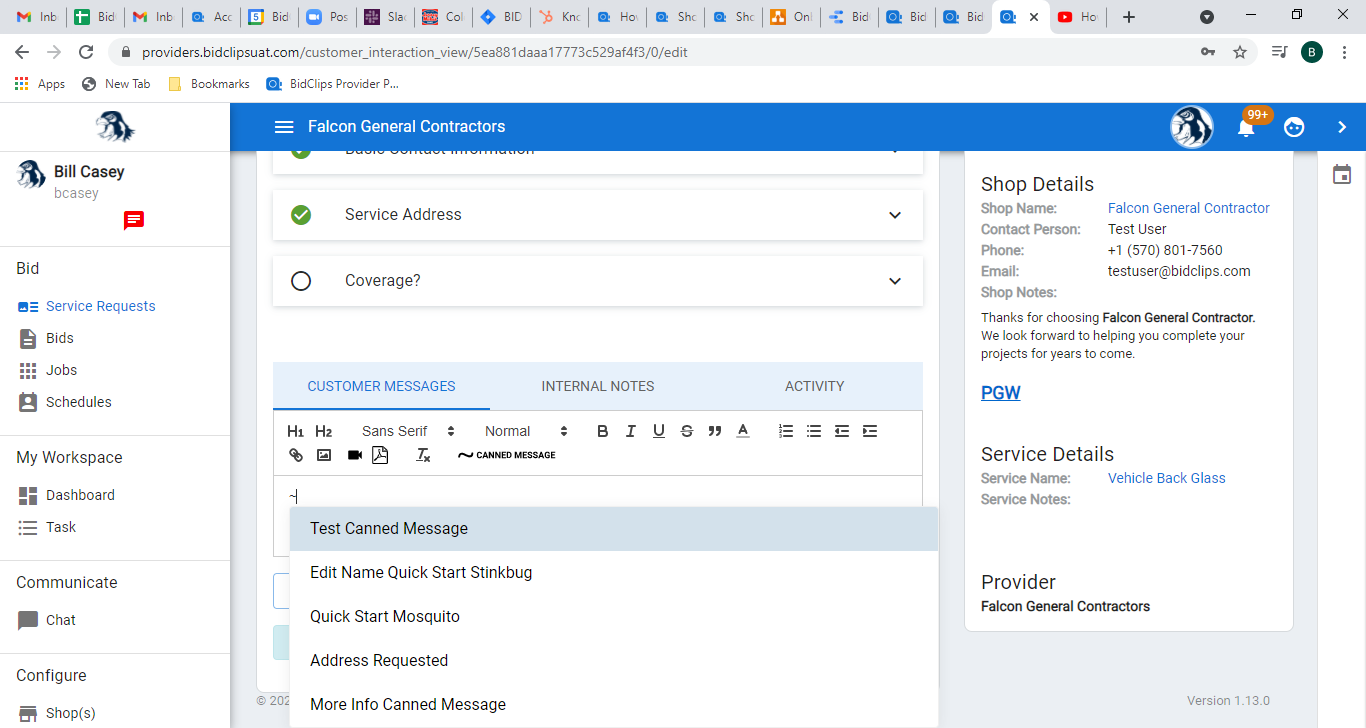
Your canned message can now be applied to customer messages in service requests that have been generated for the Vehicle Side Window and Vehicle Back Glass services. You can apply the canned messages by clicking in the customer messages editor, clicking the "~ Canned Messages" button (or typing a single "~" character) and selecting one of the available canned messages from the list. Below is an example of using a canned message.
To learn more about using canned messages and messaging your customers, click here.