Learn how to create new discounts that can be applied to bids
The BidClips platform provides a mechanism for you to configure discounts that can be applied to Bids that are generated for your customers. Discounts can be offered as stand-alone items or offered in conjunction with add-ons.
An example of a stand-alone discount is offering your customers a 5% discount on labor for jobs that exceed $500. An example of a discount item used in conjunction with an add-on is offering a 5% discount on parts when a customer purchases a one-year part protection plan. BidClips offers you the flexibility to configure and utilize any number of discounts to help increase sales for your organization. You can offer your discounts for a defined period of time or make them available indefinitely.
BidClips also includes an inherent framework for membership pricing. All part and labor items included in Bids can be marked as 'eligible for member pricing'. The only thing you need to do as a provider to utilize this framework is to set up a membership discount. This Help Center article will describe how you configure discounts and how they will appear to your customers in the BidClips widget.
Configuring New Discounts
You will start the process of configuring discounts by clicking the 'Discount' link in the 'Configure' section of the Provider Portal navigation bar that is located on the left side of the screen.

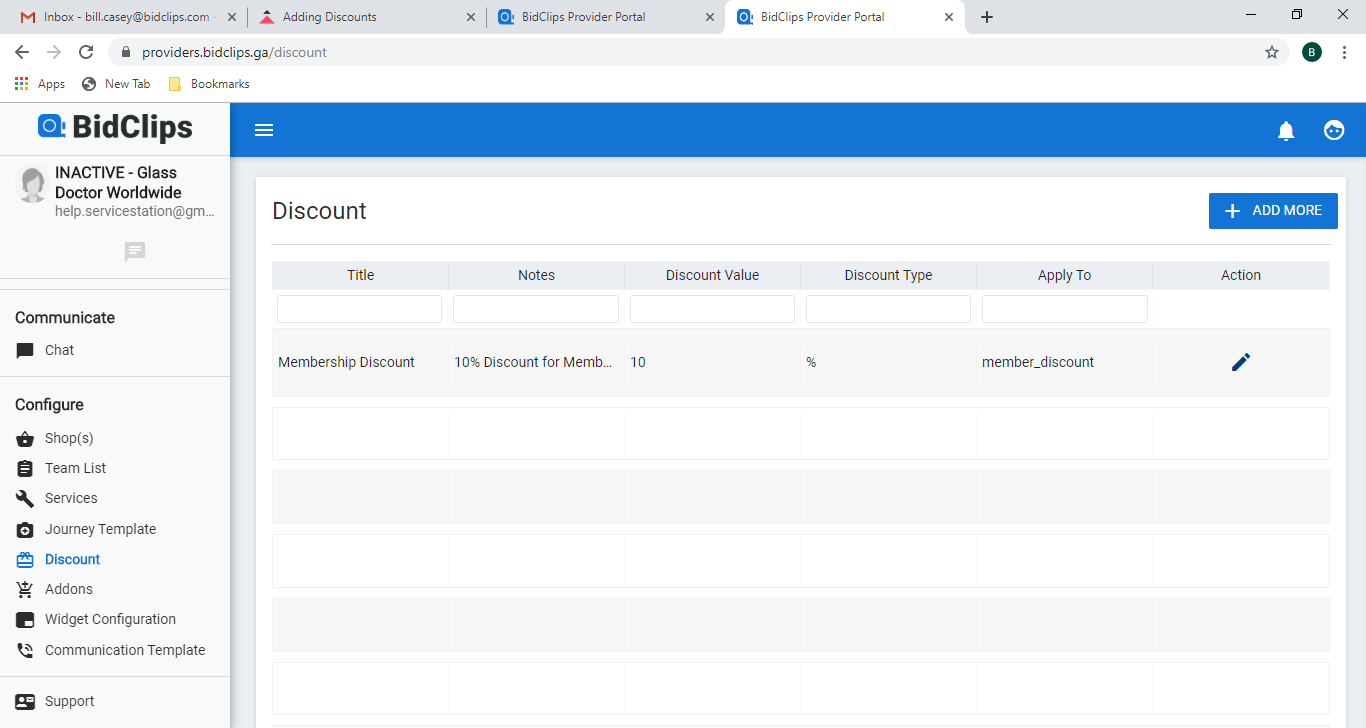
This will bring you to the 'Discount' list page as shown below:
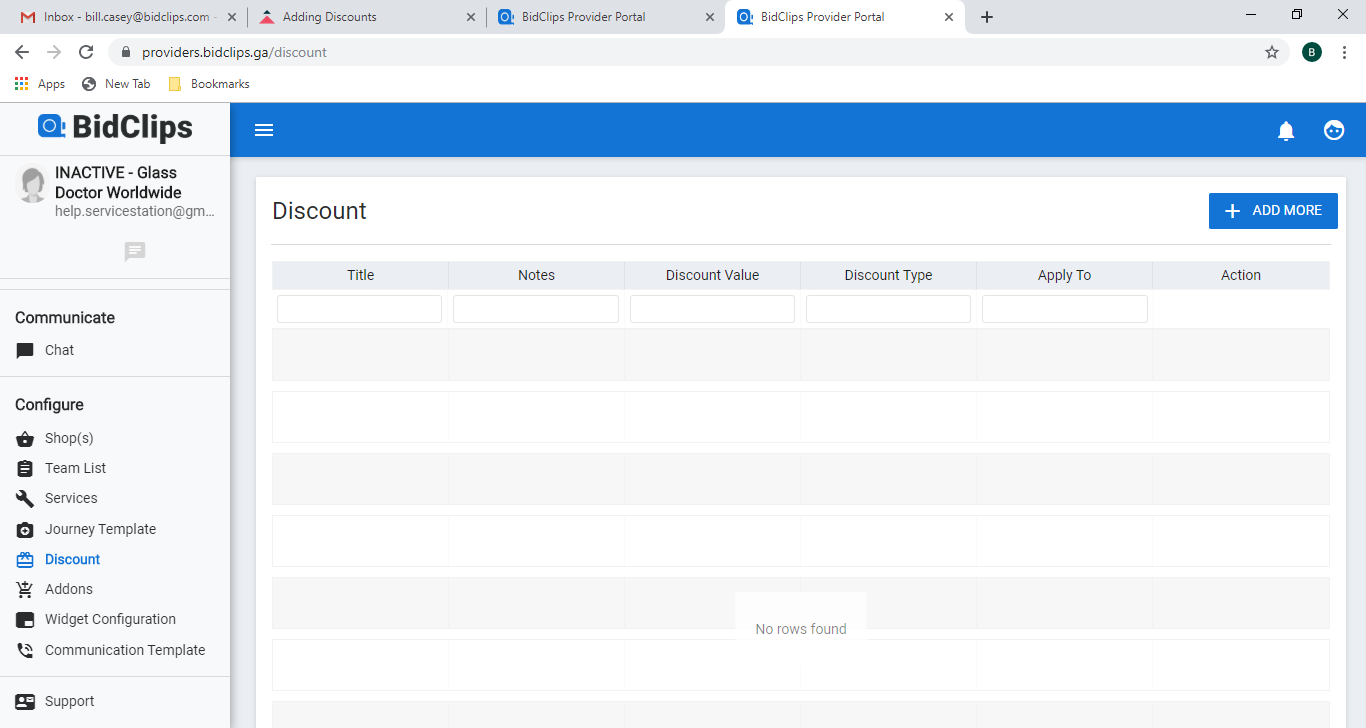
Click the '+ ADD MORE' button to create a new Discount:
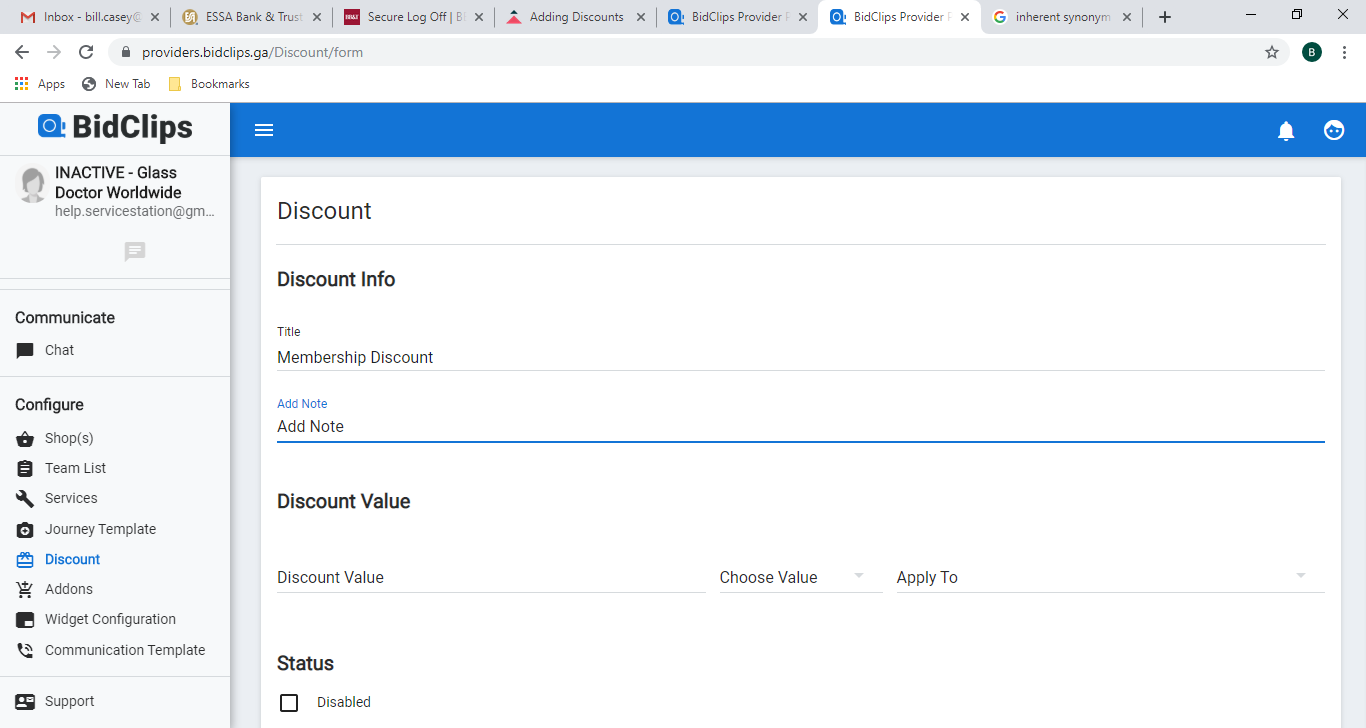
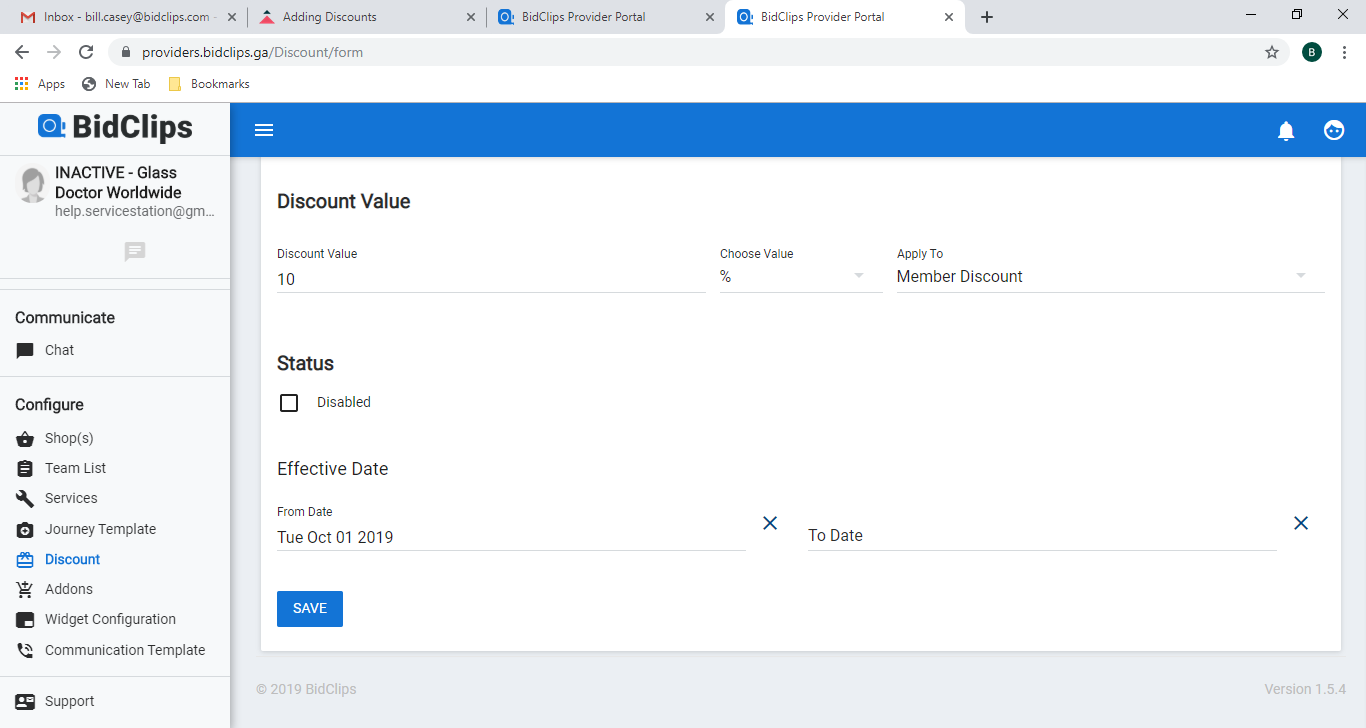
Since membership pricing is such an inherent part of the platform, the example shown below will demonstrate how you can configure a 10% membership pricing discount that is offered to the customer starting on October 1, 2019 and available for an indefinite period of time.
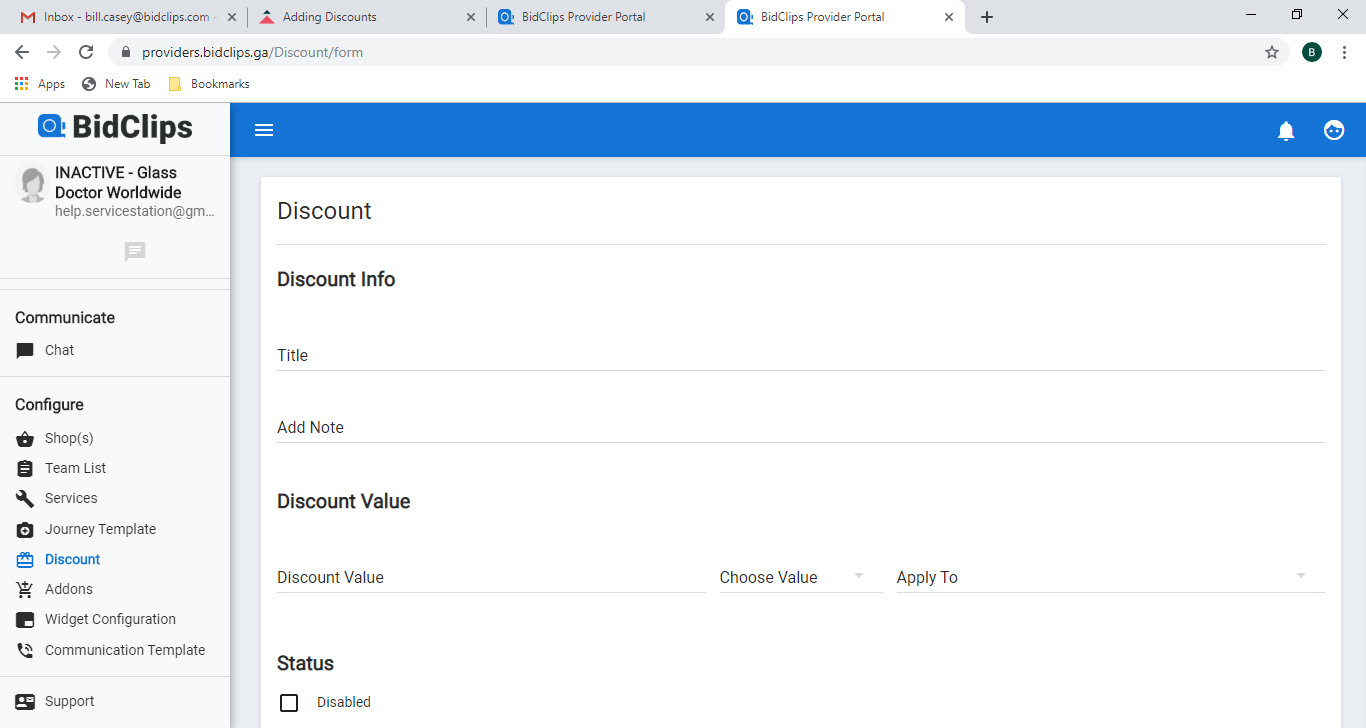
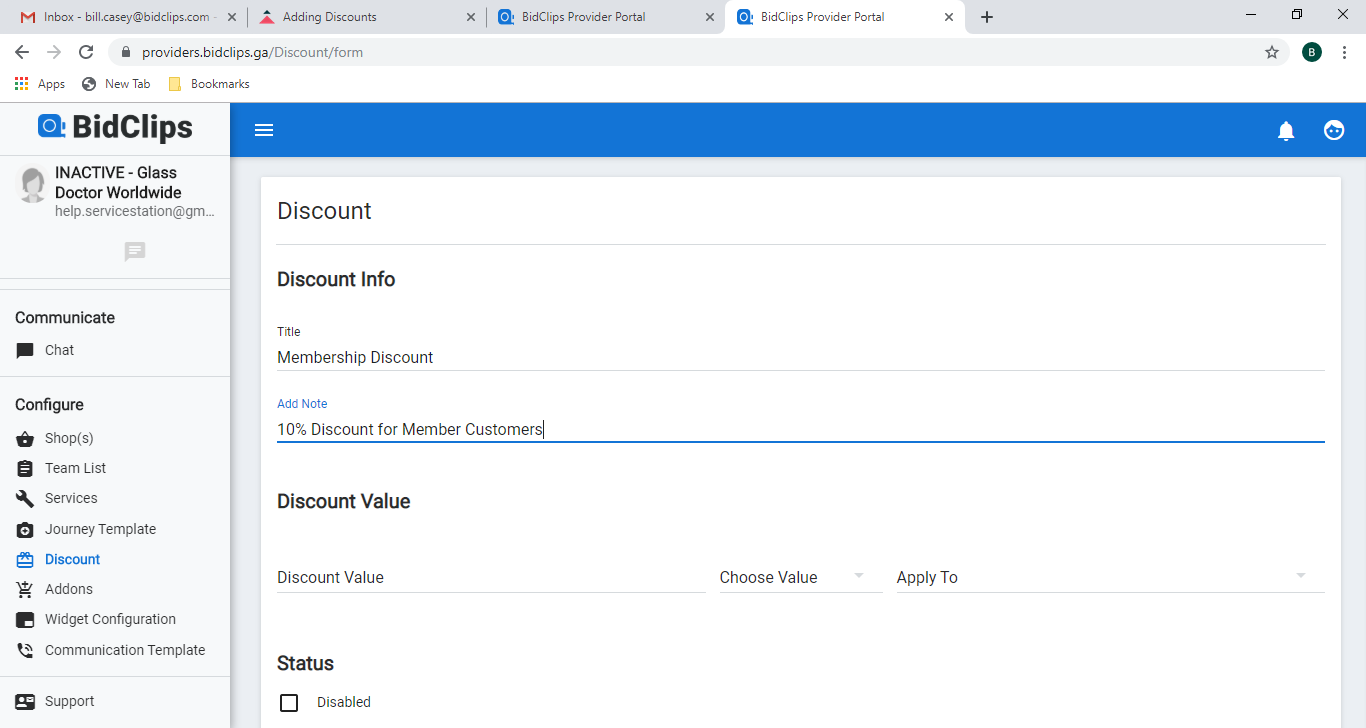
Discount Information
Title
Here, simply give your discount a title. The title should be a unique name and be descriptive enough to assist your users during the Bid creation process. The title will be displayed to your customers in the BidClips widget. The example shown below is using a 'Membership Discount' title.
Add Note
The note entered here is an internal note for your sales team and will not be displayed to your customers in the BidClips widget. The note should be designed to assist your users during the Bid creation process. The example shown below is using a "10% Discount for Member Customers" note.
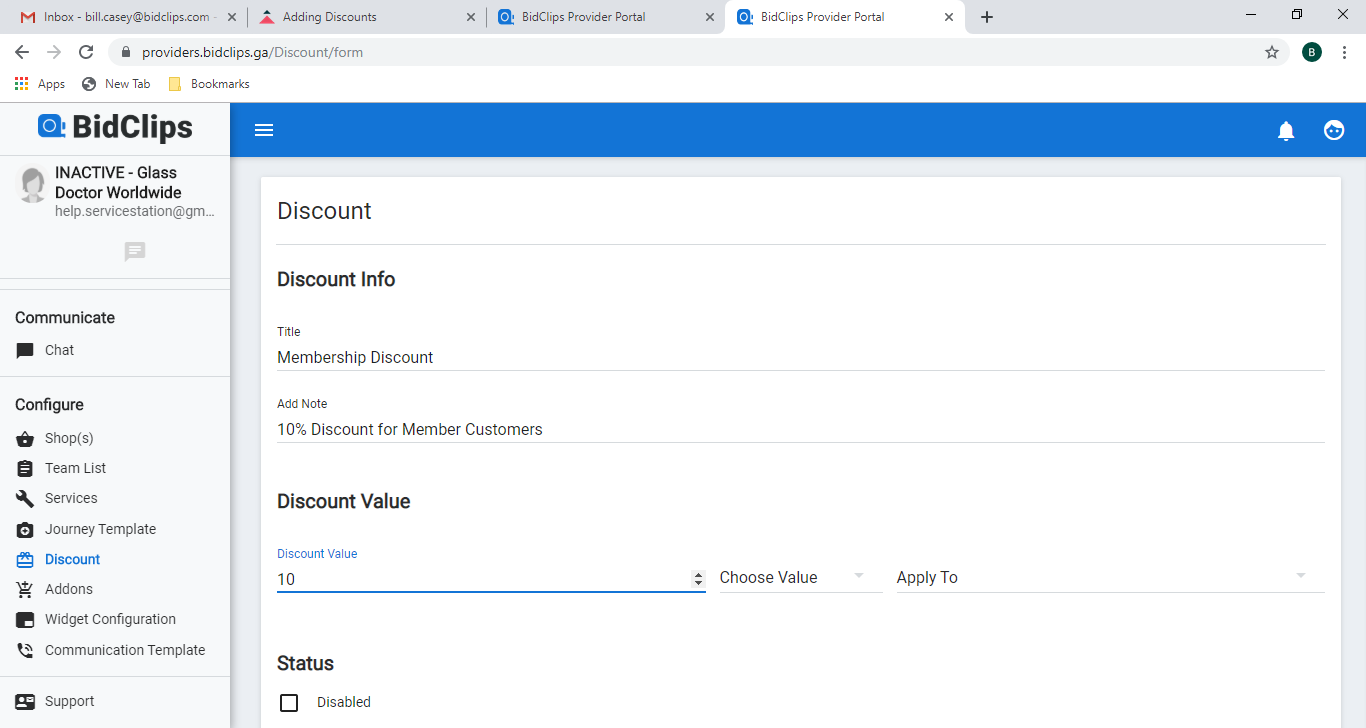
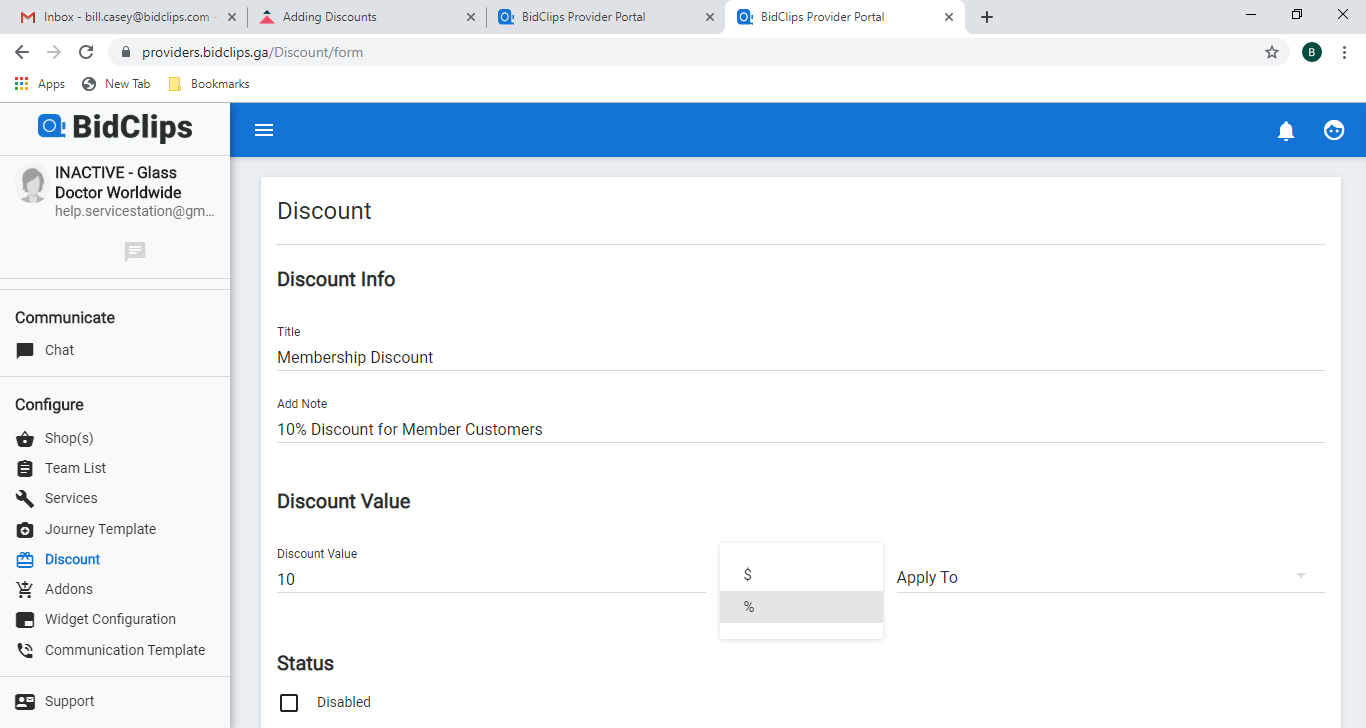
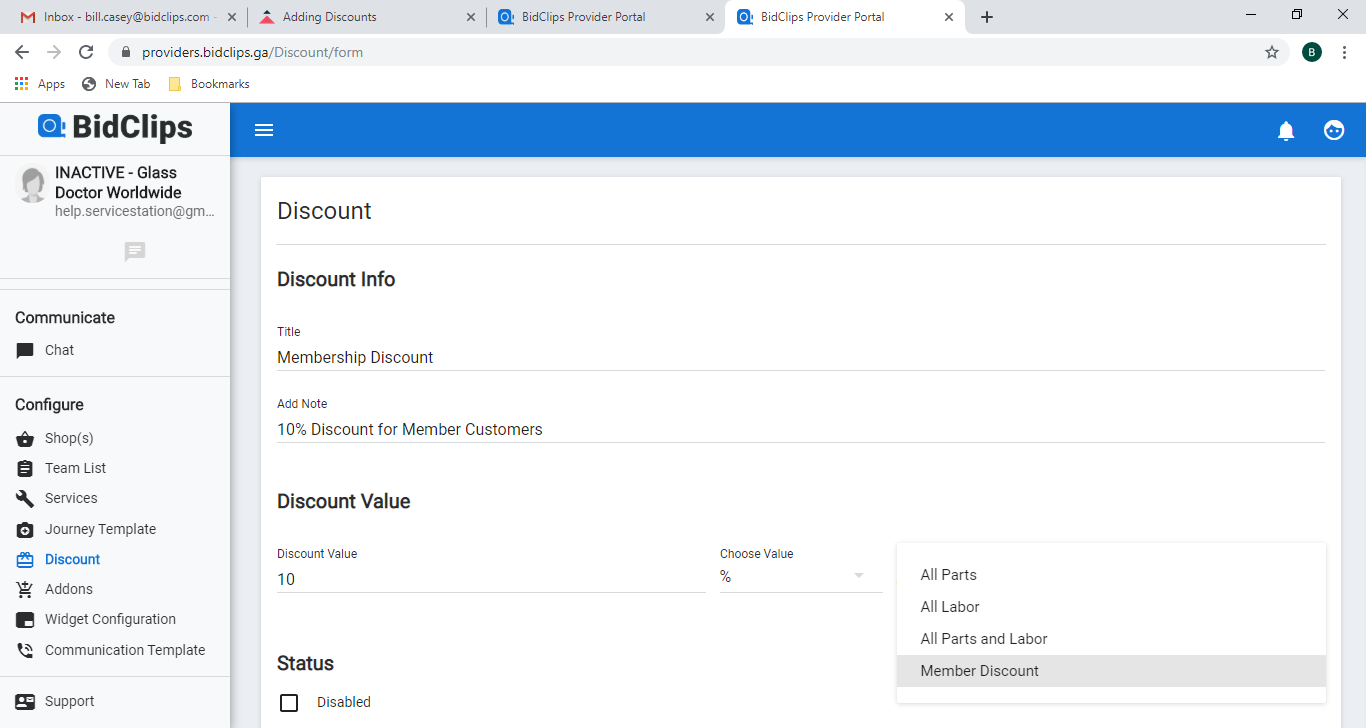
Discount Value
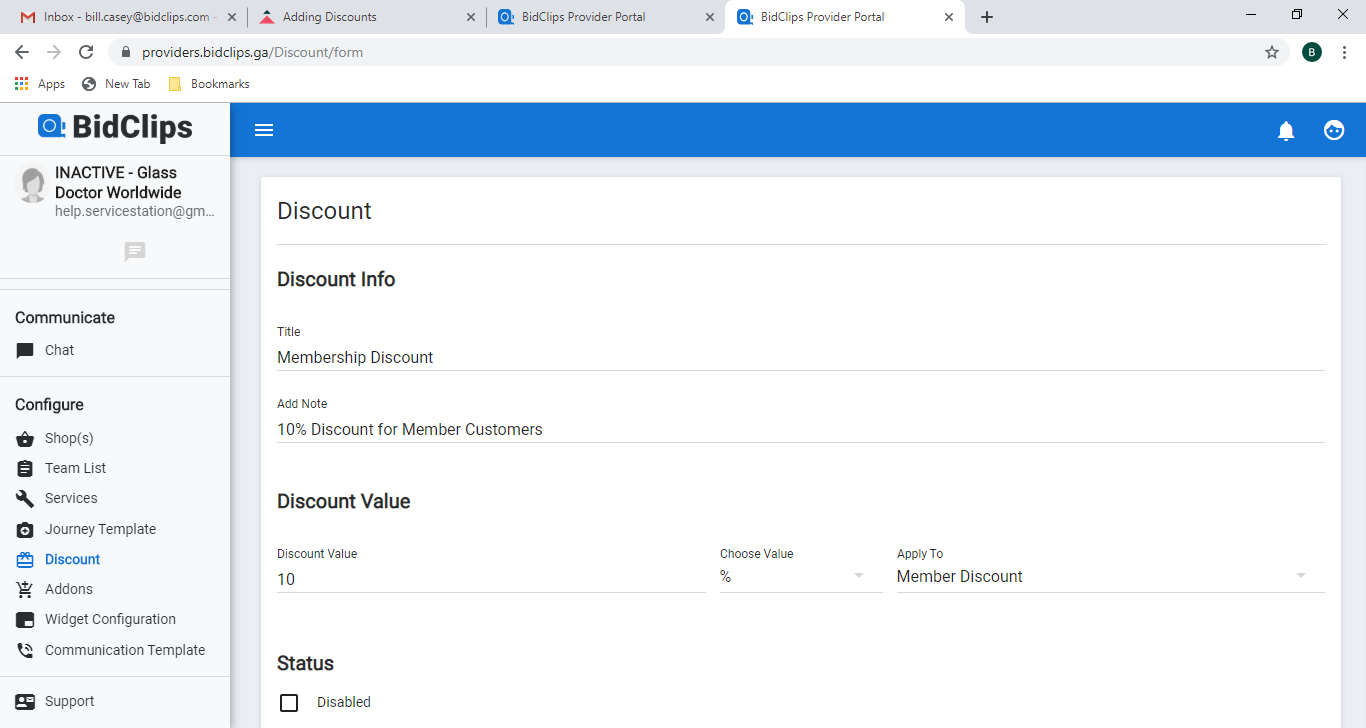
In the discount value section of the 'Discount' screen, you configure the value of the discount and choose to enter a flat amount or a discount percentage. Here, you also determine if you want to apply the discount to 'parts', 'labor', 'parts and labor', or 'membership pricing'. In this example, a 10% discount applied as a member discount will be shown. To set the discount value:
- Click on the 'Discount Value' field and enter an amount.
- Click on the 'Choose Value' field and choose between '$' (fixed amount) or '%' (percentage).
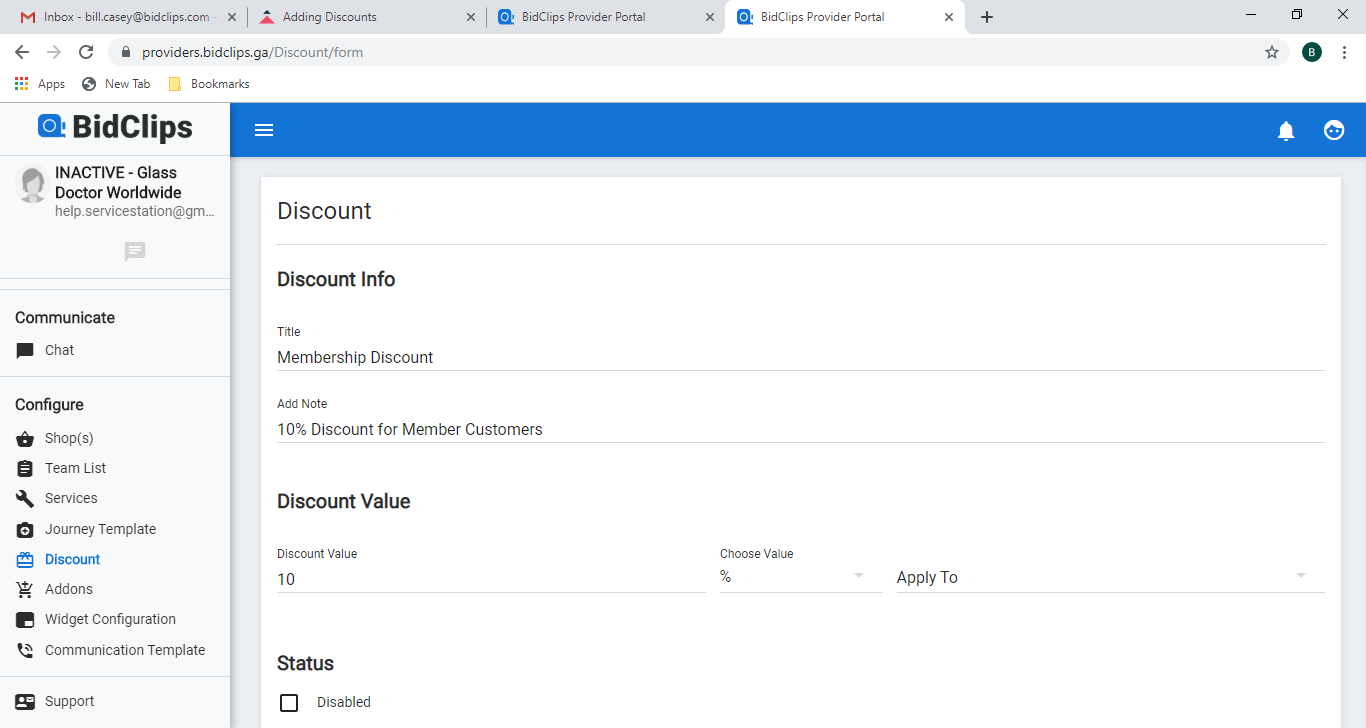
- Click on the 'Apply To' field and select from 'All Parts', 'All Labor', 'All Parts and Labor', or 'Member Discount'
Status
You can very easily disable a discount if desired. Since you are creating a new discount here, you will leave this option unchecked. More detailed information on disabling an existing discount is outlined below.
Effective Date
The effective dates of the discount are optional. You keep the discount effective indefinitely by not choosing an effective date. Alternatively, you can choose to enter effective dates that would permit the use of the discount for a predetermined amount of time. For this example, we are going to assume that you want to apply the discount on October 1, 2019 and keep it active indefinitely.
From Date
To enter an Effective From Date:
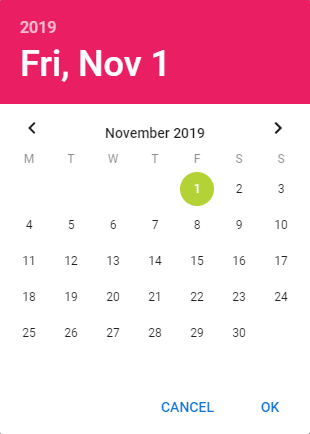
- Click on the 'From Date' field and a calendar editor will appear
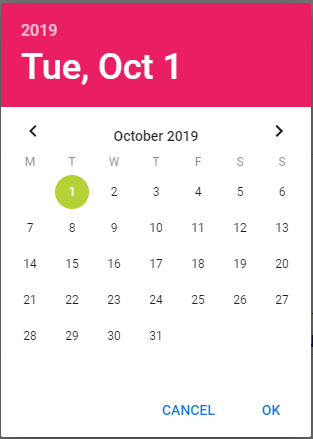
- Select the desired 'From Date' value
- Click 'OK'
- Click the 'X' next to the 'From Date' value if you would like to clear the previously selected value.
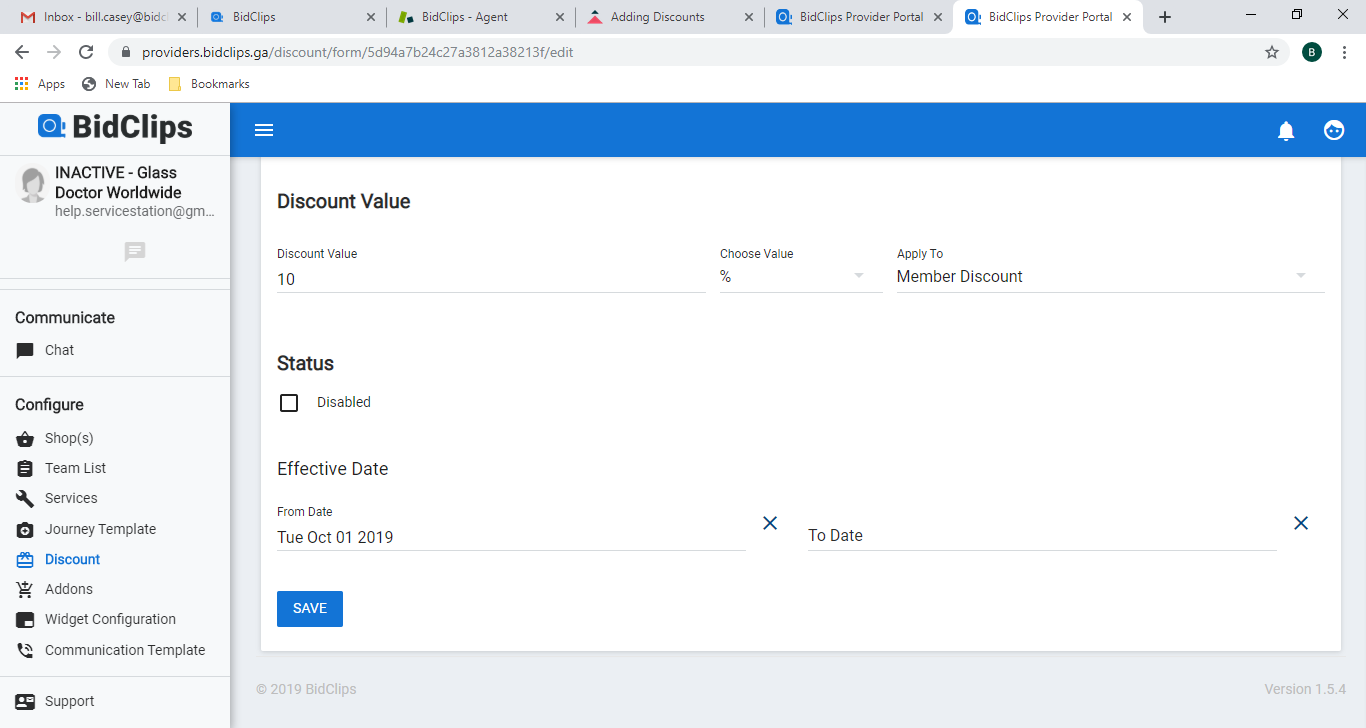
To Date
To enter an Effective To Date:
- Click on the 'To Date' field and a calendar editor will appear
- Select the desired 'To Date' value
- Click 'OK'
- Click the 'X' next to the 'To Date' value if you would like to clear the previously selected value. This example assumes you have removed the 'To Date' value.
Save Your Settings
Important!: Please remember, you must click the 'SAVE' button at the very bottom of the Discount page before leaving the page. Failure to click the 'SAVE' button before navigating away from the Discount page will result in lost work.
Once you click 'SAVE' you should see the following 'Discount Created' message appear in the upper right-hand corner of your screen. You have now successfully saved the Discount settings in your Provider Portal.

Disabling Discounts
You can very easily disable a discount if desired. To disable a discount, click on the "Discount" link in the Configure section of the Provider Portal navigation bar that is located on the left side of the screen.
This will bring you to the "Discount" list page as shown below:

To Disable the Discount:
- Click on either the grid row for the row you want to disable or click on the Edit (
 ) button
 - Once redirected to the Discount detail page, scroll to the 'Status' section of the page
- Check the 'Disabled' box

- Click the 'SAVE' button.
Once you click 'SAVE' you should see the following 'Discount Updated' message appear in the upper right-hand corner of your screen. You have now successfully saved the Discount settings in your Provider Portal.

Discounts in the BidClips Widget
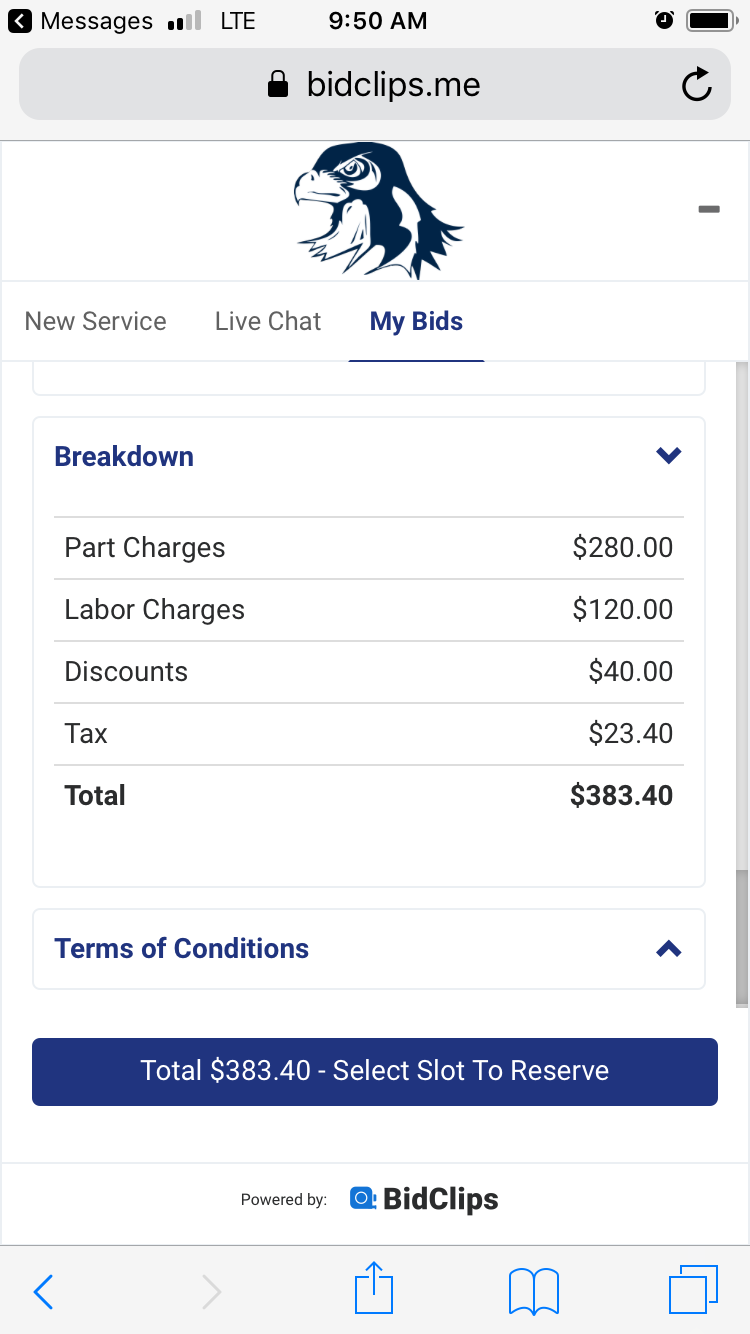
Below is a customer Bid with 'Parts & Labor' eligible for Membership Discount:

Final 'Bid Breakdown' in BidClips widget:
- Parts & Labor (eligible for Membership Discount) = $400
- Membership Discount (10%) = $40