Learn how to create additional products and services to include in the bid
The BidClips platform provides a mechanism for you to configure add-on products and services that can be offered to your customers at the time of reservation or final purchase. Add-ons are applied to specific services in BidClips and can be offered as stand-alone items or offered in conjunction with discounts.
An example of a stand-alone add-on item would be offering windshield wipers for purchase when performing windshield chip repair services. An example of an add-on item used in conjunction with a discount would be offering a 5% discount on parts when a customer purchases a one-year part protection plan. BidClips offers you the flexibility to configure and utilize any number of add-ons to increase sales for your organization.
BidClips also allows you the ability to use descriptions, web links, images and/or videos to help sell add-on products and services to your customers. Finally, you can offer add-ons for a defined period of time or make them available indefinitely. This Help Center article will describe how you configure add-ons and how they will appear to your customers in the BidClips widget.
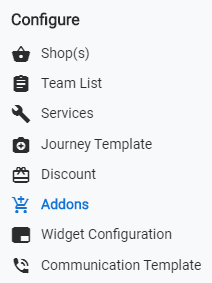
You will start the process of configuring add-ons by clicking the 'Addons' link in the 'Configure' section of the menu bar.

This will bring you to the 'Addons' list page as shown below:
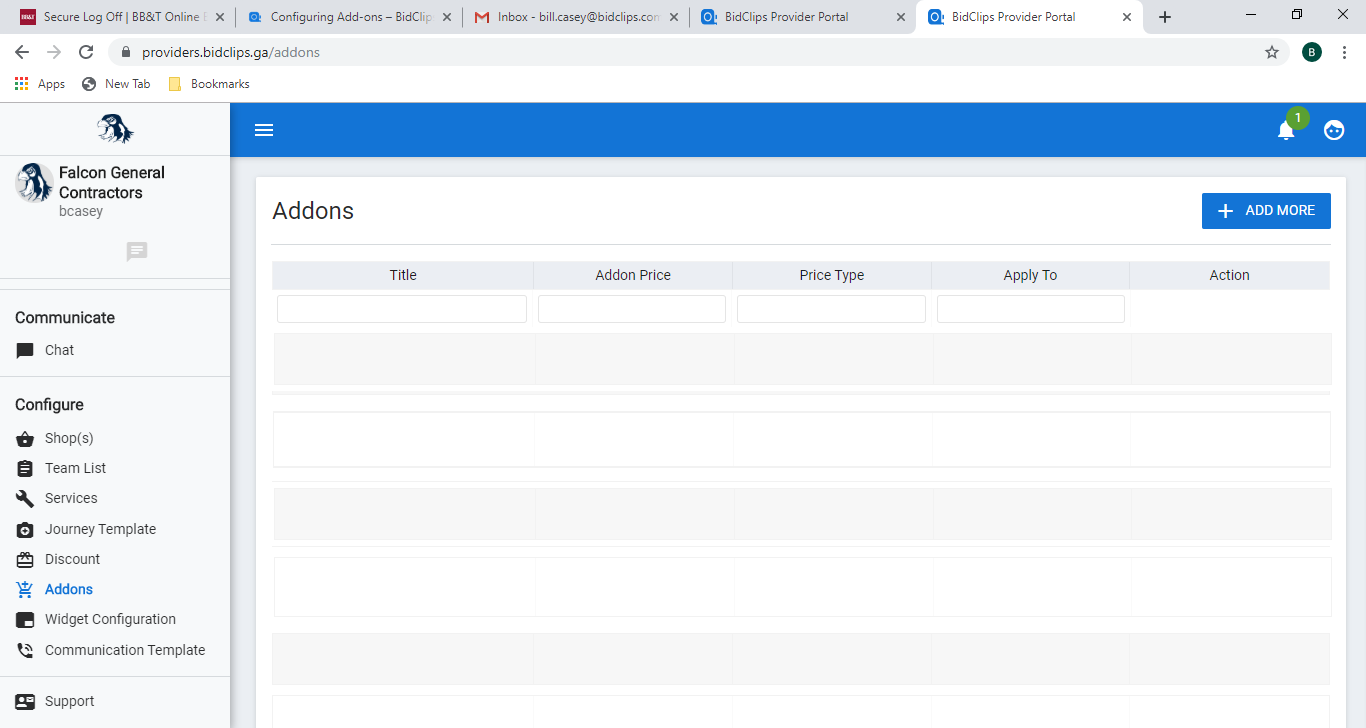
Click the '+ ADD MORE' button to create a new add-on:
The example described below will demonstrate how you can configure an add-on that is used in conjunction with a discount, is offered to the customer for a predetermined length of time, and uses web links and a video to help sell the add-on.
Configuring a New Add-On
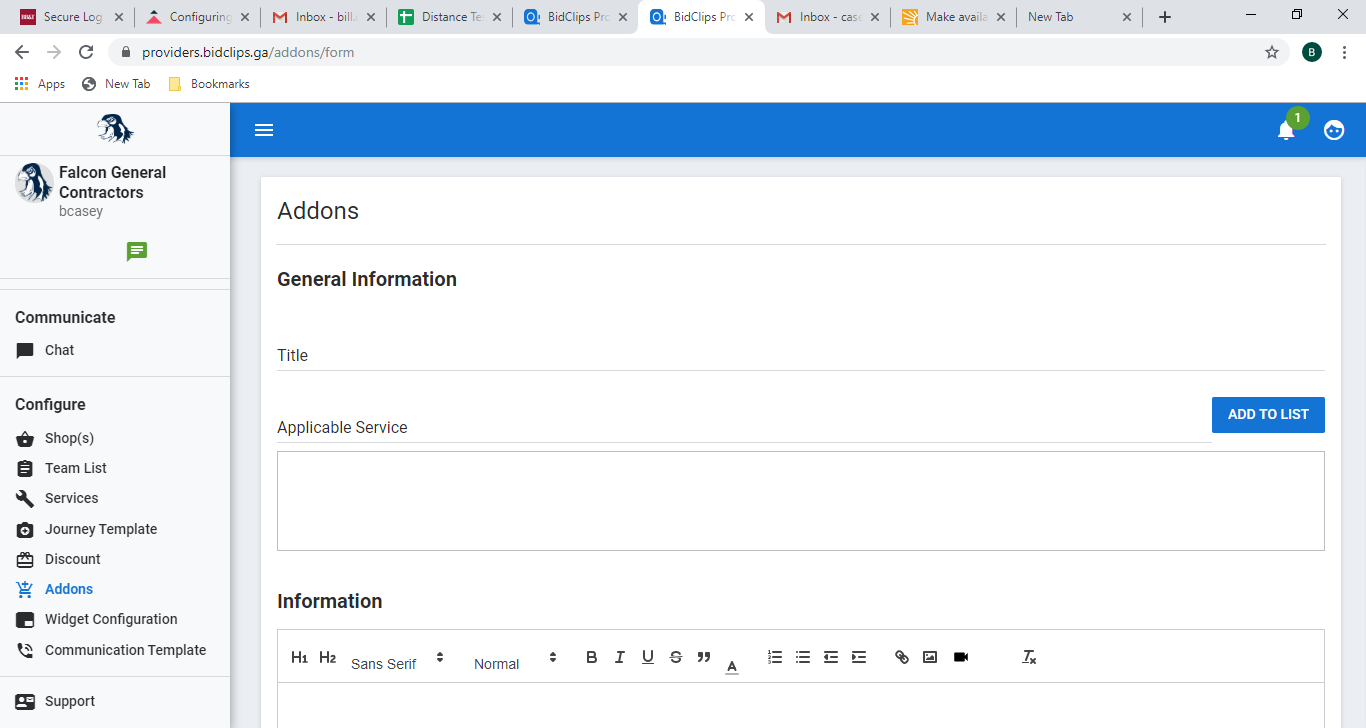
General Information
Title
Here, simply give your add-on a title. The title should be a unique name and be descriptive enough to assist your users during the bid creation process. The title will also be displayed to your customers in the BidClips widget. The example shown below is using a "Part Protection Plan" title.
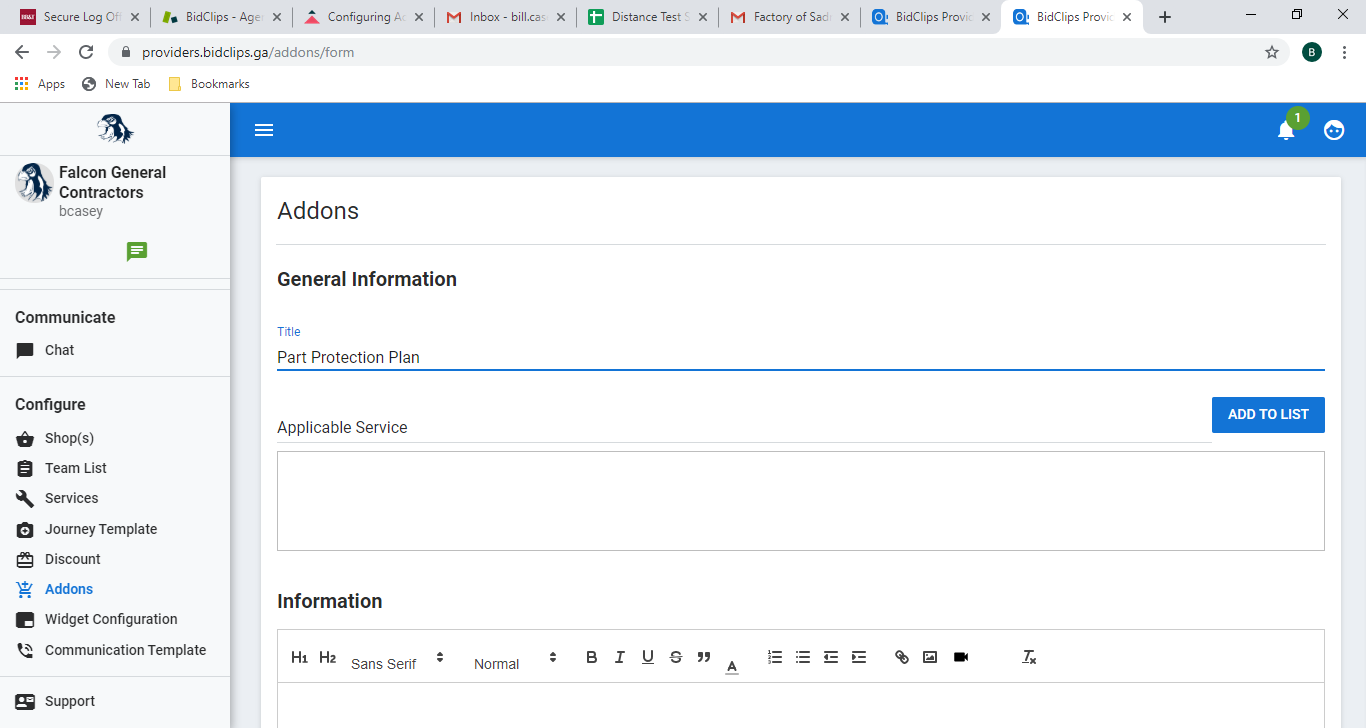
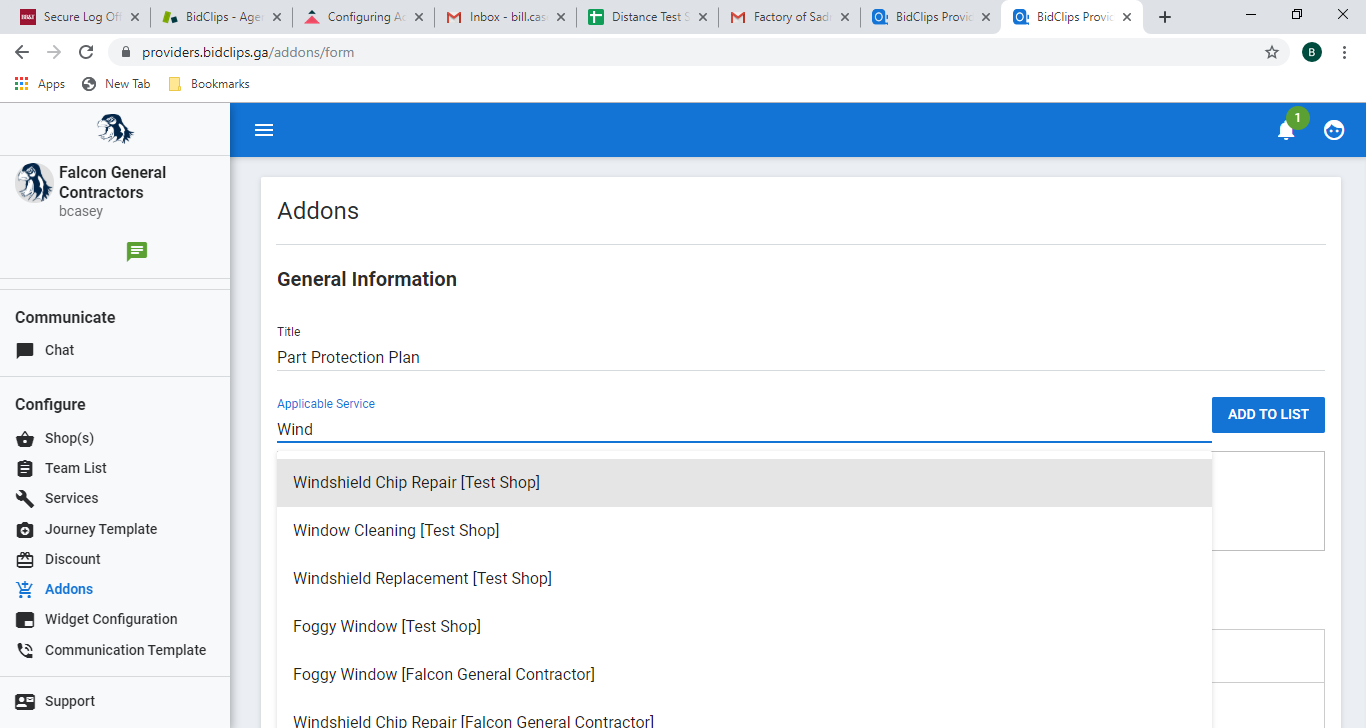
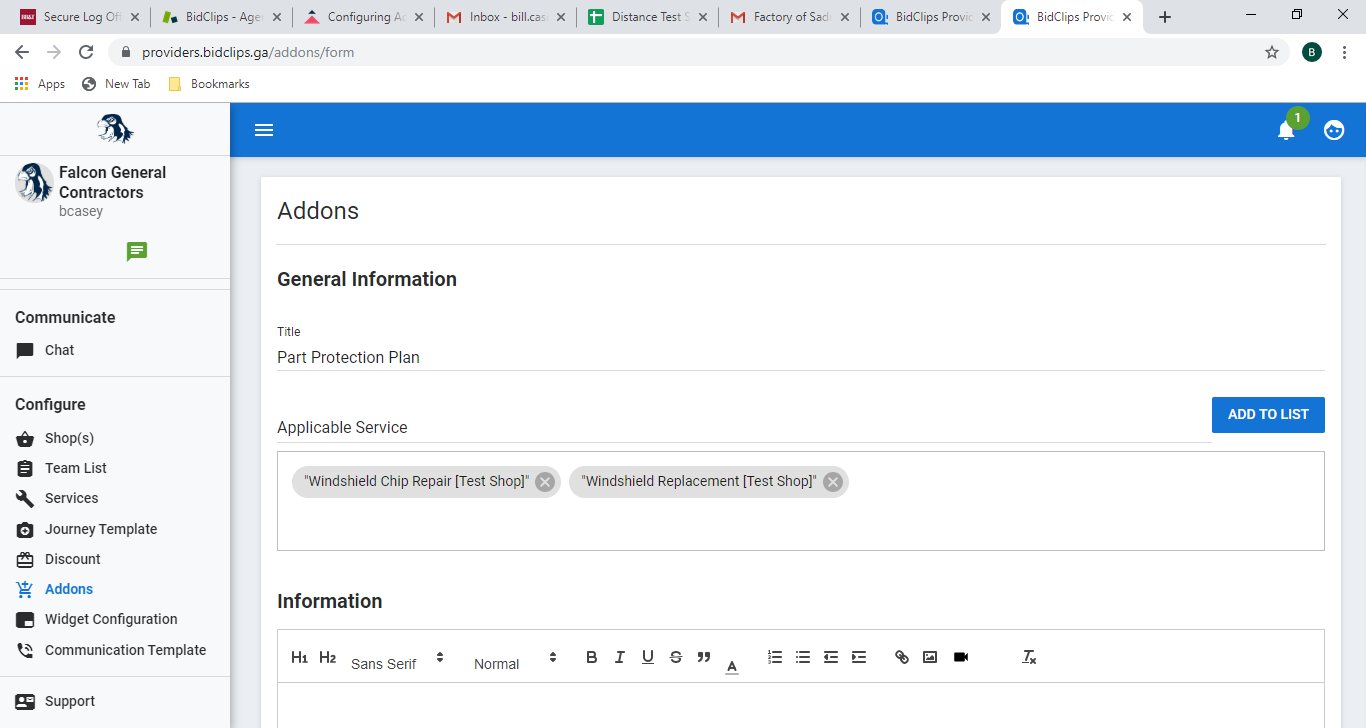
Applicable Services
Currently, you will need to apply the add-on to each service individually in BidClips. Click on the 'Applicable Service' field and either select the service in the drop-down list if it appears or start typing a service name in the field. Once you see the appropriate service to be added to the list, click on it. The example shown below will apply the add-on to the Windshield Replacement and Windshield Chip Repair services.
Information
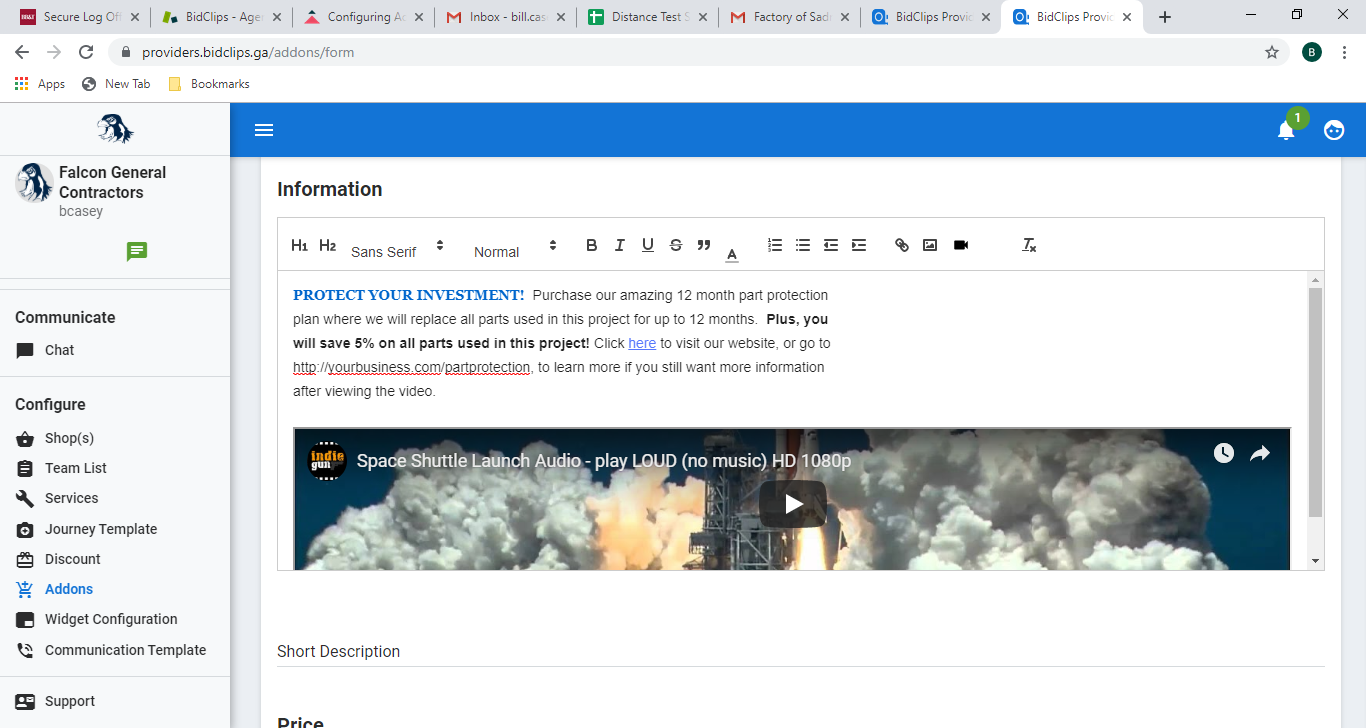
Information for the Customer
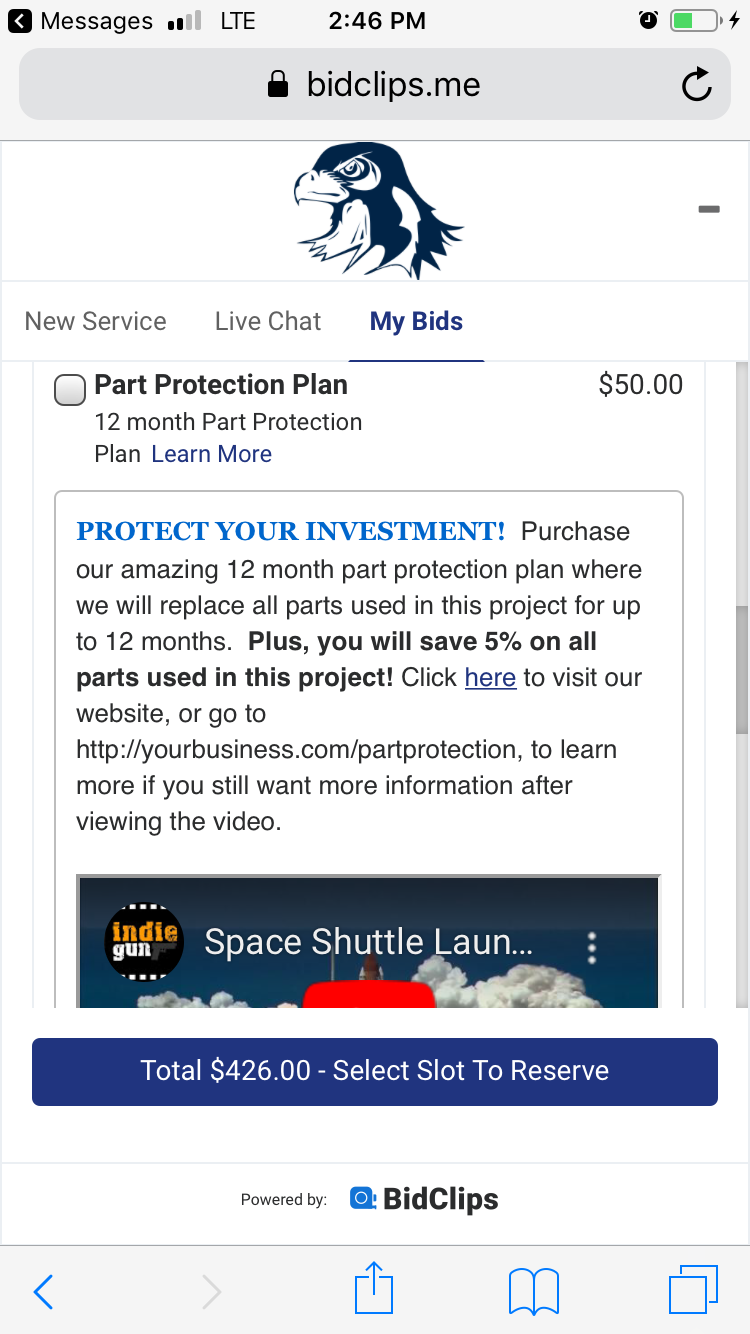
This is where you will create information that will be displayed to your customer to help sell the add-on. You can use a combination of text, web links, images or videos in this message editor. The example shows a mix of text formatting, the use of a web link, and the inclusion of a video.
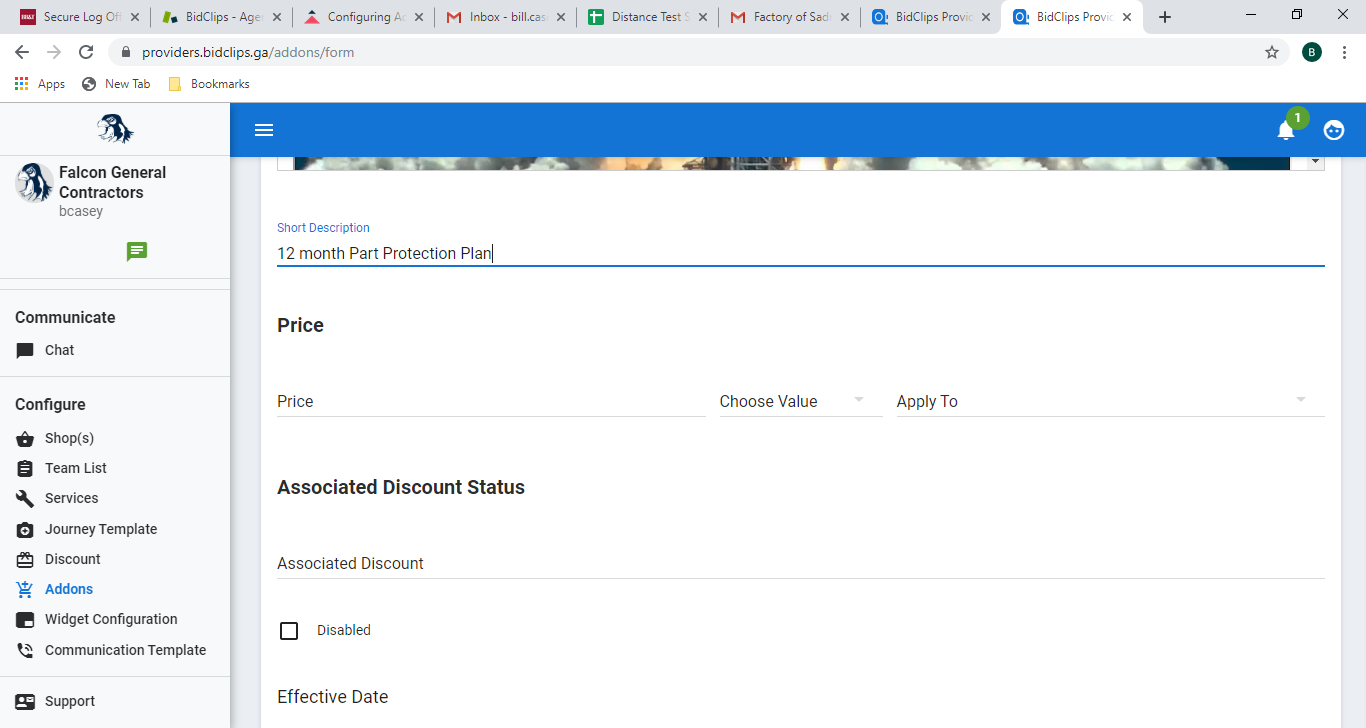
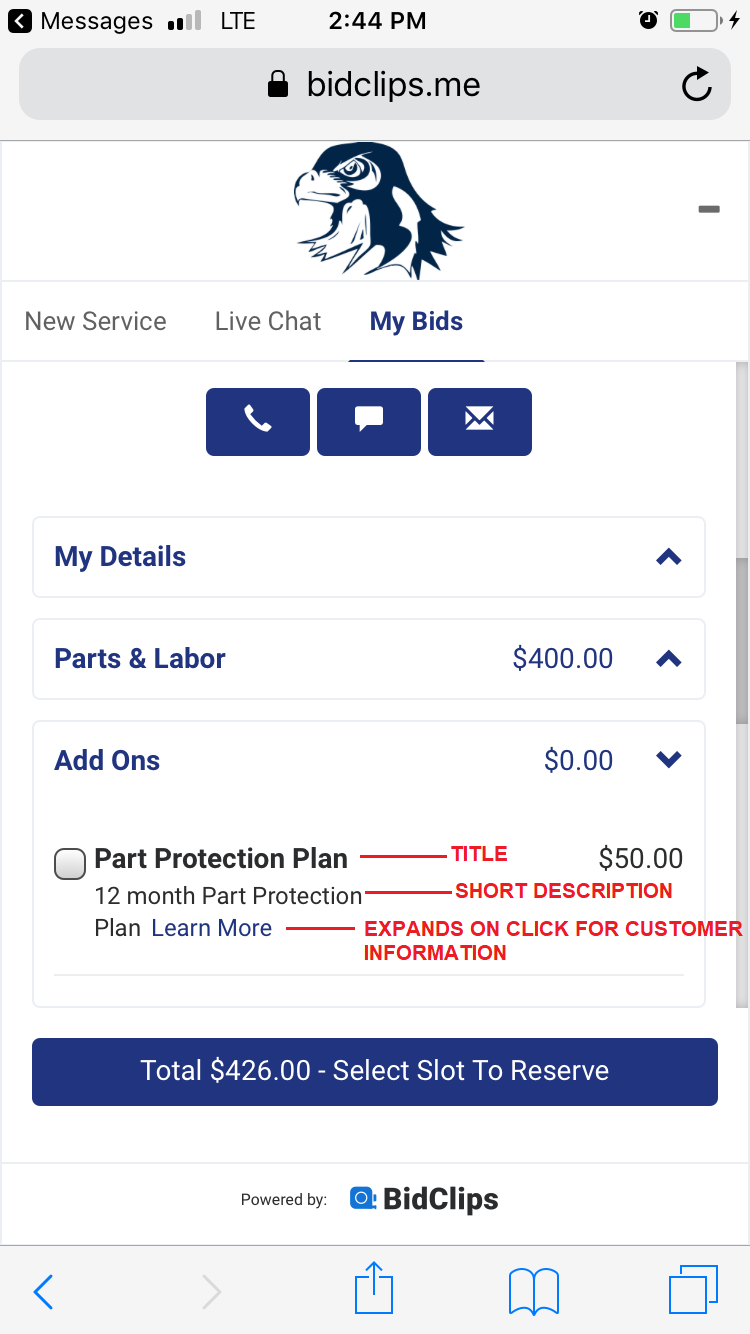
Short Description
Here you give your add-on a short description. The short description will also be displayed to your customers in the BidClips widget. The example shown below is using a '12 month Part Protection Plan' short description.
Examples showing how the Title, Short Description, and Customer Information will appear in the widget:
'Learn More' clicked by the customer:
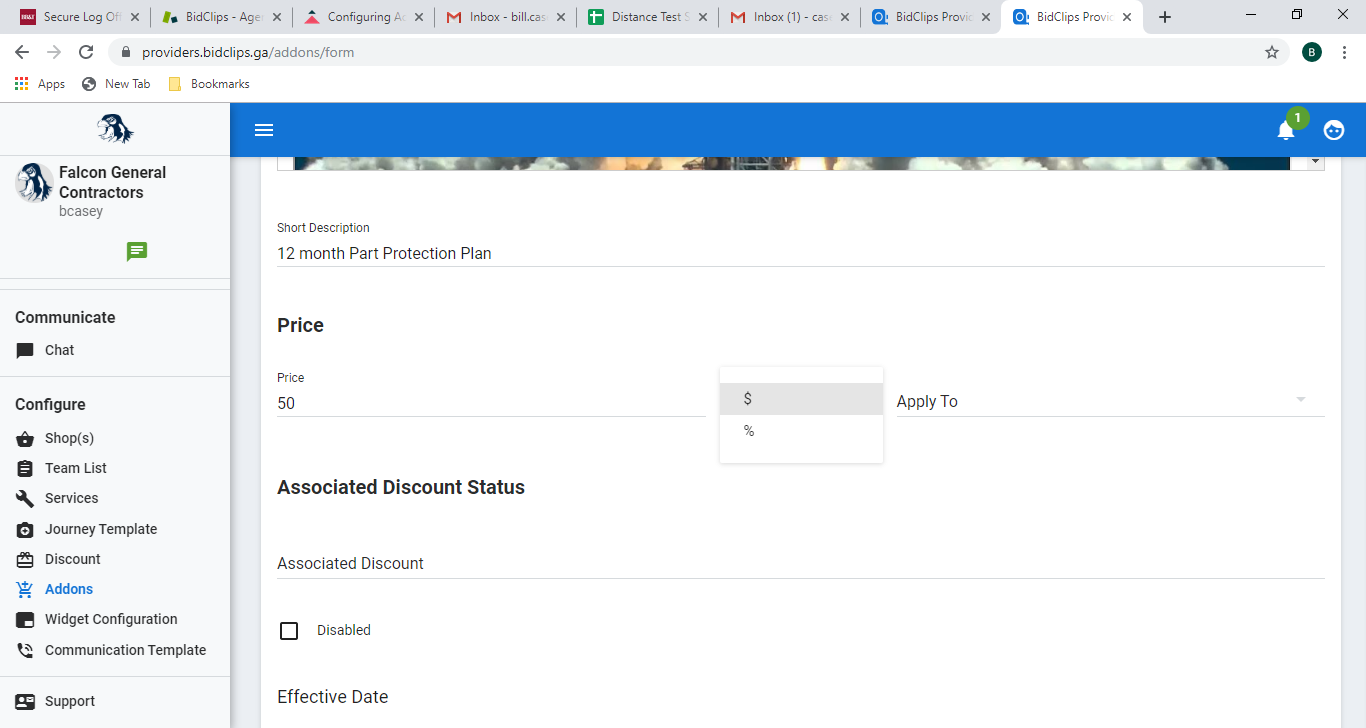
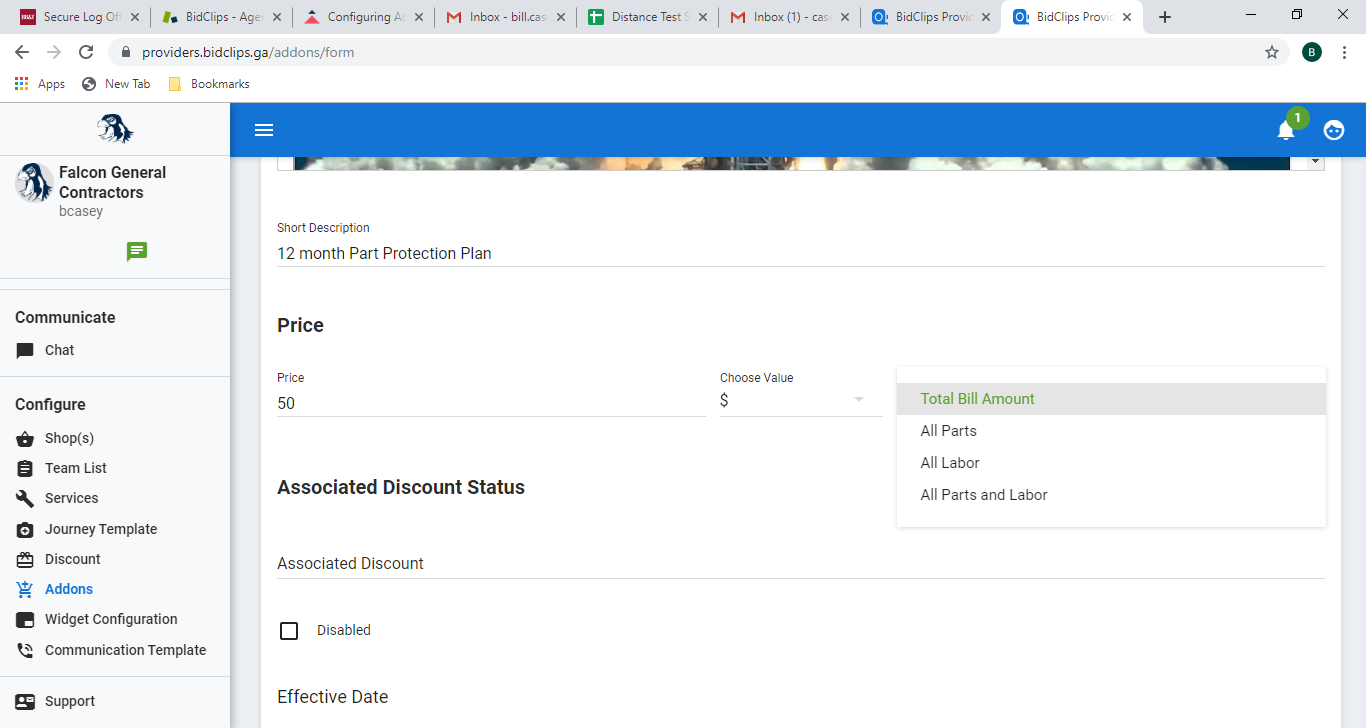
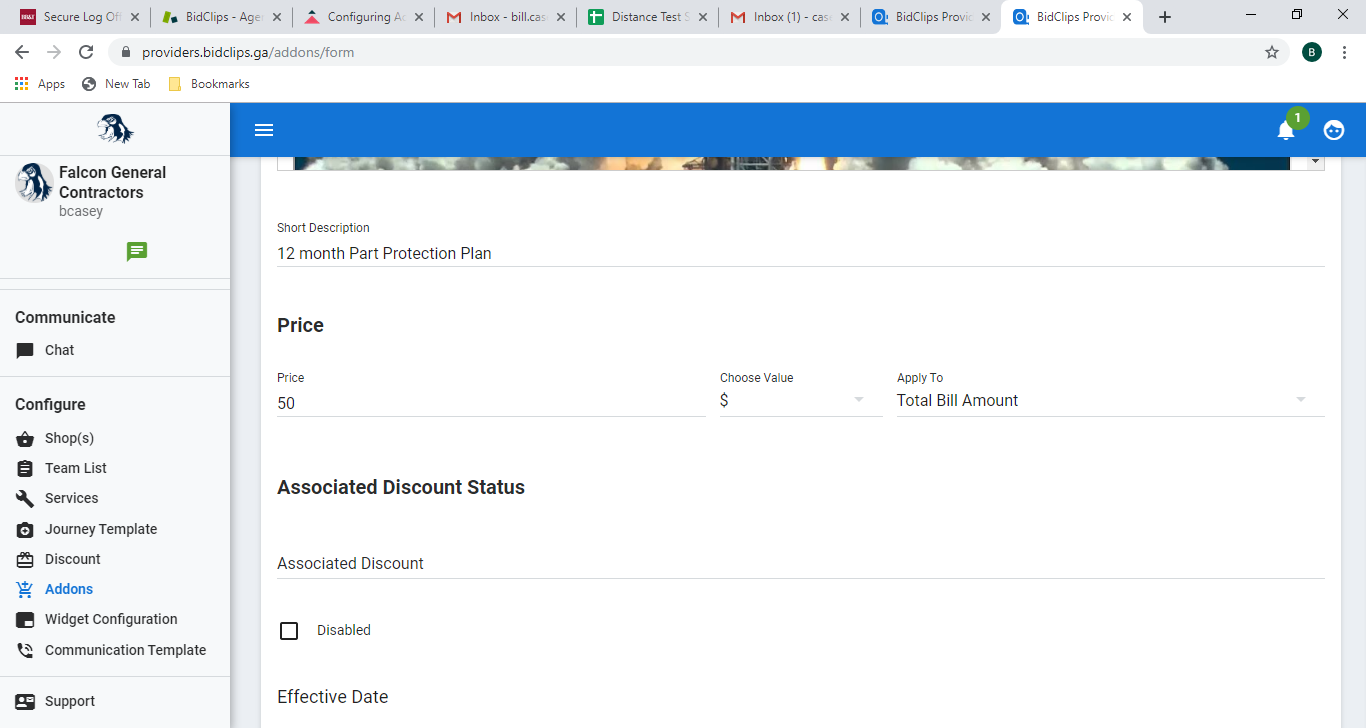
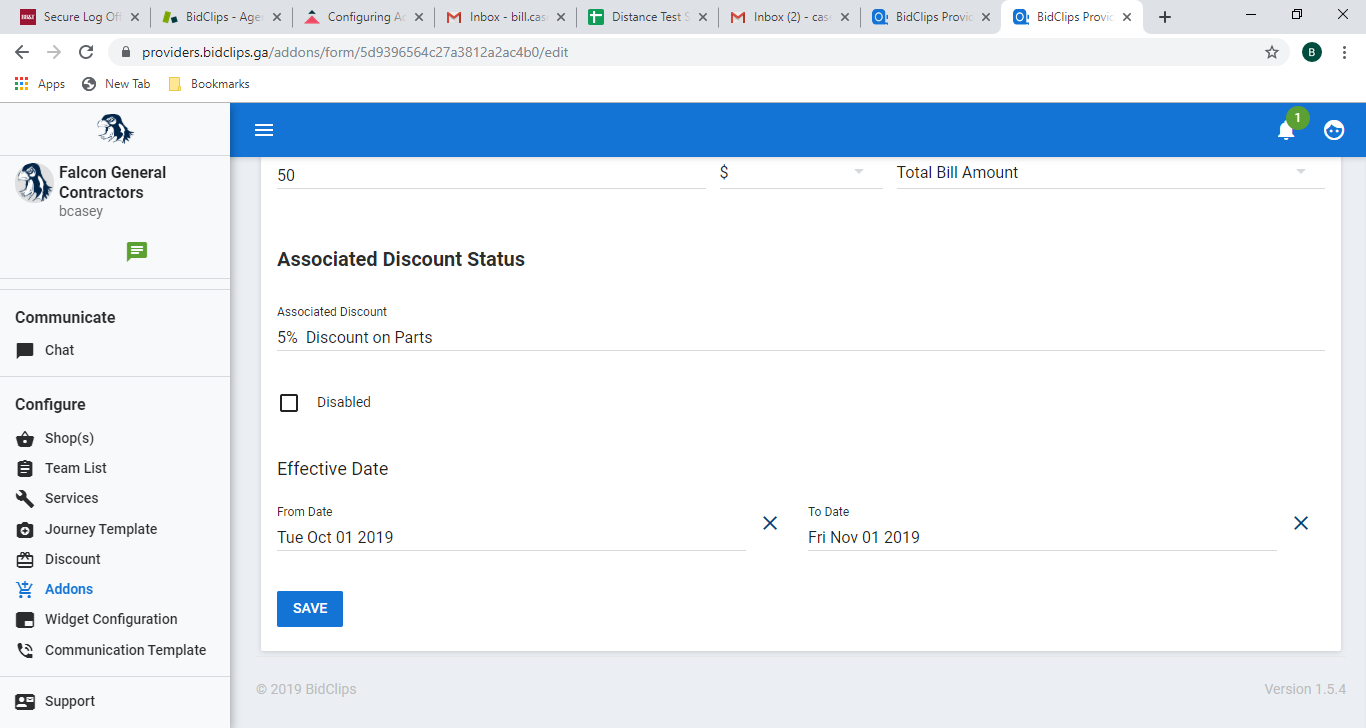
Price
In the price section of the 'Addons' screen, you configure how much to charge the customer for the add-on. You can choose to enter a flat price amount or a percentage of parts, labor, parts and labor, or the total bill. In this example, a $50 flat rate applied to the total bill will be shown. To set the price options:
- Click on the 'Price' field and enter an amount.
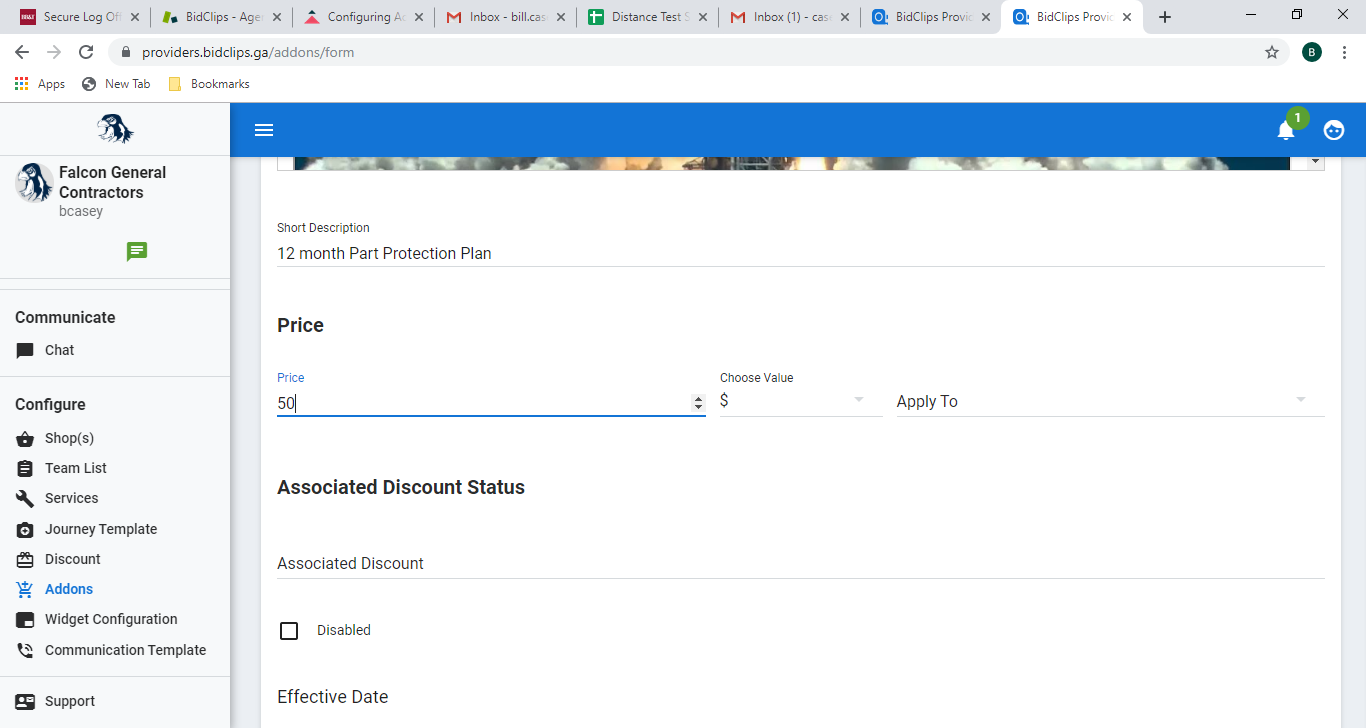
- Click on the "Choose Value" field and choose between "$" (fixed amount) or "%" (percentage).
- Click on the "Apply To" field and select from 'Total Bill Amount', 'All Parts', 'All Labor', or 'All Parts and Labor'
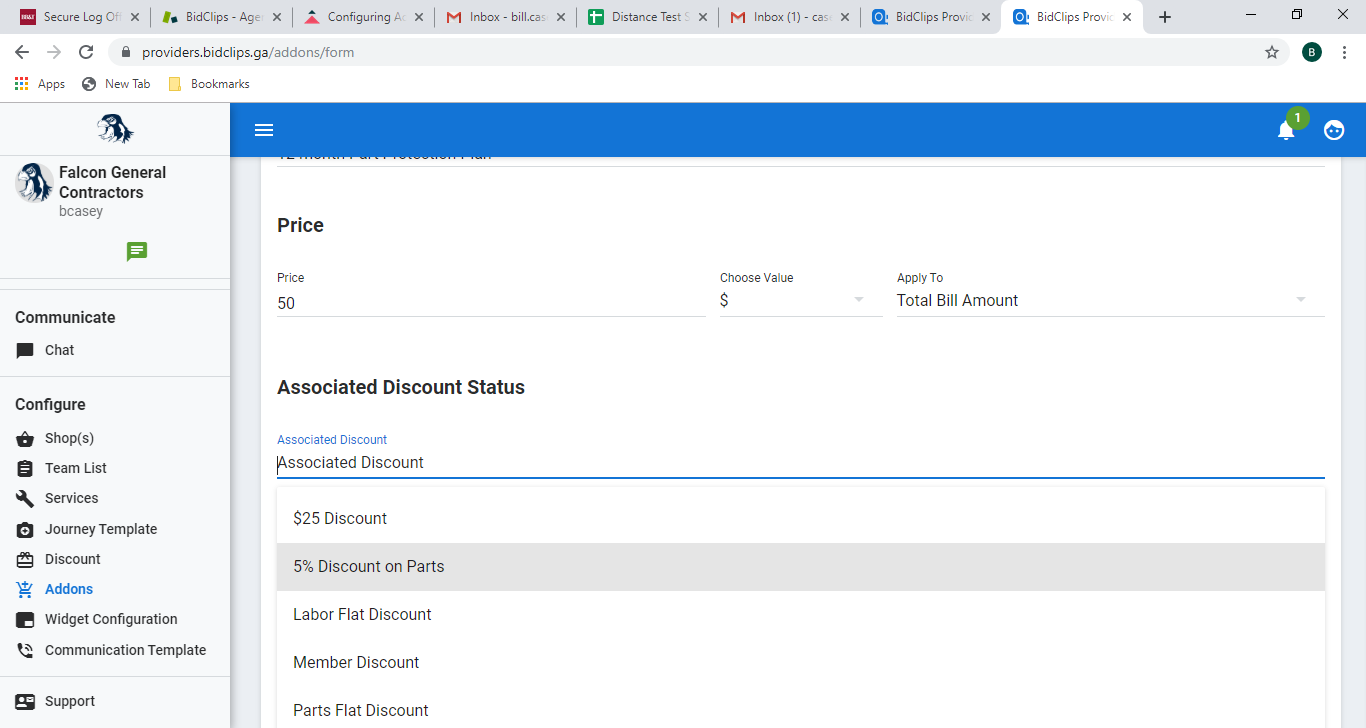
Associated Discount Status
Here is where you can associate a discount that has already been created in your provider portal. Click on the "Associated Discount" field and either select the discount in the drop-down list or start typing a discount name in the field. Once you see the appropriate discount to be added to the list, click on it. The example shown below will apply a 5% parts discount that has already been created.

Effective Date
The effective dates of the add-on are optional. If you choose not to enter effective dates the add-ons will be effective indefinitely. Alternatively, you can also choose to enter effective dates that would only permit the use of add-ons for a predetermined amount of time.
For this example, we are going to assume that you want to apply the add-on for the month of October 2019. Please note that the end date is NOT inclusive. Therefore, to enter the add-on to be effective for the month of October 2019, you would enter a 'From-Date' of 10/01/2019 and an 'End-Date' of 11/01/2019.
From Date
To enter an Effective From Date:
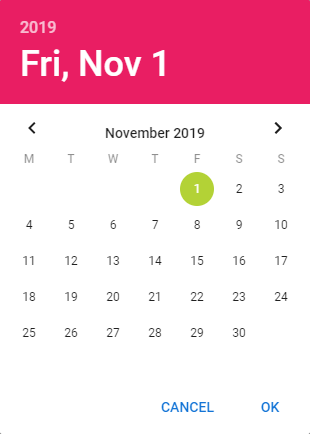
- Click on the 'From Date' field and a calendar editor will appear
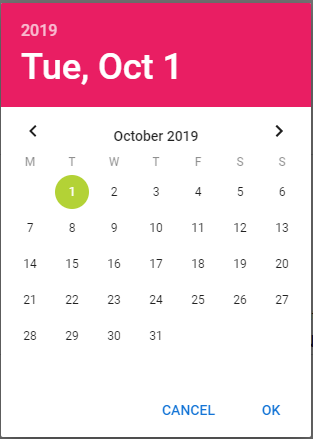
- Select the desired 'From Date' value
- Click 'OK'
- Click the 'X' next to the 'From Date' value if you would like to clear the previously selected value.
To Date
To enter an Effective To Date:
- Click on the 'To Date' field and a calendar editor will appear
- Select the desired 'To Date' value
- Click 'OK'
- Click the 'X' next to the 'To Date' value if you would like to clear the previously selected value.
Save Your Settings
Important!: Please remember, you must click the 'SAVE' button at the very bottom of the Addons page before leaving the page. Failure to click the 'SAVE' button before navigating away from the Addons page will result in lost work.
Once you click 'SAVE' you should see the following 'Addons Created' message appear in the upper right-hand corner of your screen. You have now successfully saved the Add-On settings in your Provider Portal.


Disabling Configured Add-Ons
You can very easily disable an add-on if desired. To disable an add-on, click on the 'Addons' link in the 'Configure' section of the Provider Portal navigation bar that is located on the left side of the screen.
This will bring you to the "Addons" list page as shown below: 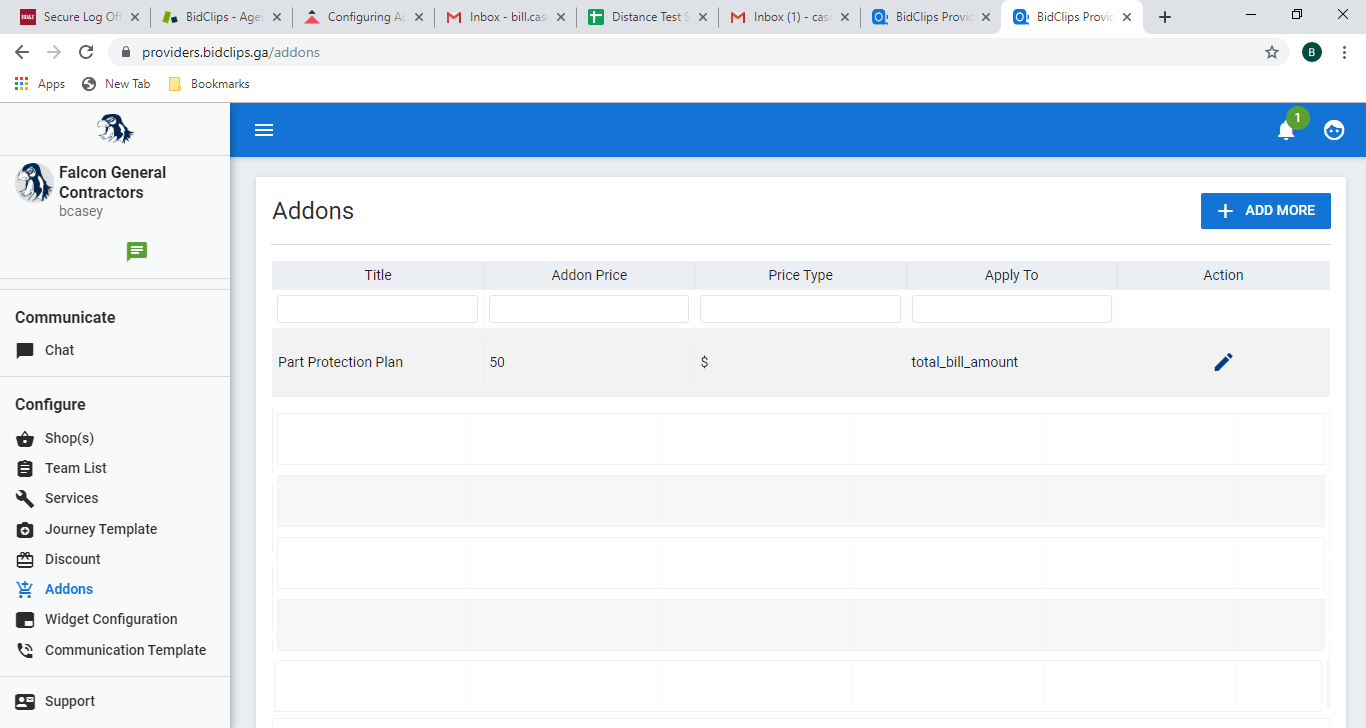
To disable the add-on:
- Click on either the grid row for the row you want to disable or click on the Edit (
 ) button
 - Once redirected to the Add-On detail page, scroll to the bottom of the page
- Check the "Disabled" box
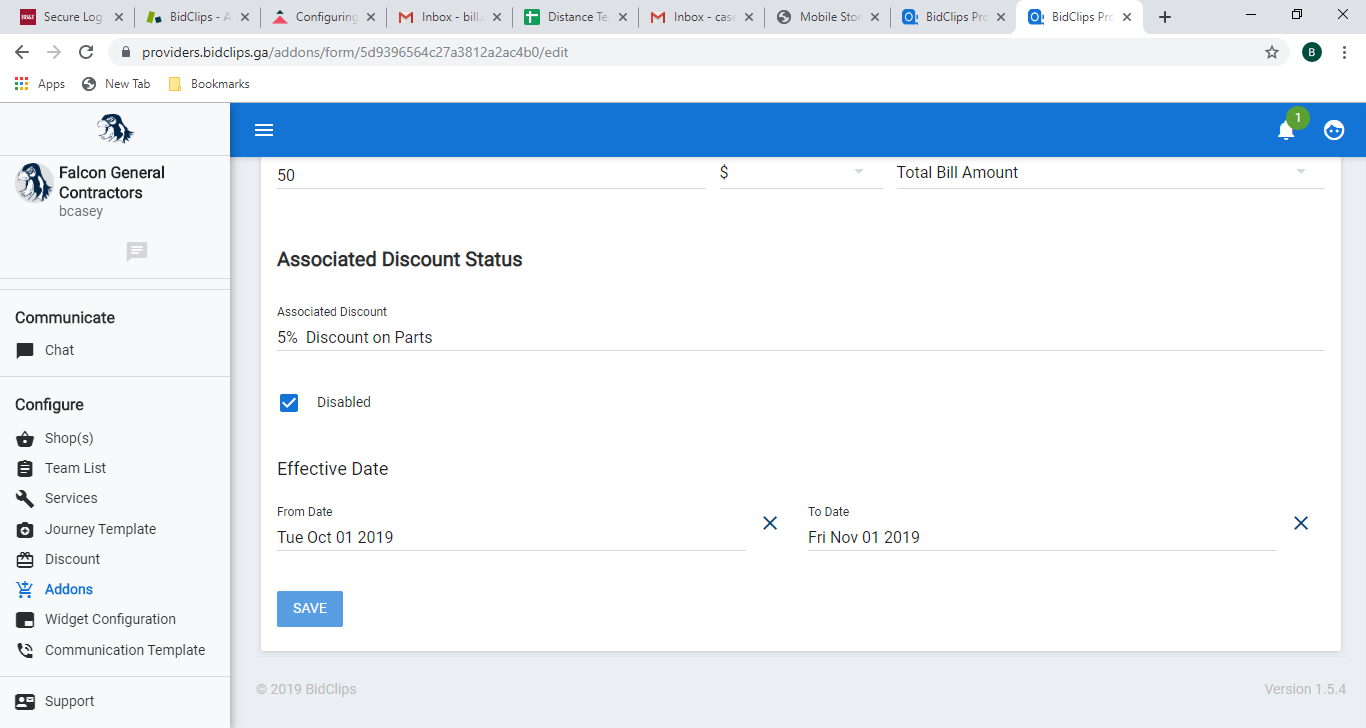
- Click the 'SAVE' button.
Once you click 'SAVE' you should see the following 'Addons Updated' message appear in the upper right-hand corner of your screen. You have now successfully saved the add-on settings in your Provider Portal.
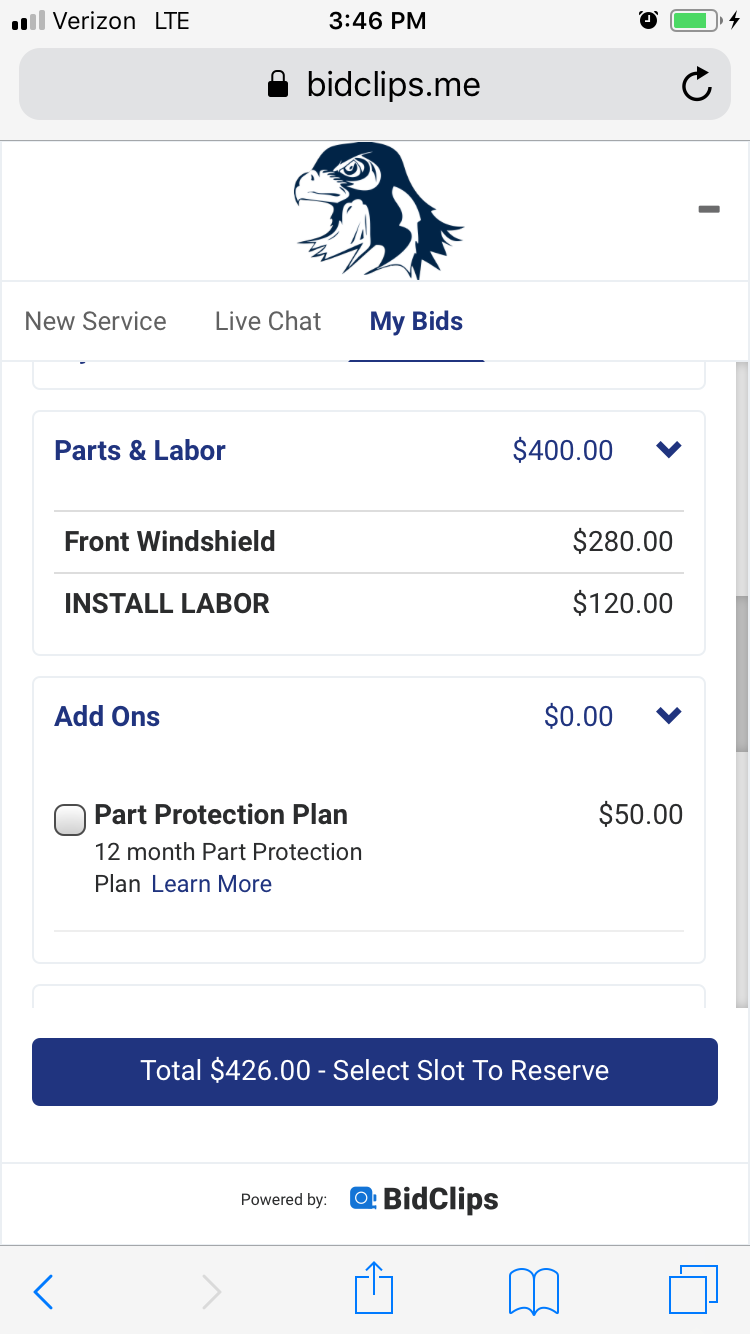
BidClips Widget Example
Below is what your customer will see when selecting an add-on in the BidClips widget.
Below the customer Bid has 'Parts & Labor' and 'Add-Ons' expanded:
Below the customer selects an add-on. Shown with 'Parts & Labor', 'Add-Ons' and 'Discounts' expanded:
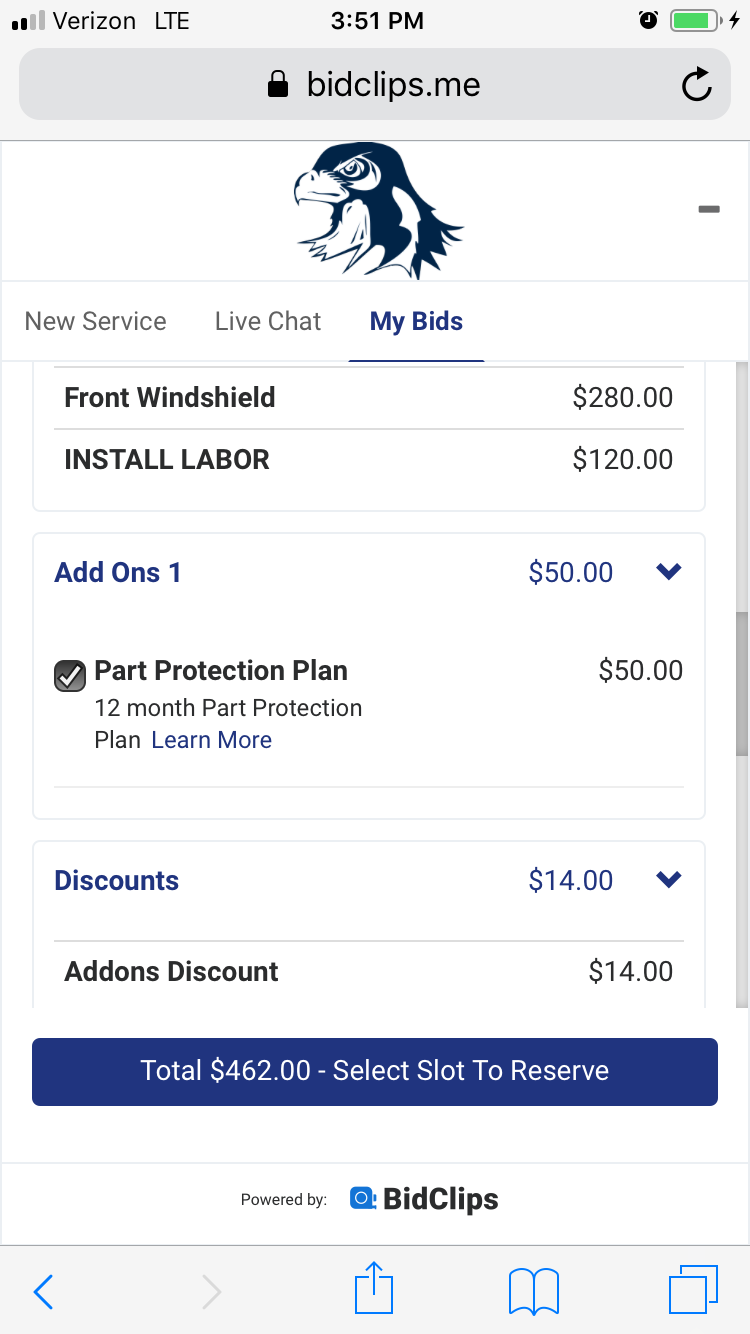
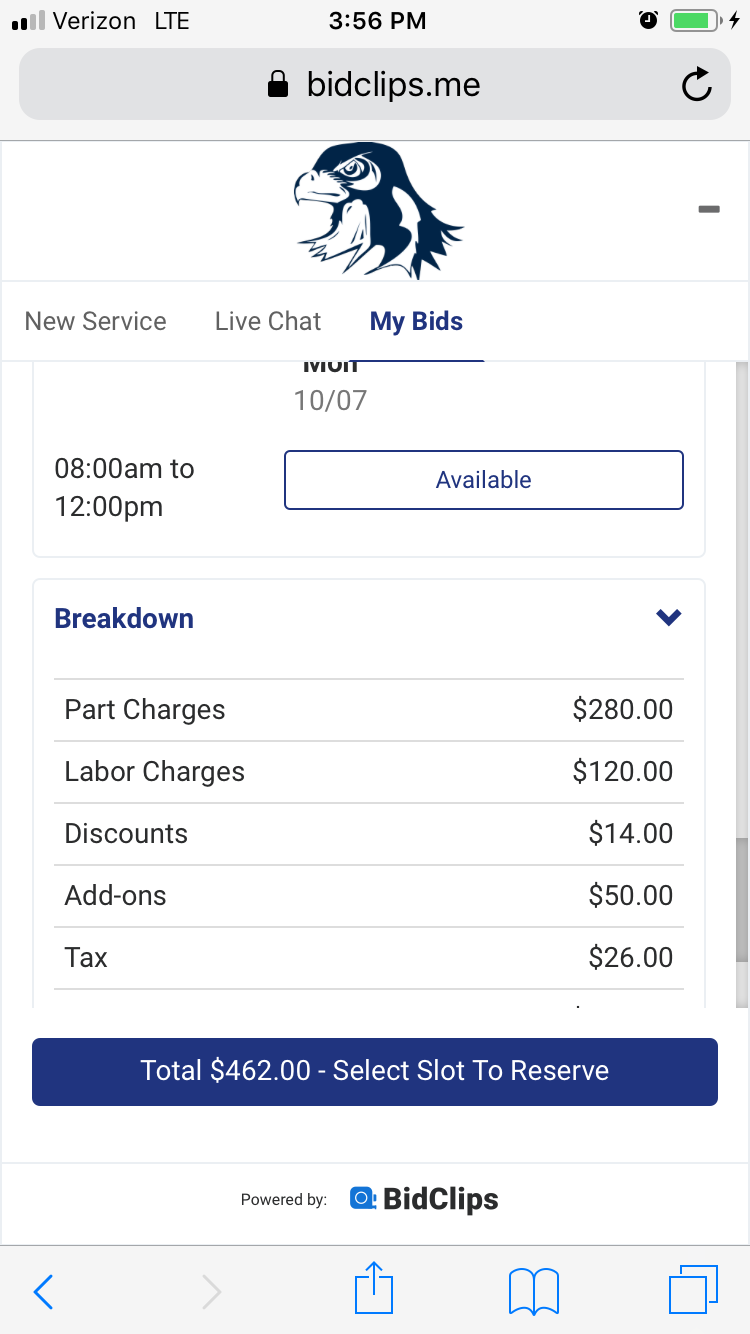
Final Bid Breakdown in the BidClips widget:
- Parts = $280
- Labor = $120
- Discount (5% of Parts Applied by Add-On) = $14
- Add-On = $50