How do I edit an existing contact in BidClips?
Step 1: Locate the Contact You Wish to Edit
In order to edit an existing contact, you must first access the specific contact you wish to edit. You can access an existing contact in multiple ways throughout the platform:
- Contact link on left-side navigation menu
- Shop(s) link on left-side navigation menu
- Performing normal workflow items in the platform such as creating/editing service requests, bid, and jobs.
Each of these access methods are described in more detail below. Performing the edit will be the same no matter which access method you employed.
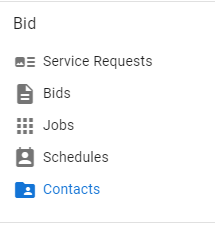
Contacts Link on Navigation Menu
Click the 'Contacts' link in the Bid section within the left-side navigation menu.
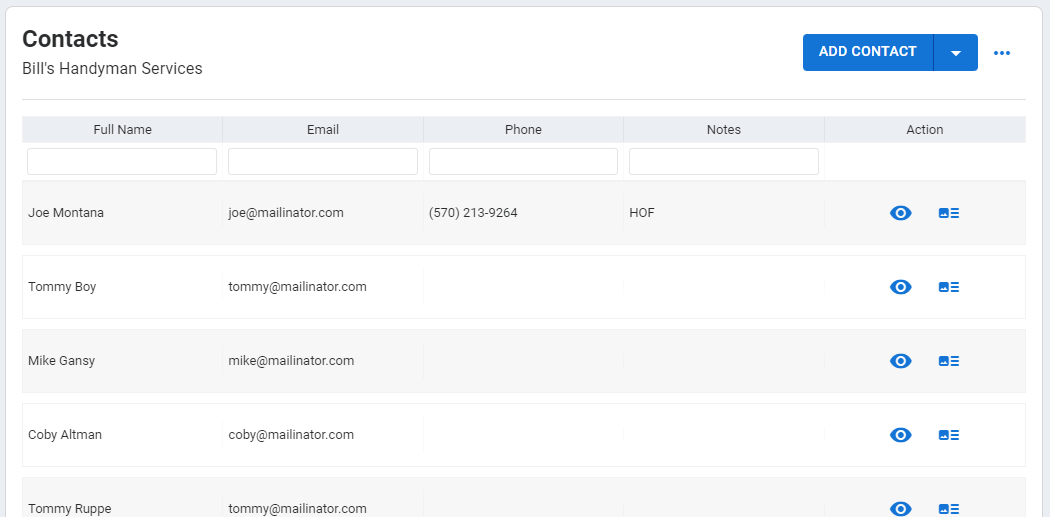
This will bring you to a list of all the existing contacts in your BidClips portal. If you have multiple shops configured, you will see the contacts for all of your shops.
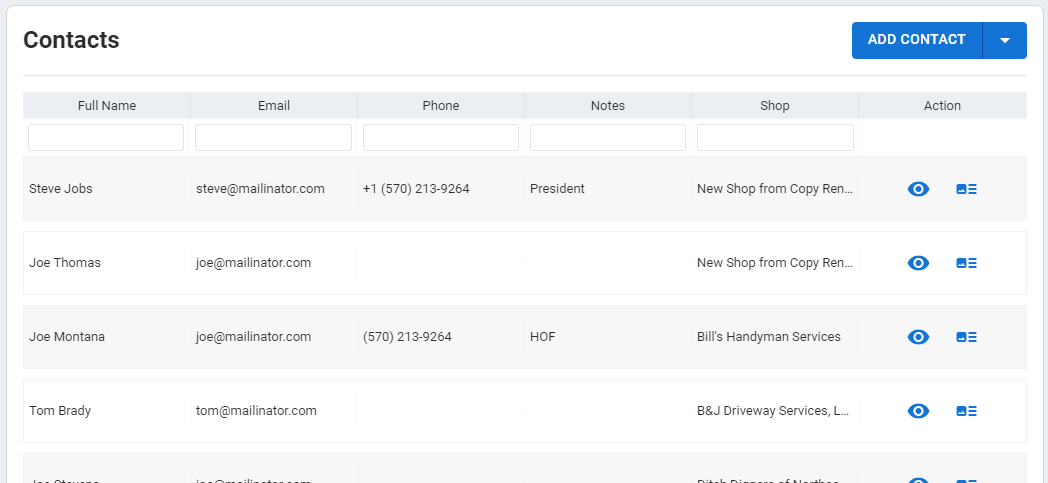
Locate the contact you wish to edit and either click on the grid row or the 'View/Eye' icon in the actions column. This will take you to the details of that specific contact.
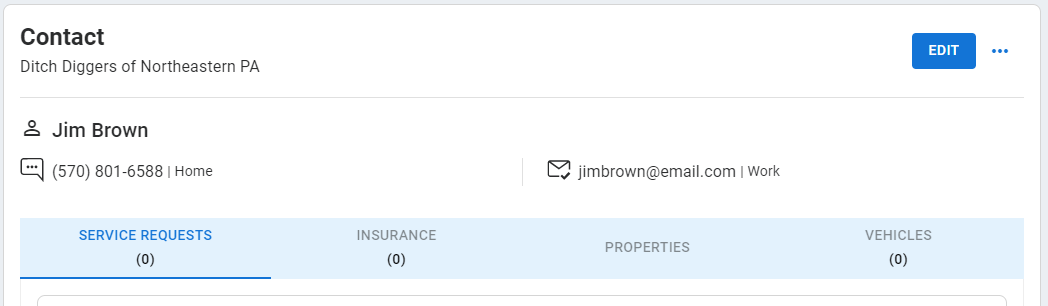
Click on the 'Edit' button in the upper right corner of the page to perform the edit.
Shop(s) Link on Navigation Menu
Since contacts are associated with a particular shop, you can also click the 'Shop(s)' link in the Configure section of the left-side navigation menu.
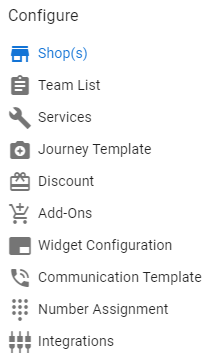
Click on the 'Contacts' icon on the Shop Information page.
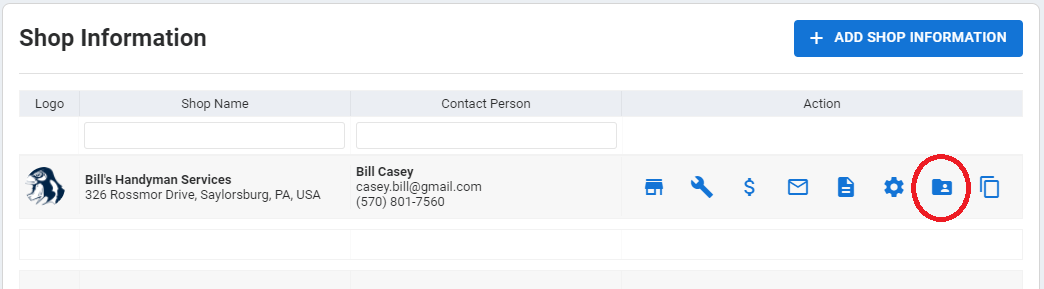
This will bring you to a list of all of the contacts that are associated with your shop of interest.
Locate the contact you wish to edit and either click on the grid row or the 'View/Eye' icon in the actions column. This will take you to the details of that specific contact.

Click on the 'Edit' button in the upper right corner of the page to perform the edit.
Performing Normal Workflow Items (Service Request, Bid, Job)
You will also have the opportunity to edit an existing contact while performing normal workflow activities in the platform such as creating/editing service requests, bids, and jobs. In these cases, you will notice a Contacts section on the right side of the page and an ellipses button next to each contact.
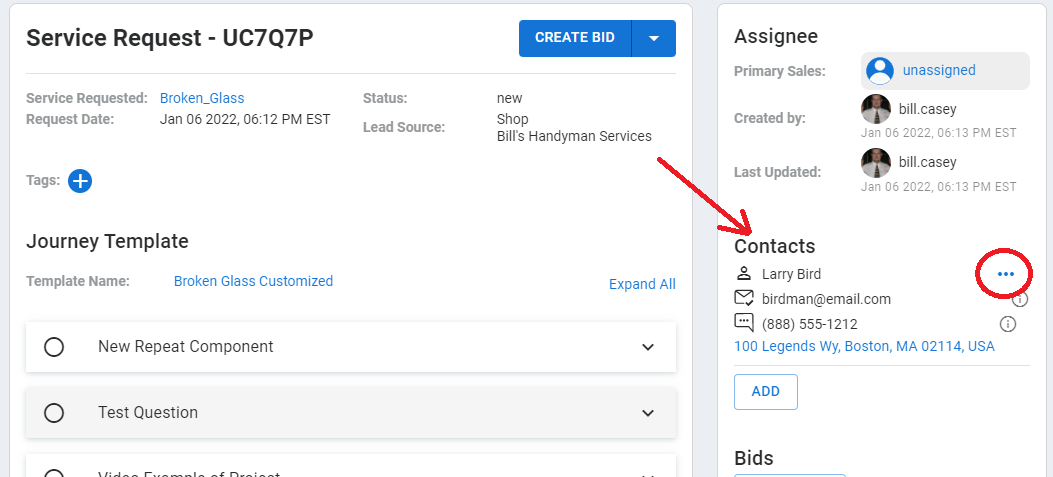
To edit a contact, click the ellipses button and select 'Edit' from the drop-down list.

This will take you to the details of that specific contact.
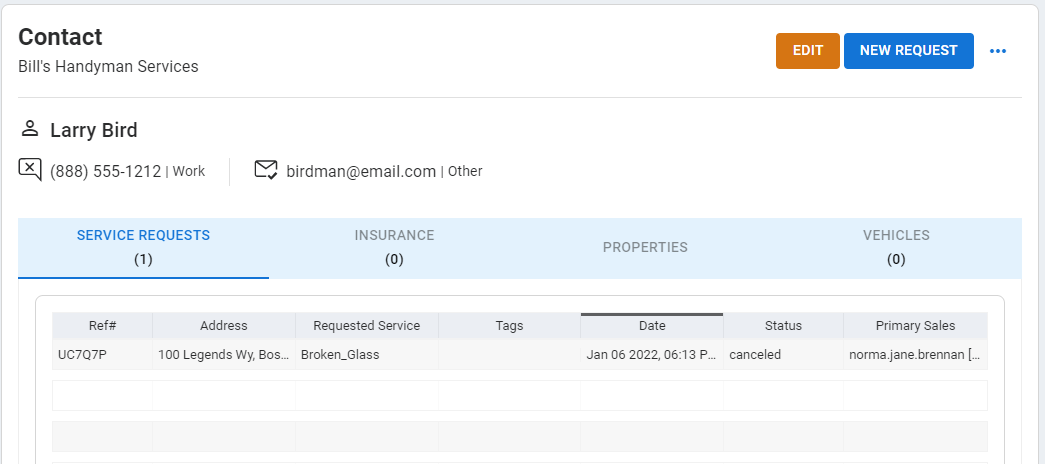
Click on the 'Edit' button in the upper right corner of the page to perform the edit.
Tip: Remember to use the filter boxes underneath each column heading to help locate existing contacts.
Step 2: Perform the Edit
Once you have located the contact you want to edit; proceed with your updates on the Contact form page. Click the 'SAVE' button to apply your changes.
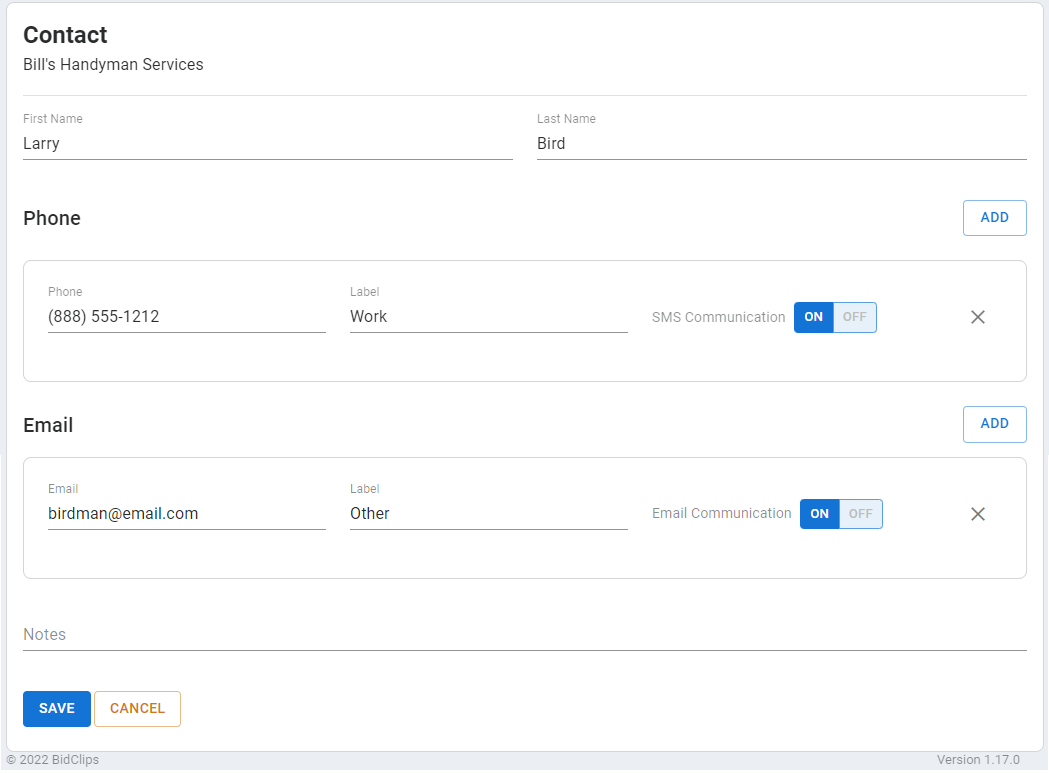
Some things to consider when updating a contact:
- Both a first name and at least one phone number or email address is required.
- You can specify whether the contact is exempt from tax or not.
- Multiple phone numbers/email address are supported.
- There is a drop down list of pre-formatted phone and email labels. You can select one of the pre-formatted values (Home, Work, Other) or you can create your own.
- While editing, you will see a warning for potential matches if a first and last name combination, a phone number, or an email address already exists within the same shop.

- You will also see a warning, and be prevented from making the update, if an exact match exists within the same shop.

- Once the contact is updated, all historical information (service requests, bids, and jobs) will be updated throughout the platform.