Learn how to connect a credit card payment processor to BidClips
Once you have successfully configured your payment processing account for your shop(s), you will be able to accept credit card payments in BidClips. Credit card payments can be accepted in the BidClips platform using one of four payment processing interfaces - Intellipay, Authorize.net, Stripe, or NMI.
In order to process payments in BidClips, you will need to add your payment processing account credentials in your Shop Configuration settings. If you are setting up an Intellipay or Authorize.net payment processor, you will need both the API Login ID and Transaction Key values. If you are setting up a Stripe payment processor, you will need only the Secret Key value from Stripe. If you are setting up an NMI payment processor, you will need both the Gateway ID and Security Key values.
Locating your payment processor credentials
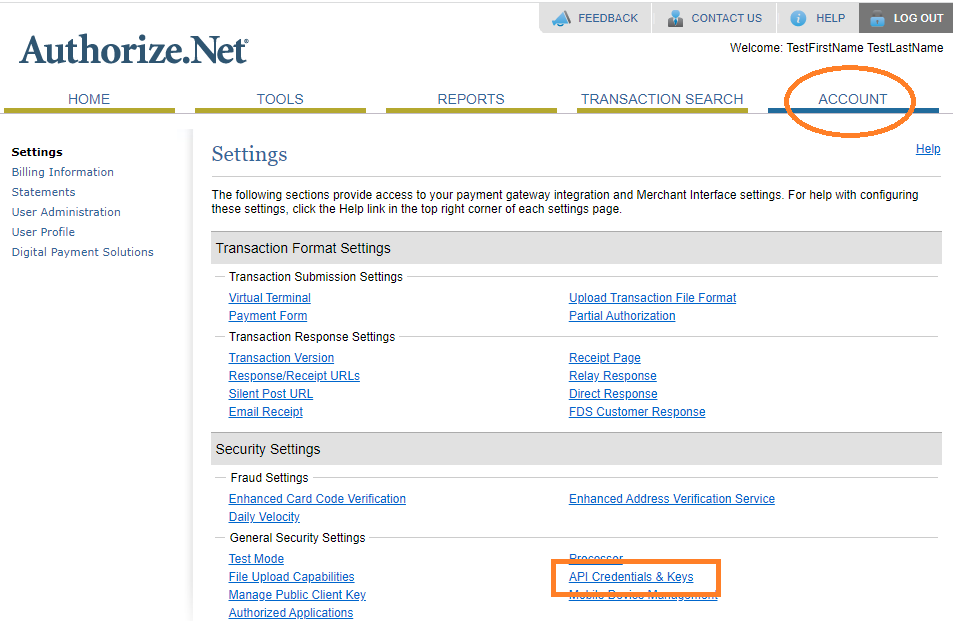
- Authorize.net: Access your Authorize.net account and select Account from the list of menu options, then select API Credentials and Keys
- Intellipay: Upon signing up with an Intellipay account, your account executive will provide you with your API keys.
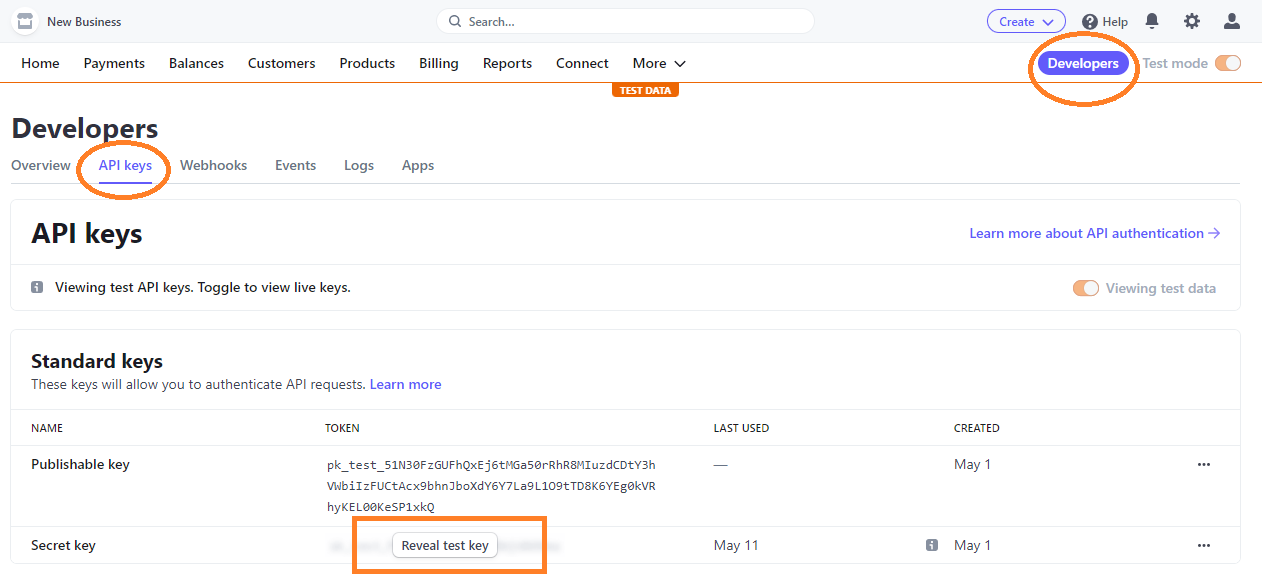
- Stripe: Any user with Administrative rights to your Stripe account can access the Developer settings, which is where you will find your Secret Key. Developers > API Keys > Secret Key > Reveal Secret Key
- NMI: Any user with access to your NMI merchant account portal can access/create the necessary credentials.
- Security Key: My Settings > Security Keys > Private Security Keys section. Copy an existing key OR use the "Add a New Private Key" if an existing key does not exist.


-
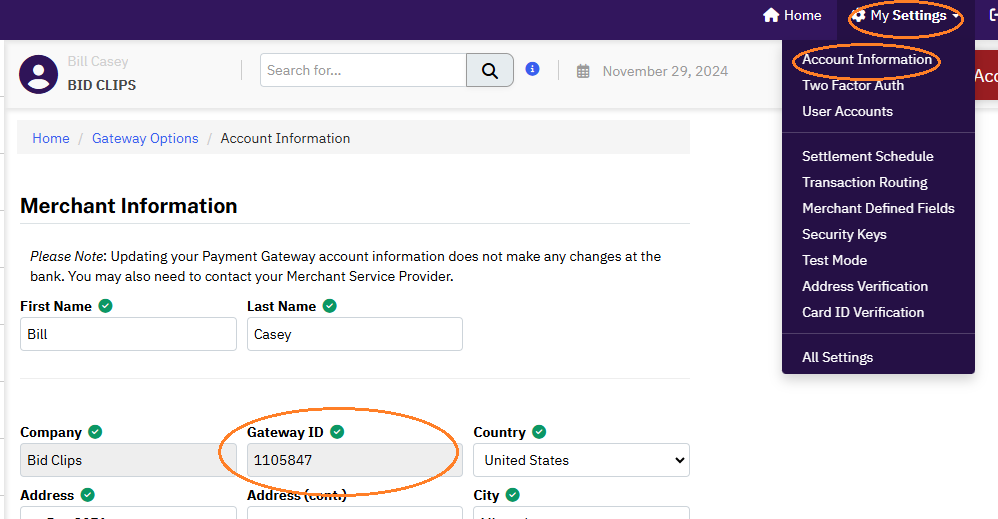
- Gateway ID: My Settings > Account Information > Locate Gateway ID in profile
Applying your payment credentials in BidClips
Once you have identified your Transaction Key and API login ID (Authorize.net and Intellipay), Security Key and Gateway ID (NMI), or Secret Key (Stripe) values, you will need to apply them in the 'Payments' section of your shop settings.
Note: Payment Processing Account settings are done at the shop level. Therefore, if you have more than one shop; you will have to repeat this for each of your shops.
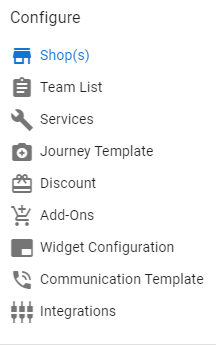
You will start this process by clicking on the 'Shop(s)' link in the 'Configure' section of the Provider Portal navigation bar that is located on the left side of the screen.
Next, you will click on the 'shop information' ( ) icon in the 'Shop Information' page and will be redirected to the 'Add/Edit Shop Information' page:

You will be redirected to the 'Add/Edit Shop Information' page:
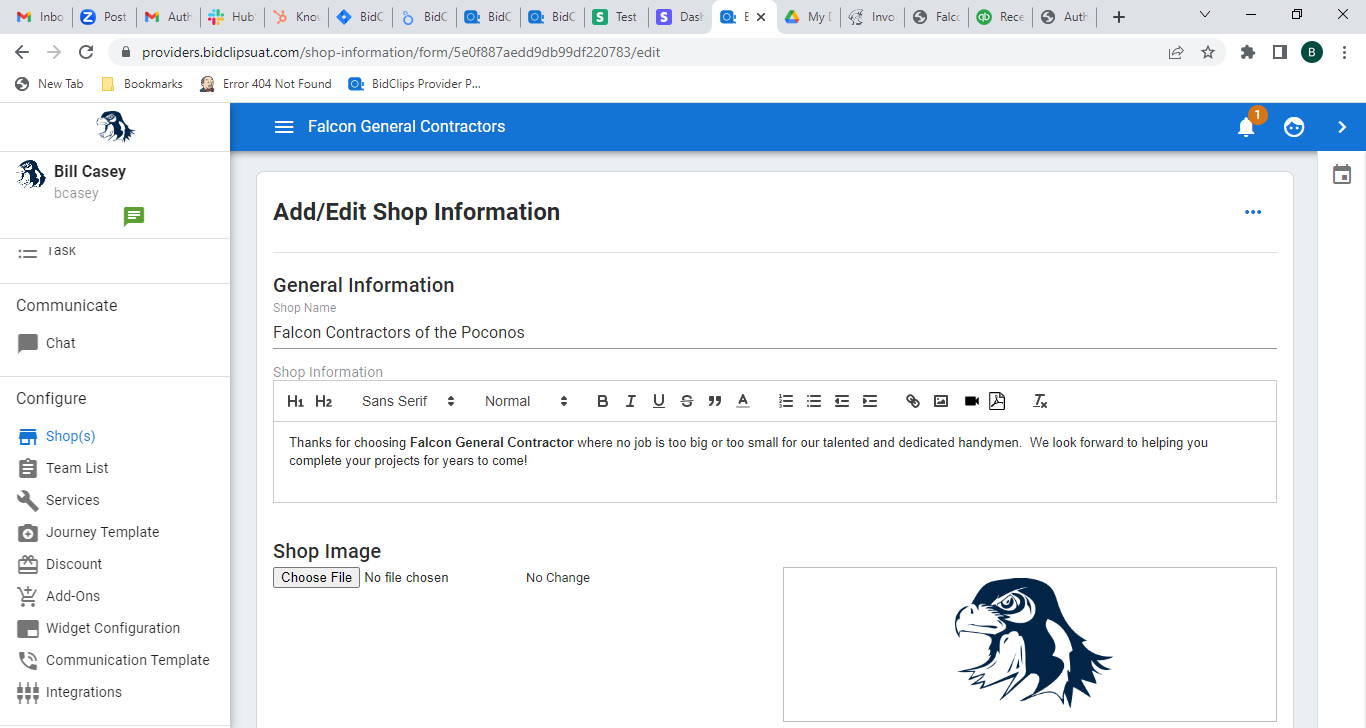
Scroll down until you see the 'Pricing' section and expand the section.
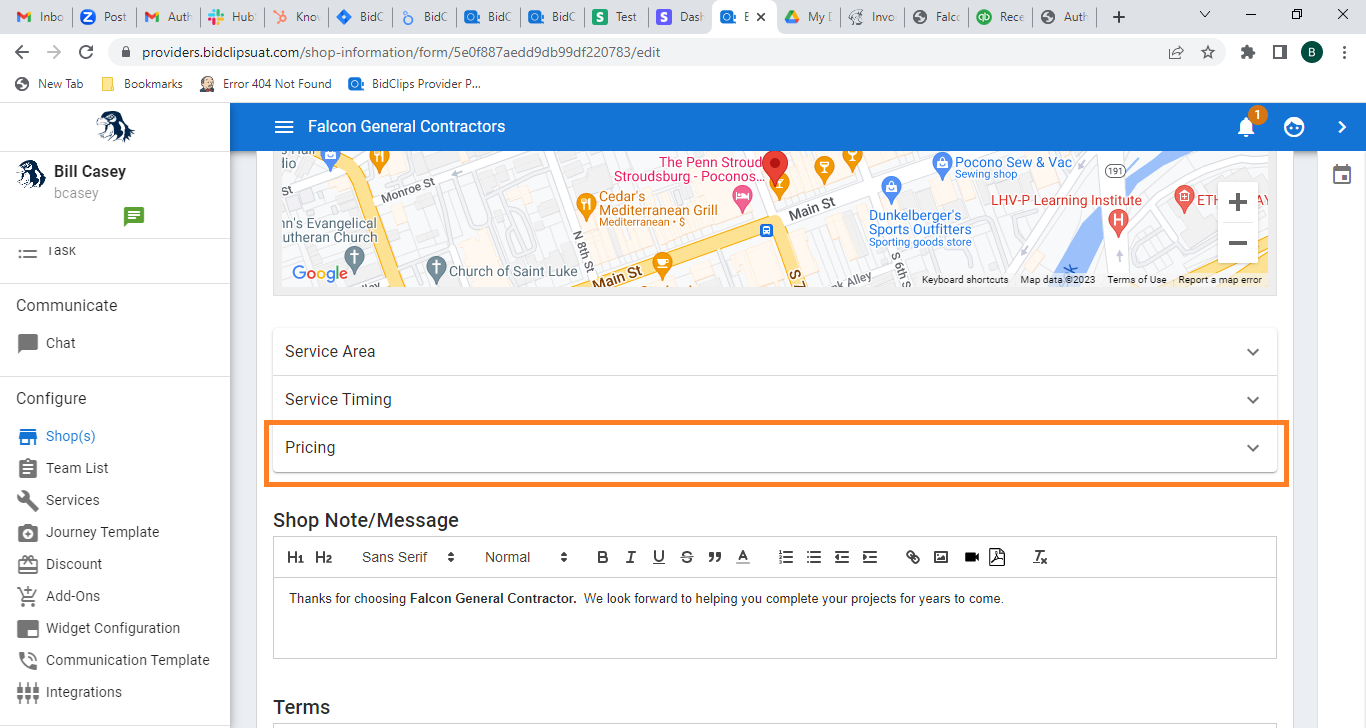
Scroll down until you see the 'Payment' sub-section. To enable payments for your shop in BidClips:
- Check the 'Enable Accept Payment' box.
- Click the 'Select Payment Processor' down arrow and pick either "Intellipay", "Authorize.net", or "Stripe"from the drop-down list.
- Select either the 'Production' option.
- Select the correct currency (USD or CAD).
- Enter your account credentials
- Transaction Key/Secret Key/Security Key
- API Login ID/Gateway ID (if applicable)

Note: Intellipay payments can only be accepted in USD.
Important!: Please note, you must click the 'SAVE' button at the very bottom of the Add/Edit Shop Information page before leaving the page. Failure to click the 'SAVE' button before navigating away from the Add/Edit Shop Information page will result in lost work.
