Learn how to setup new users in your provider portal.
Once you have activated your Provider Portal account, you are now ready to add other members of your sales team to the portal. It is important to note that only Admin users are able to add new users to the portal.
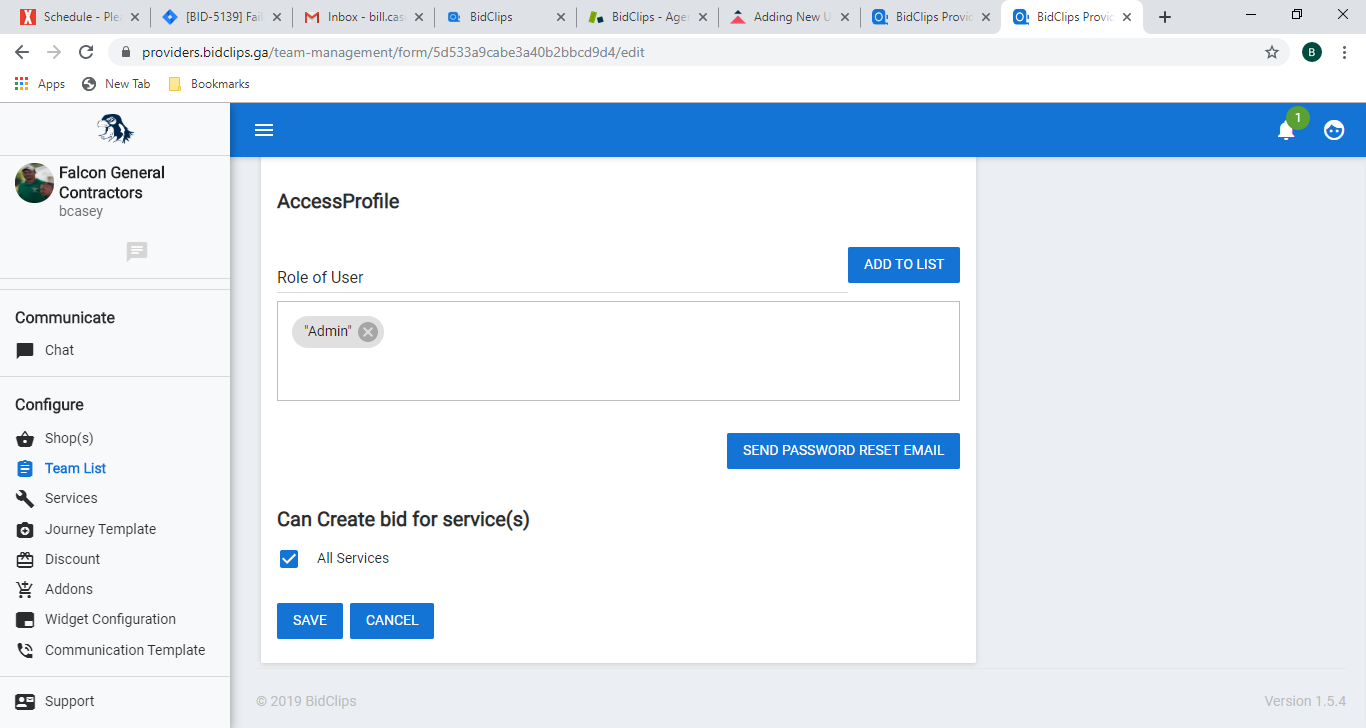
Therefore, prior to adding new users, please access your account settings and verify that your user AccessProfile is set up as an "Admin" account.
If you are not set up as an "Admin" account, please make that setting now. Your user account AccessProfile setting should now look like:
You will start the process of adding new users by clicking on the 'Team List' link in the Configure section of the Provider Portal navigation bar that is located on the left side of the screen.
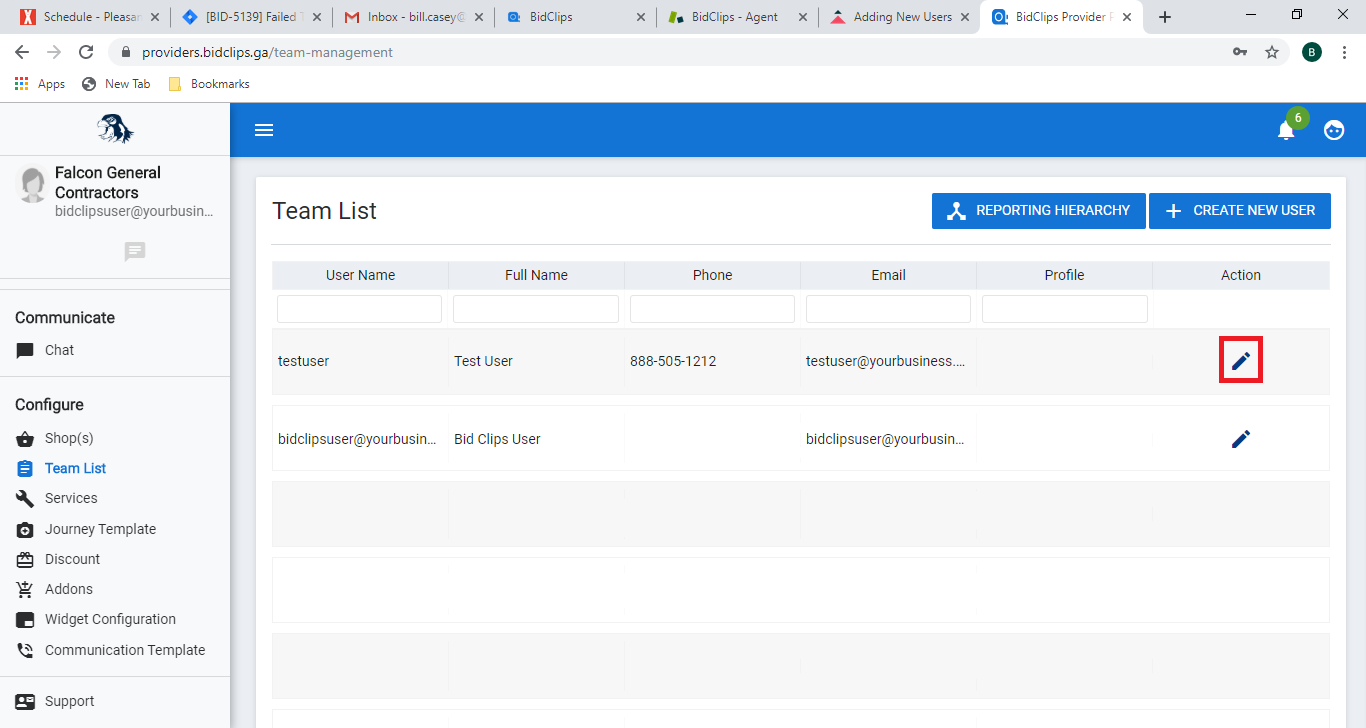
Clicking on the "Team List" link will show you a list of the users currently in your Provider Portal.
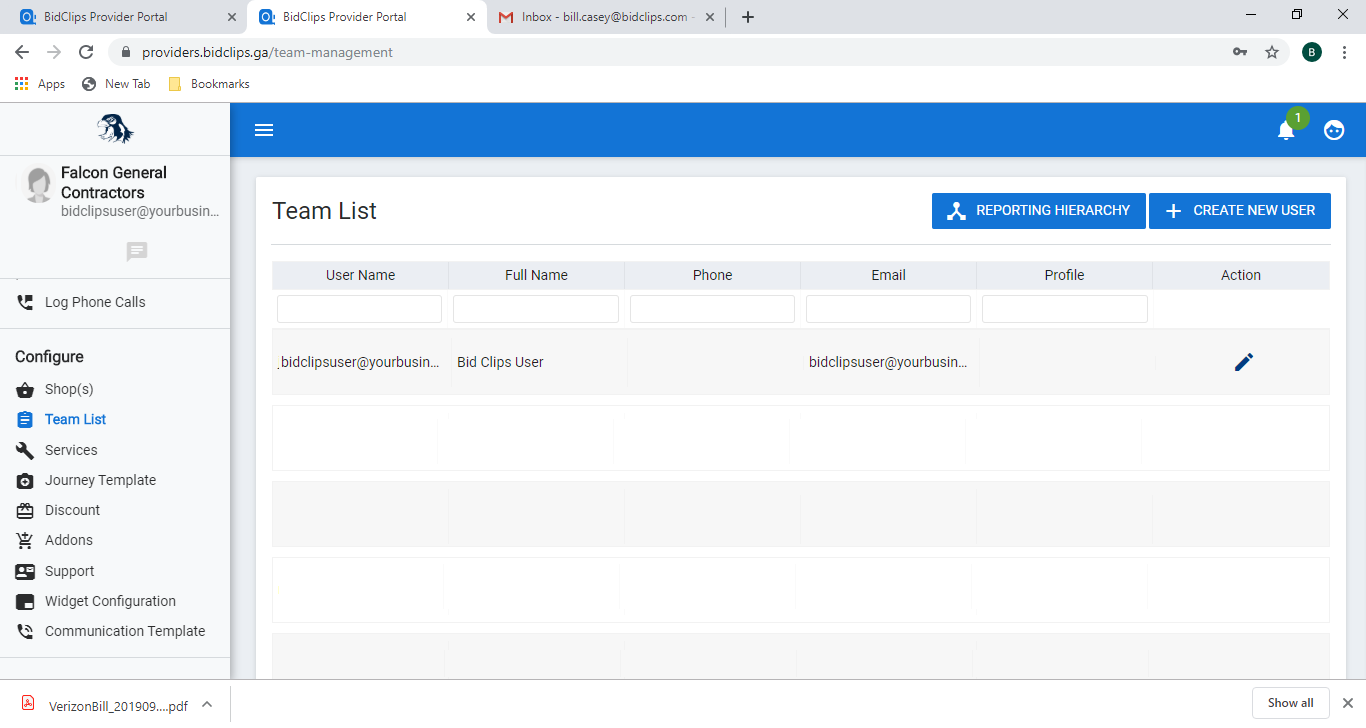
Click the '+ Create New User' button to add a new user for your organization.
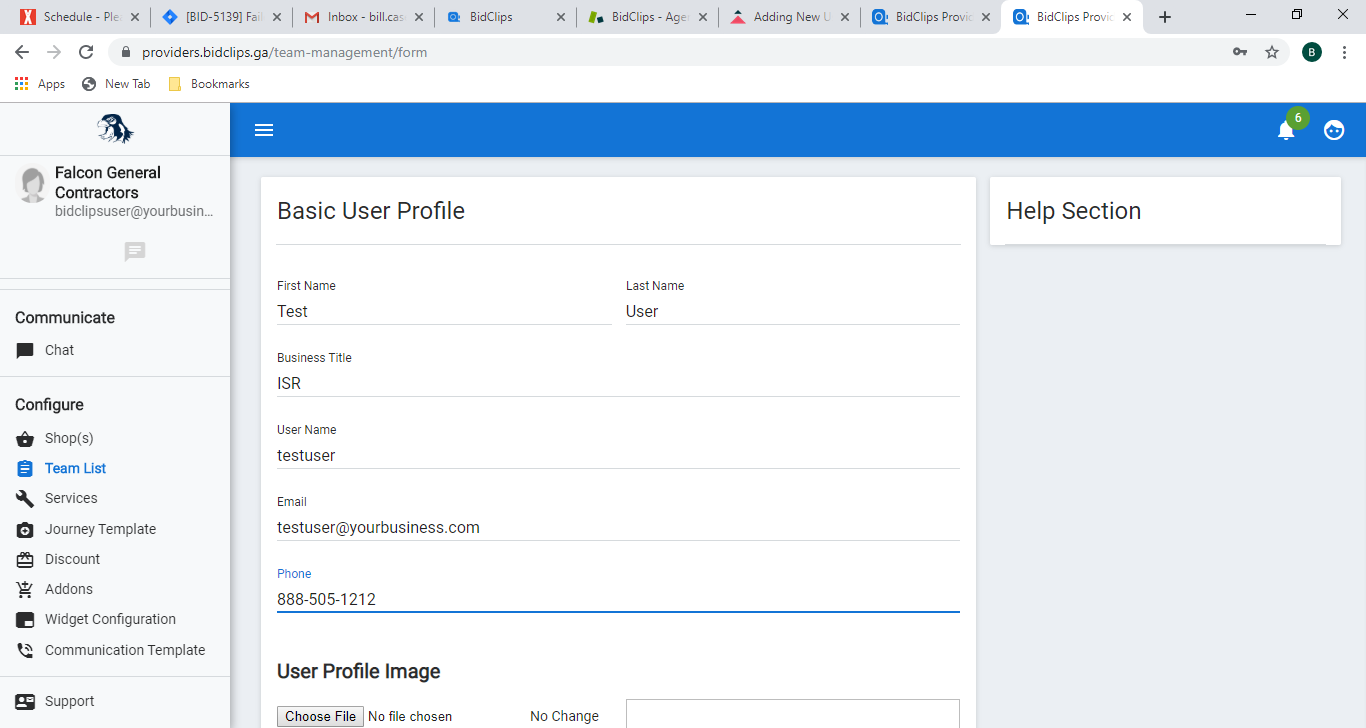
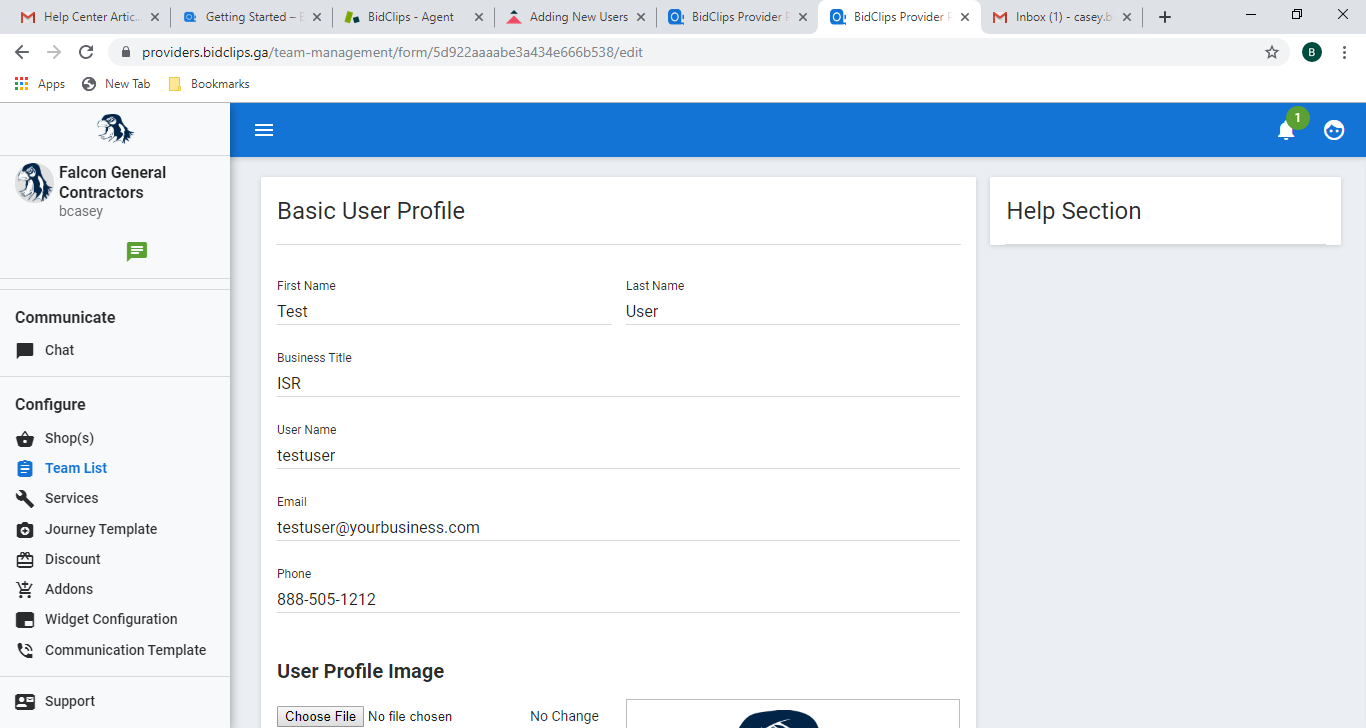
Basic User Profile
Here you will enter basic user information such as first name, last name, job title, username, email address, and phone number. Please note that the username cannot contain spaces and every user must have a unique email address.
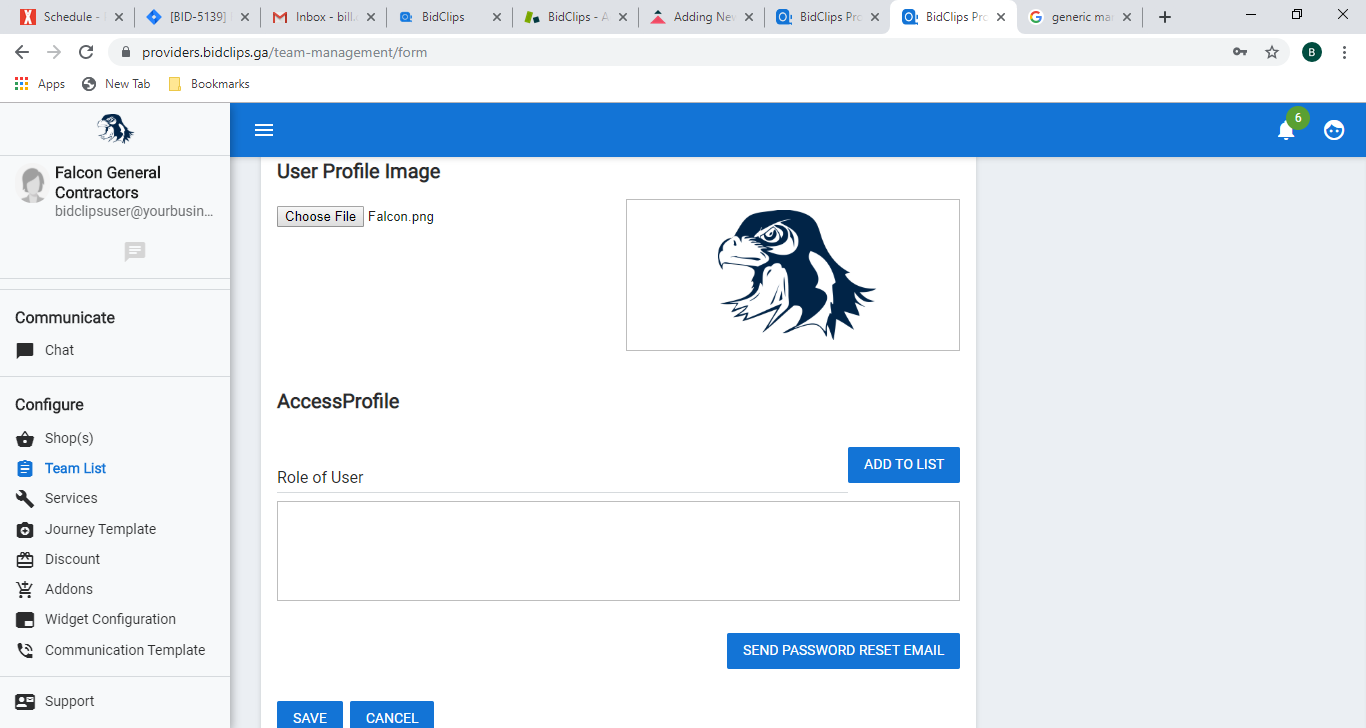
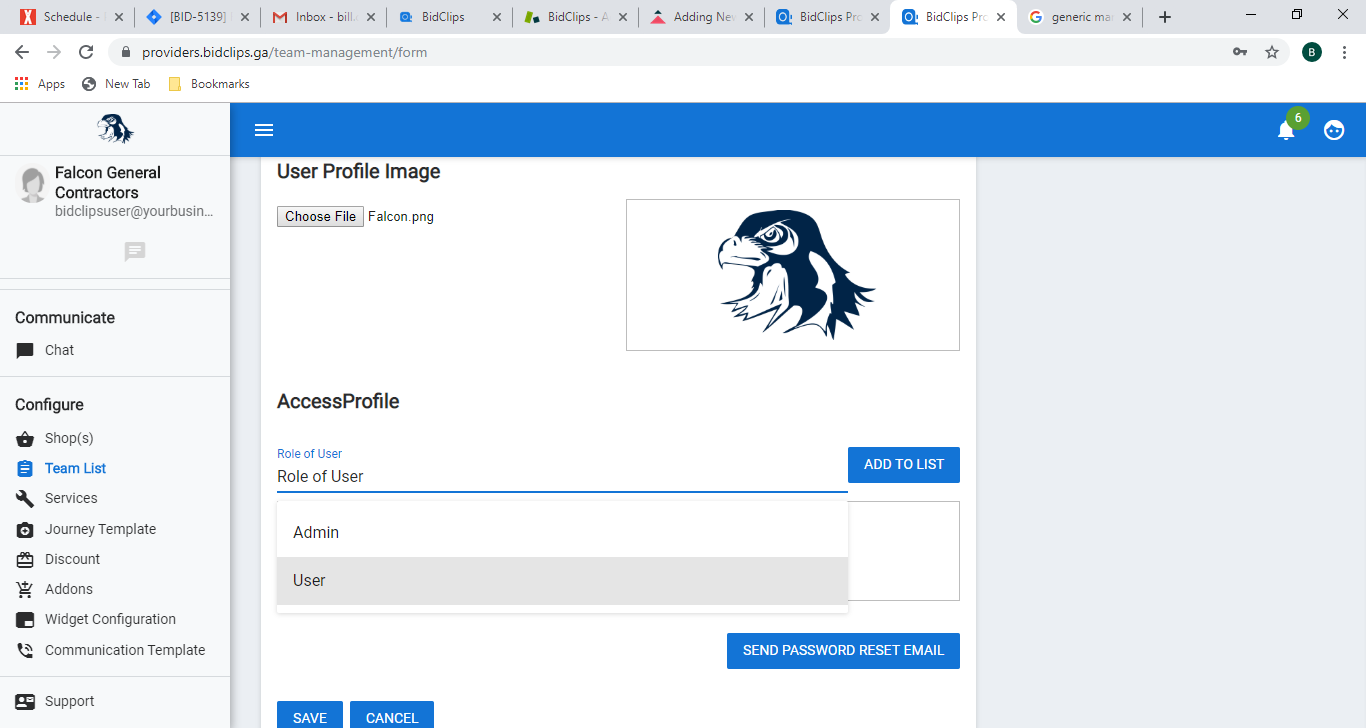
User Profile Image (Optional)
If you would like to add a user image click on the 'Choose File' button and select a logo from your local device. It is important to note that this image, along with the user's first name, will be shown to customers on the BidClips widget for Bids the user sends.
If you do not include a user image, a default image will be shown to the customer in the widget.
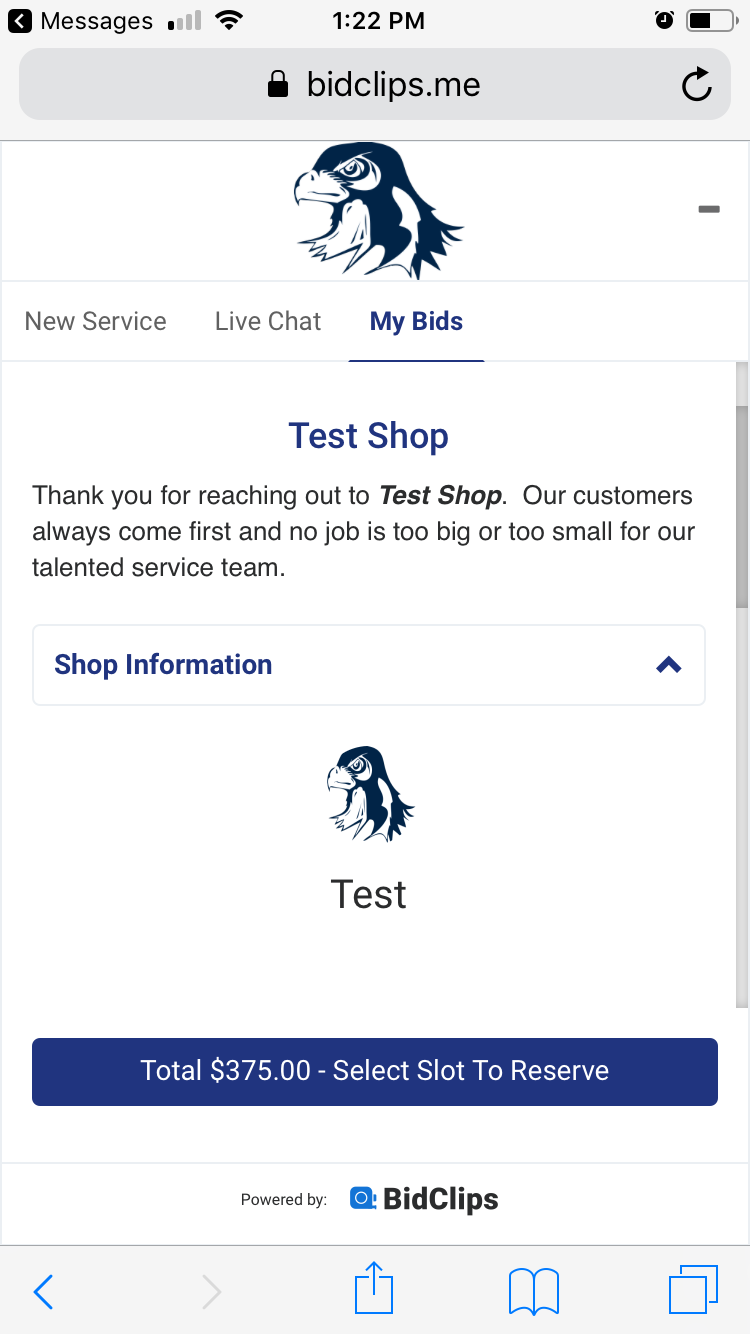
Example of username and image as it is shown to the customer in the BidClips widget:
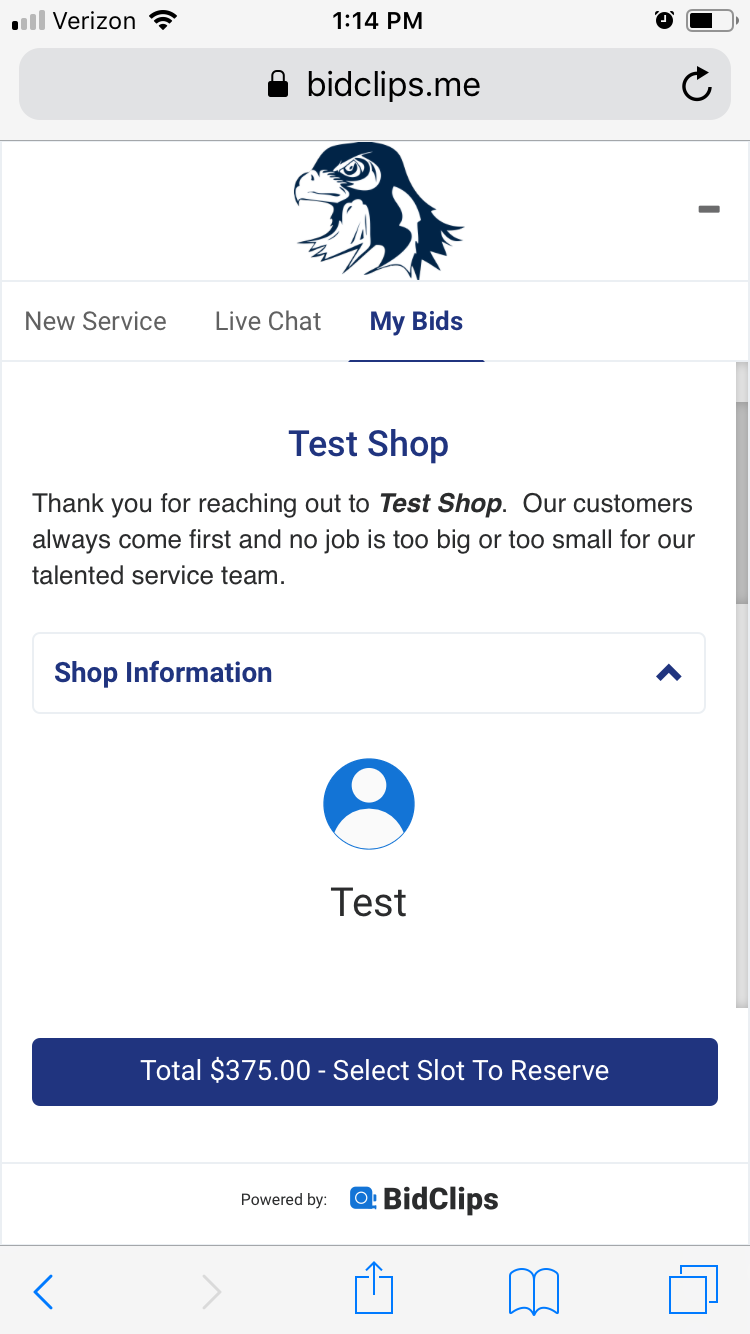
Example of a Bid, with no user image, in the BidClips widget:
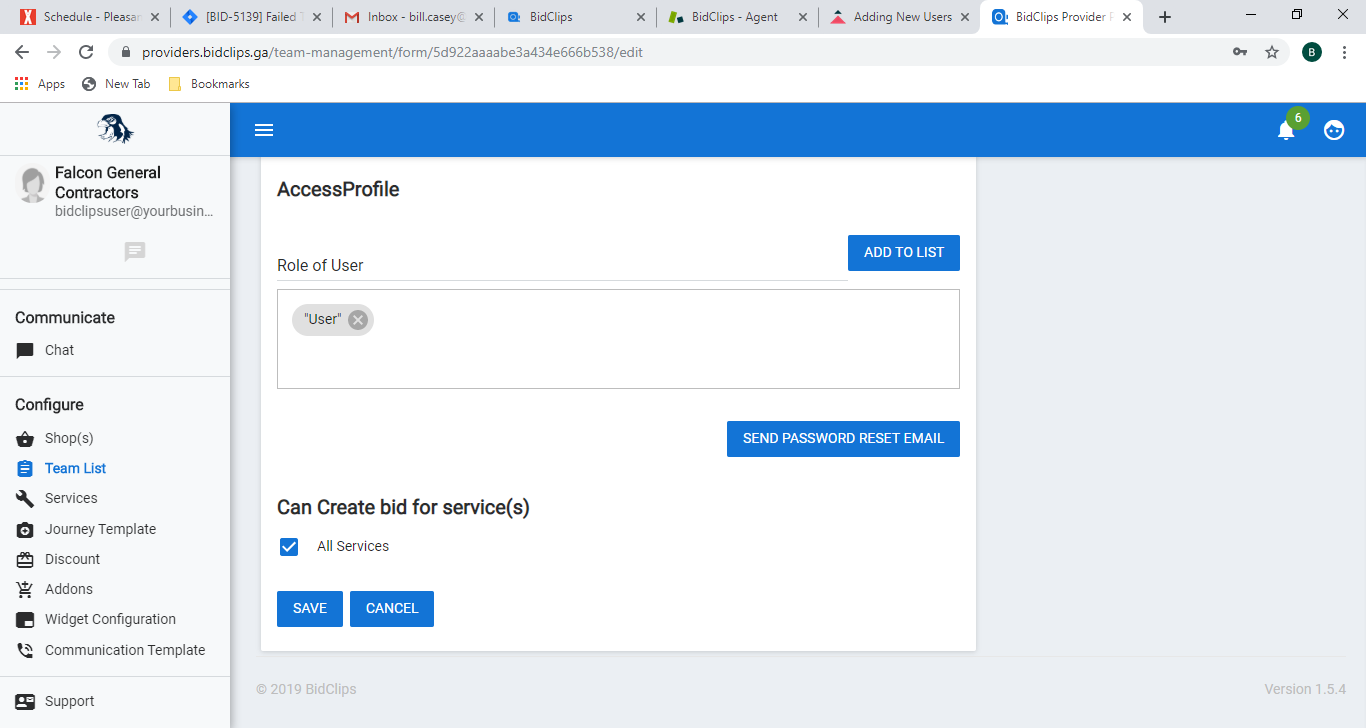
Access Profile Settings
You must give the user you are adding a role. Currently, there are two roles for users in BidClips: "User" and "Admin". The example shown below describes adding a User role which is consistent with adding an ISR.
- Click into the "Role of User" field and a drop-down list showing "Admin" and "User" will appear
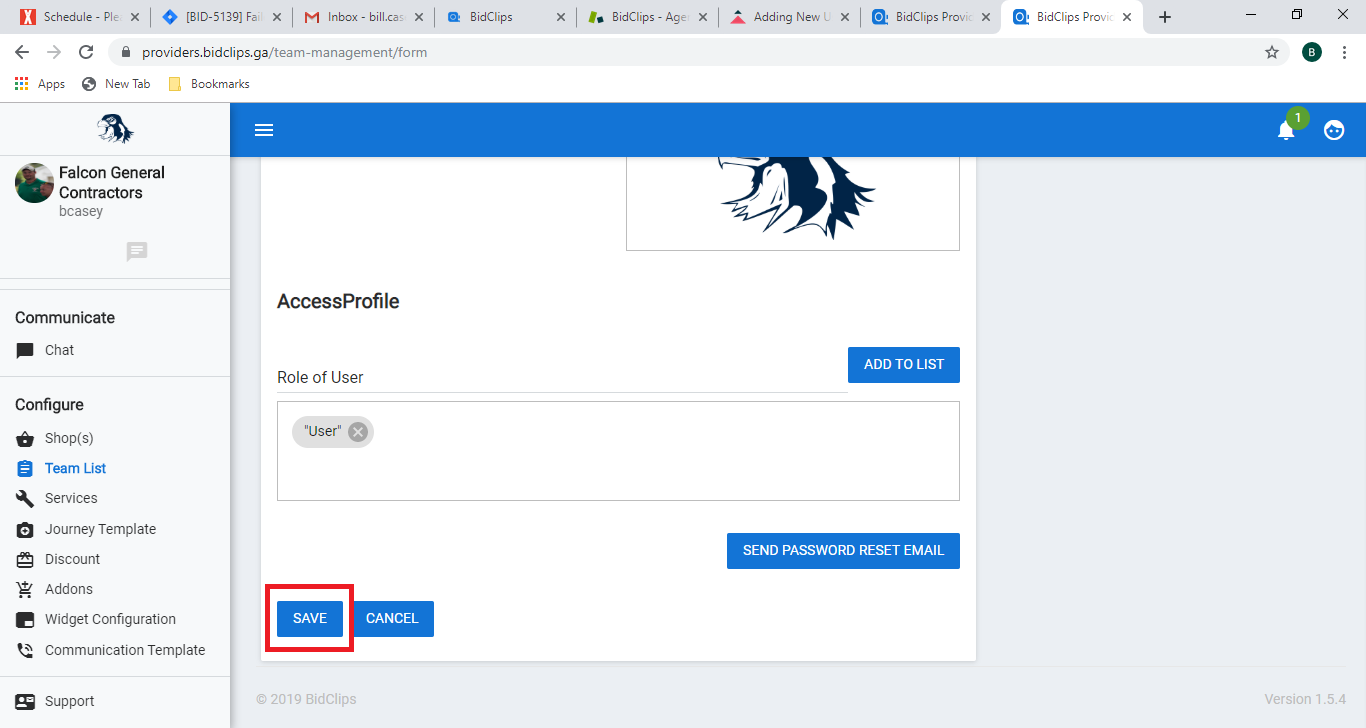
- Select a role from the list
In this example, we have selected the "User" role:

Save Your Settings
Important!: Please remember, you must click the 'SAVE' button at the very bottom of the page before leaving. Failure to click the 'SAVE' button before navigating away from the page will result in lost work.
Once you click 'SAVE' you should see the following User Created and Updated messages appear in the upper right-hand corner of your screen.
Please note that your new user will need to follow the steps outlined in the Accepting User Invitation article to activate their BidClips account.
Upon successfully adding the new user, you will be redirected back to the Team List page and will see the new user you added to the list:

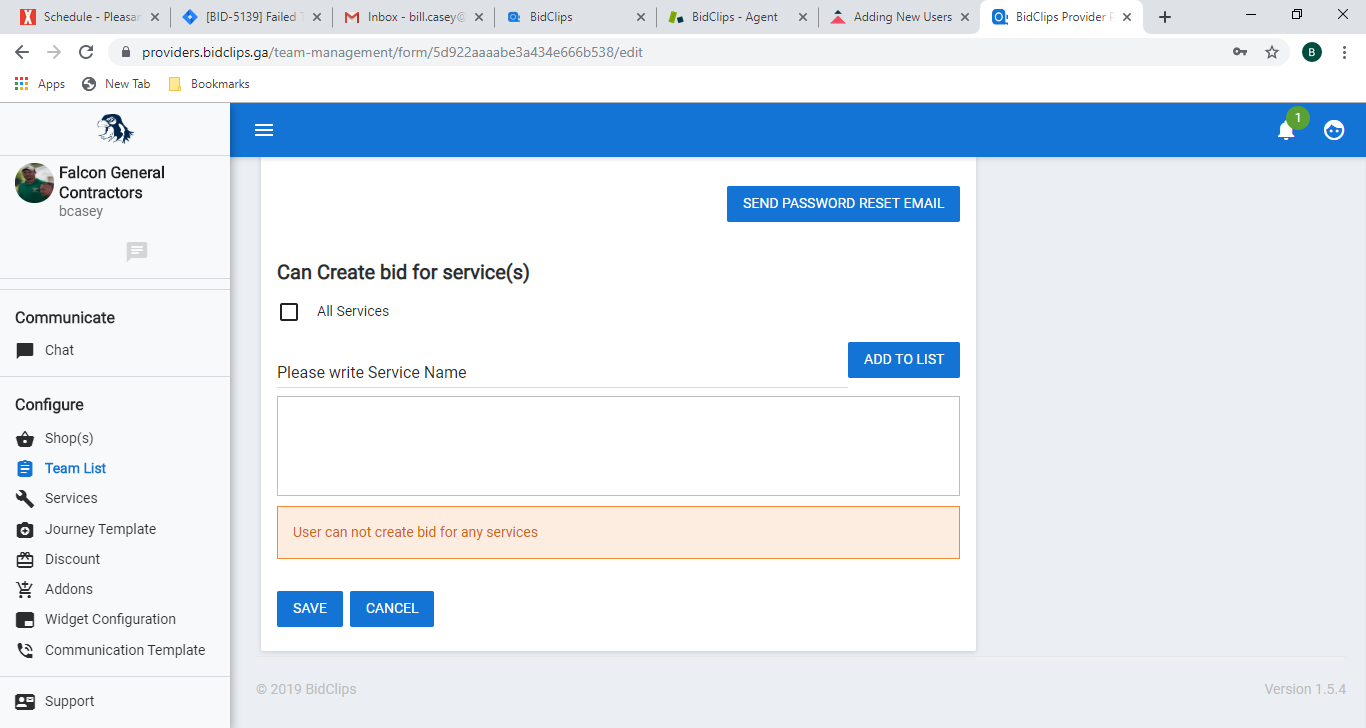
Can create Bid for services?
Once your new user has been added, you will need to configure which service(s) they will be able to create bids for.
You will do this by either clicking on the grid row or the 'Edit' ( ) button on the row for the user you just added.
This will take you back to the user details page.
You will then scroll down to the "Can Create bid for service(s)" section of the page. You will notice that the user has been created with no services selected.
You have the option to:
- allow the user to create bids for all service(s) offered by your provider
- allow the user to create bids for specific service(s) offered by your provider
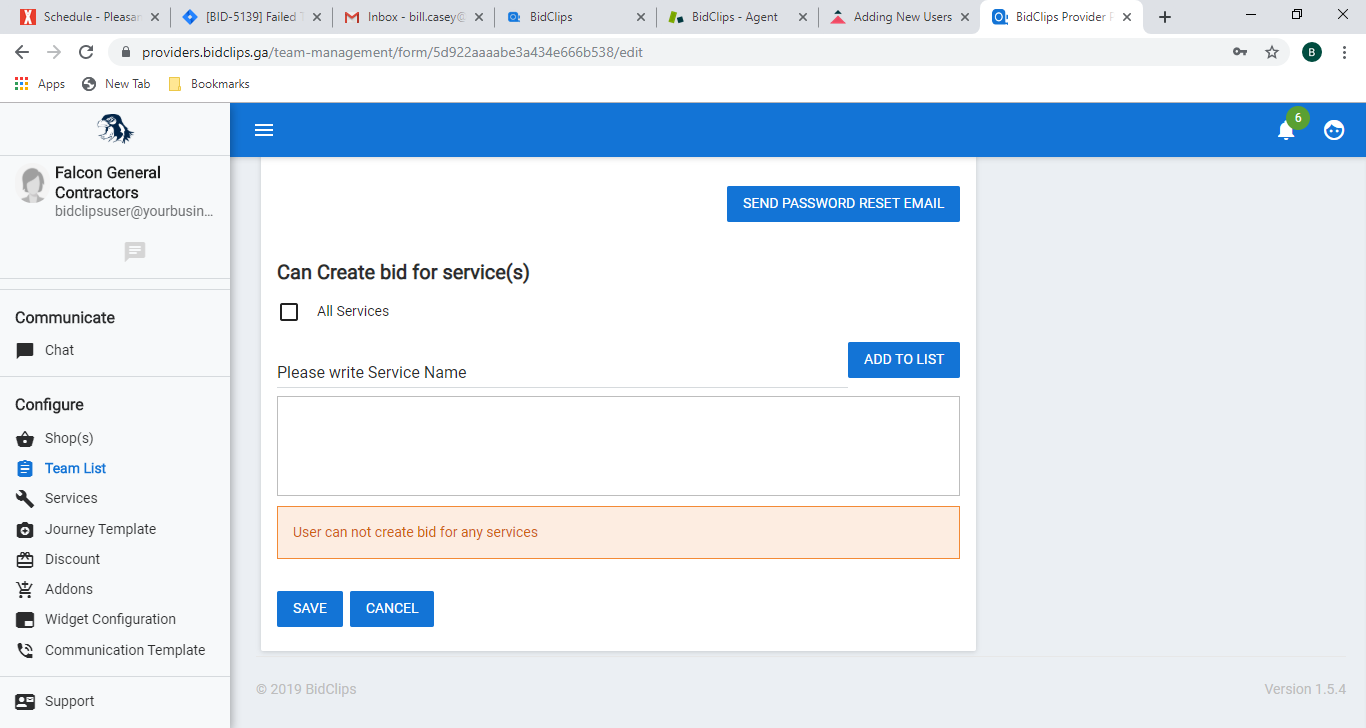
- disallow the user from creating any bids for your provider
To allow the user to create bids for all service(s) offered by your provider, simply select the 'All Services' option as shown below:
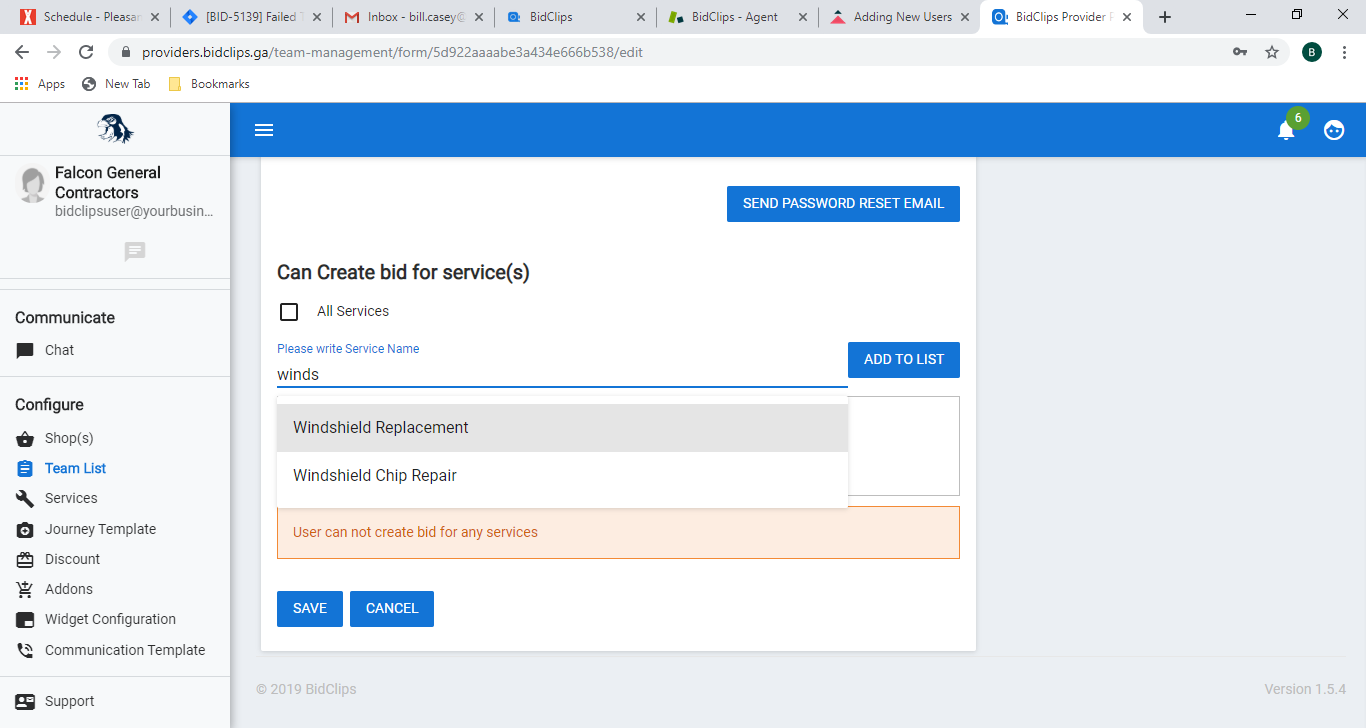
To allow the user to create bids for only specific service(s) offered by your provider, please click on the "Please write Service Name" field and either select the service in the drop-down list or start writing a service name in the field.
Once you see the appropriate service to be added to the list, click on it.
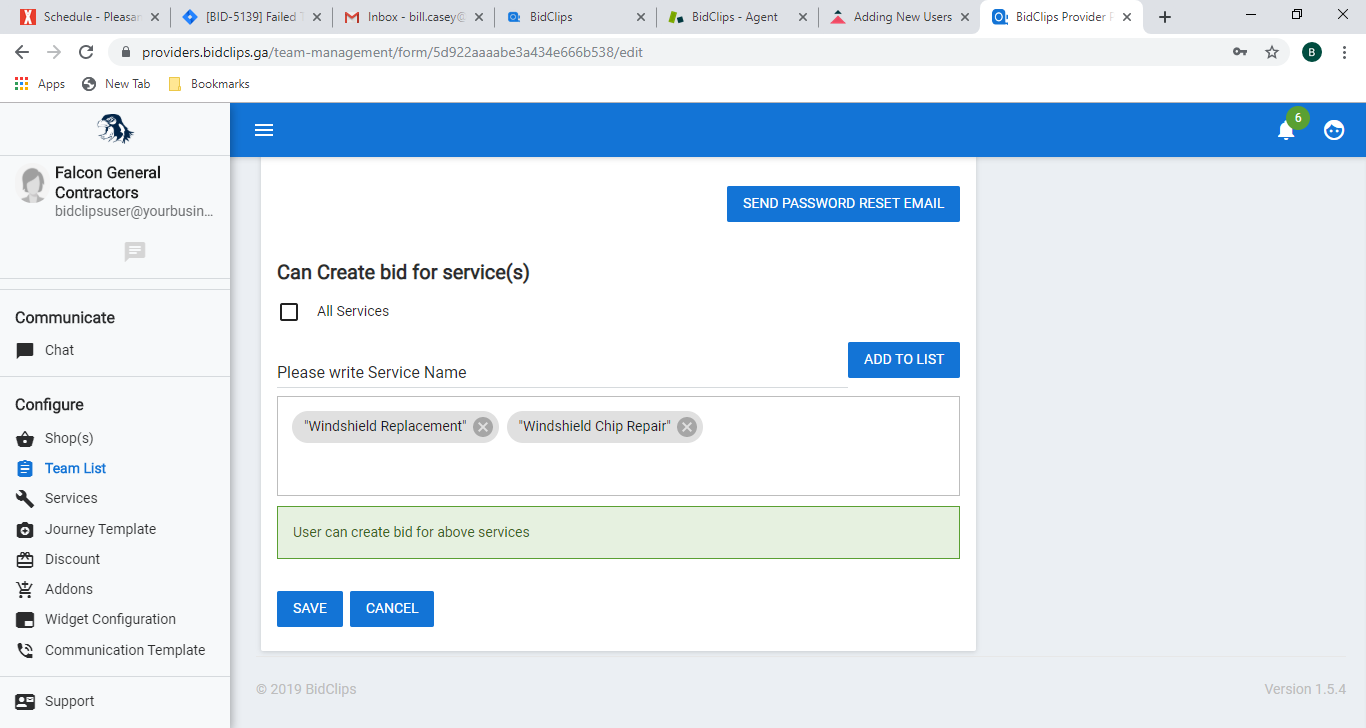
In this example, we have elected to have the user create bids for only the "Windshield Replacement" and "Windshield Chip Repair" services.
If you need to remove a service from this list, you can click on the "x" next to the service in the list that you would like to eliminate.
To disallow the user from creating any bids for your provider, leave the 'All Services' option unchecked and do not add any individual services:
Save Your Settings
Important!: Please remember, you must click the 'SAVE' button at the very bottom of the page before leaving. Failure to click the 'SAVE' button before navigating away from the page will result in lost work.
Once you click 'SAVE' you should see the following 'User Updated' message appear in the upper right-hand corner of your screen. You have now successfully added a user in your Provider Portal.
Repeat the steps outlined here for each member of your team that you wish to add to your Provider Portal.