How do I configure my QuickBooks integration?
BidClips provides several different configuration options when integrating with QuickBooks. This article will outline each of the QuickBooks integration options available to you and detailed information on how those options function.
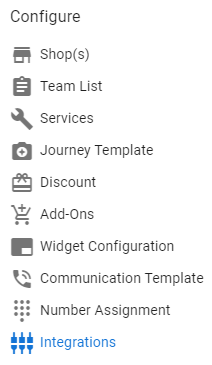
Your QuickBooks integration options can be accessed by clicking on the 'Integrations' link in the Configure section of the left side navigation menu.
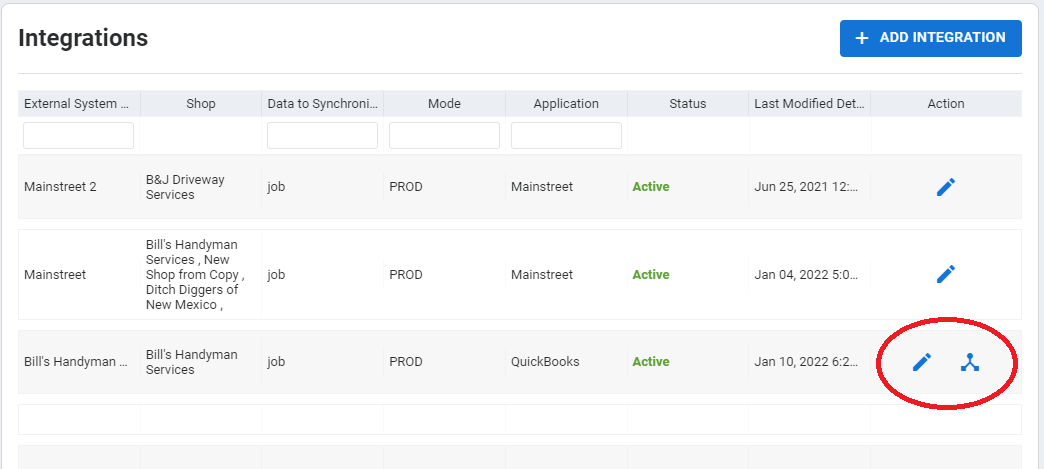
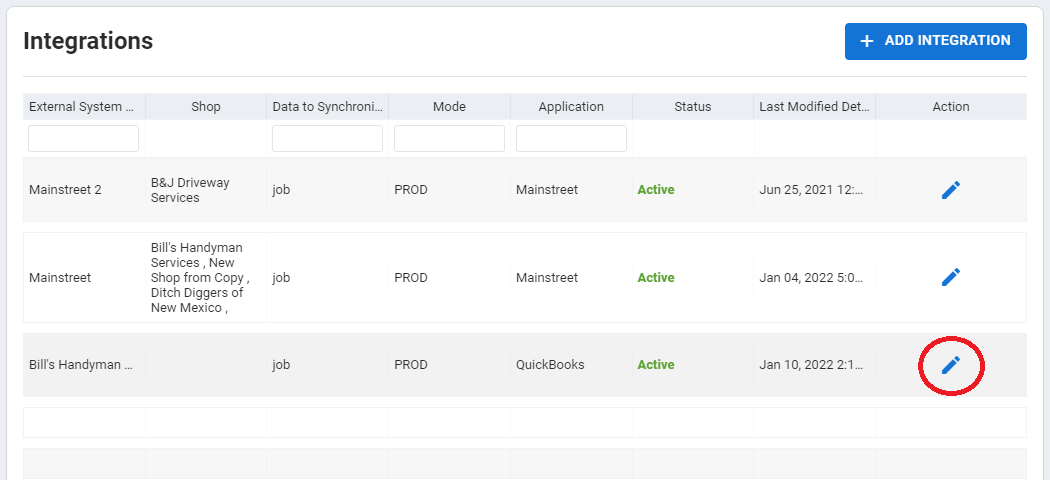
This will bring you to the list of integrations that exist in your BidClips provider portal. Locate the QuickBooks integration you wish to configure and either click on the grid row itself or the 'Edit/Pen' icon in the Actions column.
Shop
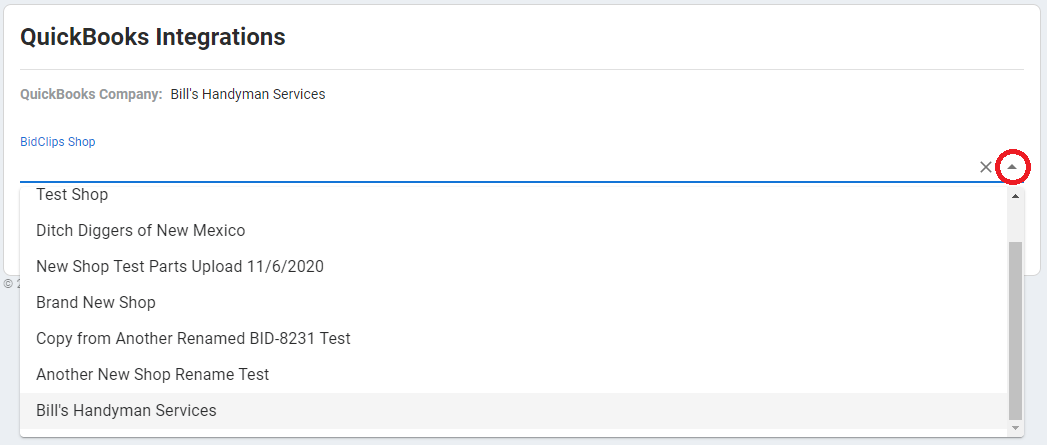
If this is your initial configuration, you will need to select a shop from your BidClips provider portal. You can do this by clicking the drop-down arrow and selecting the BidClips shop name. The QuickBooks company, selected when adding the integration, will be populated in header section of the page and will be read-only after initial value is selected and saved.
External System Name
The external system name will be set to your QuickBooks company name by default, but can be modified to something else if desired.

Application
The application name is set to QuickBooks and is the only option available.

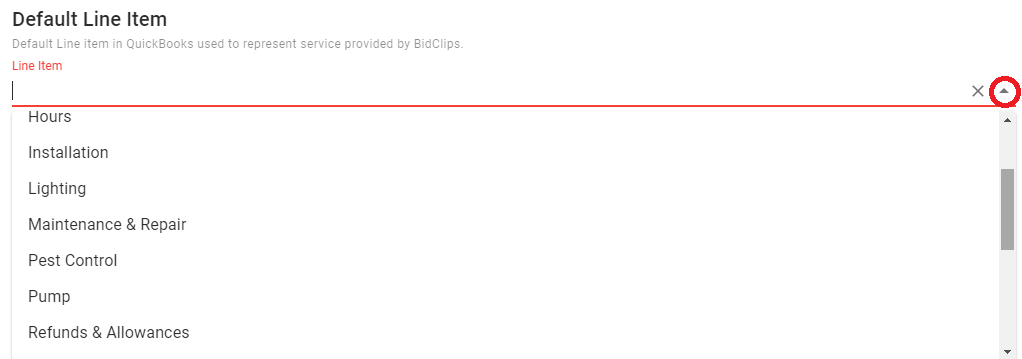
Default Line Item
You must select a default QuickBooks line item to associate with your BidClips service offerings. Unless specified in the Service Specific Line Item option, described next, all of your BidClips jobs and payments will be applied to this default line item in QuickBooks.
Click the drop-down list and select a default line item.
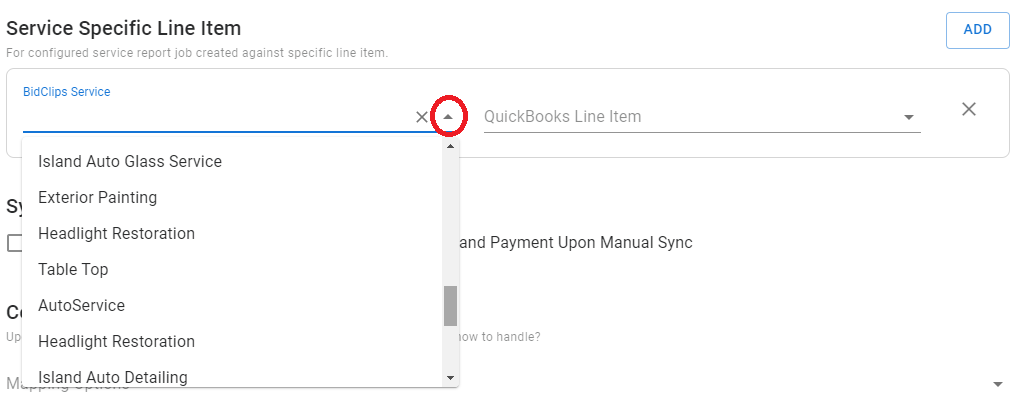
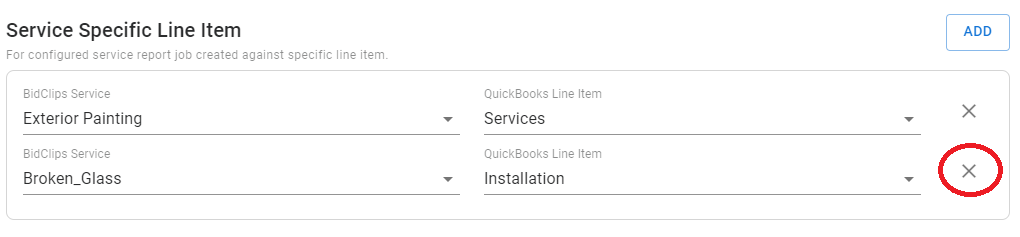
Service Specific Line Item
You have the option to specify different QuickBooks line item categories for different service offerings. This setting will override the default line item category described previously. To override the default line item value for specific service offerings in your BidClips portal, click the 'ADD' button in the Service Specific Line Item section of the form.
 Select a BidClips service offering from the drop-down list.
Select a QuickBooks line item category from the drop-down list.
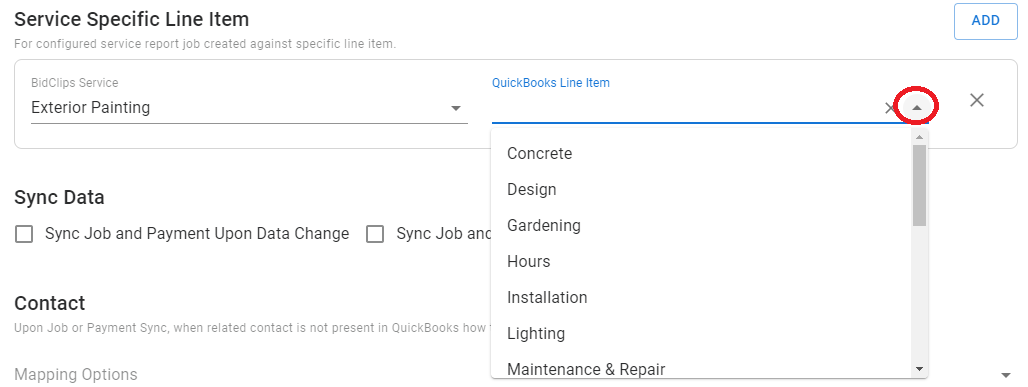
Repeat for additional service offering mappings.
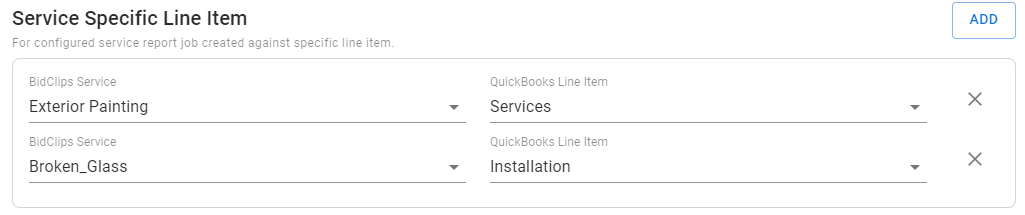
You can remove a service specific line item mapping at any time by clicking the 'X' option next to the mapping.
Sync Data Options
You have the option to specify when BidClips job and payment data gets transmitted to QuickBooks. There are three options at your disposal.
- Sync Job and Payment Data Upon Change only - set this option if you want BidClips job and payment data to be transmitted whenever a job is first created or upon subsequent changes in BidClips

- Sync Job and Payment Data Upon Manual Sync only - set this option if you want BidClips job and payment data to be transmitted only when manually triggered by a BidClips user

- Make both options available in your BidClips platform - set this option if you want BidClips job and payment data to be transmitted whenever a job changes in BidClips and allow your users the ability to perform the transmission manually.

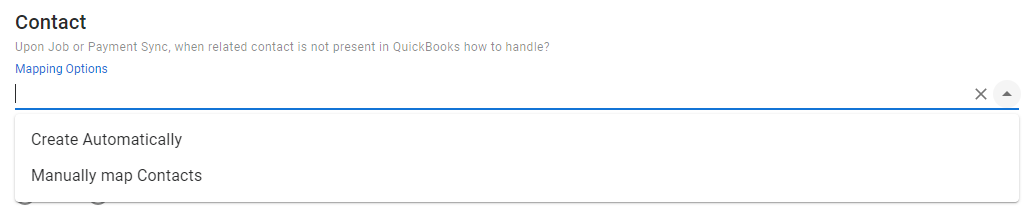
Contact Mapping Options
There are two different contact mapping options you must make. First, you will determine how BidClips should handle a situation when a job or payment synchronization is attempted for a BidClips contact that has not been linked to a QuickBooks contact.
- Create Automatically - if this option is selected, a QuickBooks contact will be created when a synchronization occurs for a BidClips contact that has not been linked to a QuickBooks contact.
- Manually Map Contacts - if this option is selected, a synchronization will fail for a BidClips contact that has not been linked to a QuickBooks contact. You will then need to manually link the BidClips contact to a QuickBooks contact and retry the synchronization.
Click the drop-down list to make your selection.
You will also determine how to handle changes to BidClips contacts that are linked to a QuickBooks contact. Do you want the contact changes made in BidClips to propagate to QuickBooks?
- Yes: whenever changes are made to a BidClips contact that is linked to a QuickBooks contact, those changes will be propagated to QuickBooks.
- No: changes made to your BidClips contacts will not be propagated to the QuickBooks contact to which it is linked.

To learn more about how you link your BidClips and QuickBooks contacts, click here.
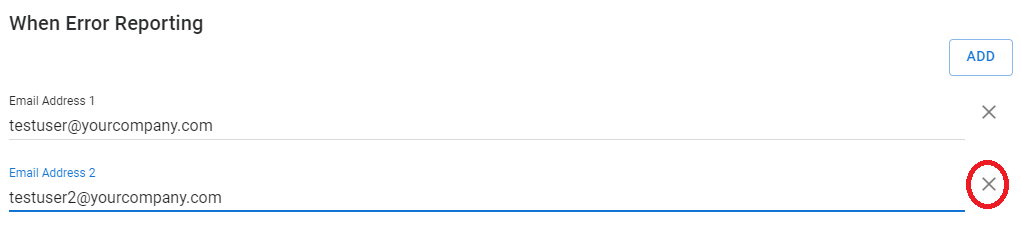
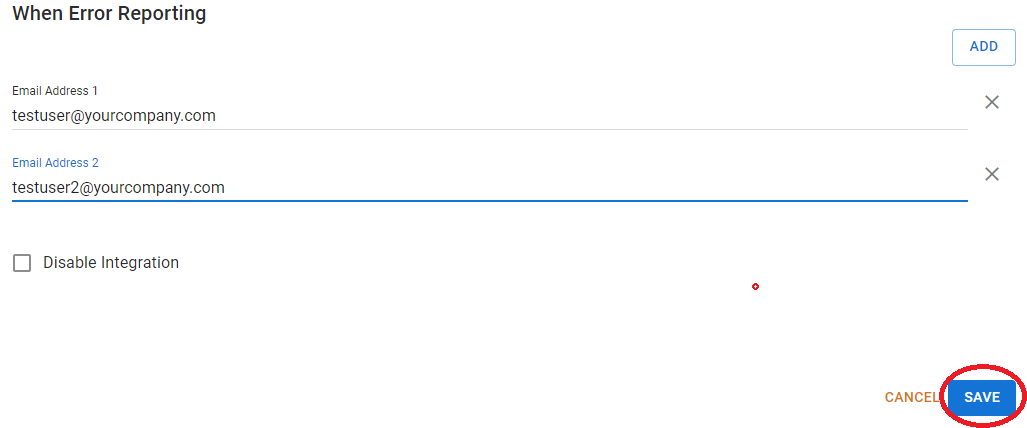
Error Reporting Options
You can specify who gets notified, via email, when a QuickBooks integration transmission fails. Click the 'ADD' button and enter an email address to be notified in case of a transmission failure.

Repeat for additional users.
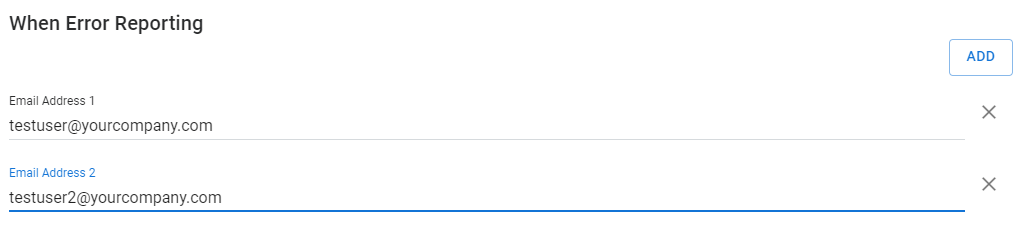
You can remove an email notification address at any time by clicking the 'X' option next to the entry.
Enabling/Disabling Integration
You can enable or disable the QuickBooks integration by having the Disable Integration box unchecked or checked, respectively.

Remember to click the 'SAVE' button at the bottom right of the page to apply your configuration settings!
Once you have configured your QuickBooks integration you can always edit the configuration or work with your Contact mapping details using the 'Edit' or 'Mapping' icons in the Action column.