Learn how to change the widget on your website
The BidClips widget is your conduit to your customers during the lead to order process using the BidClips platform. You will communicate with and send quotes to your customers through the widget. Your customers will also generate service requests organically from your website via the widget. You will integrate the BidClips widget with your business' main website and have the ability to configure the appearance of the widget using your Provider Portal. This Help Center article outlines:
- Creating and configuring the appearance of your business' BidClips widget
- Integrating the BidClips widget into your business' main website once it has been created and configured.
- How your configuration settings will appear to your customers
- Modifying the configuration settings for an existing widget
Creating and configuring the appearance of your BidClips widget
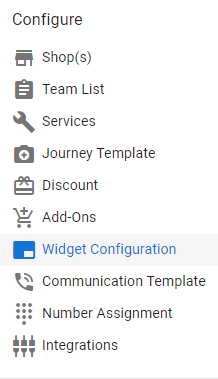
You will start the process of adding a BidClips widget by clicking on the 'Widget Configuration' link in the Configure section of the Provider Portal navigation bar that is located on the left side of the screen.
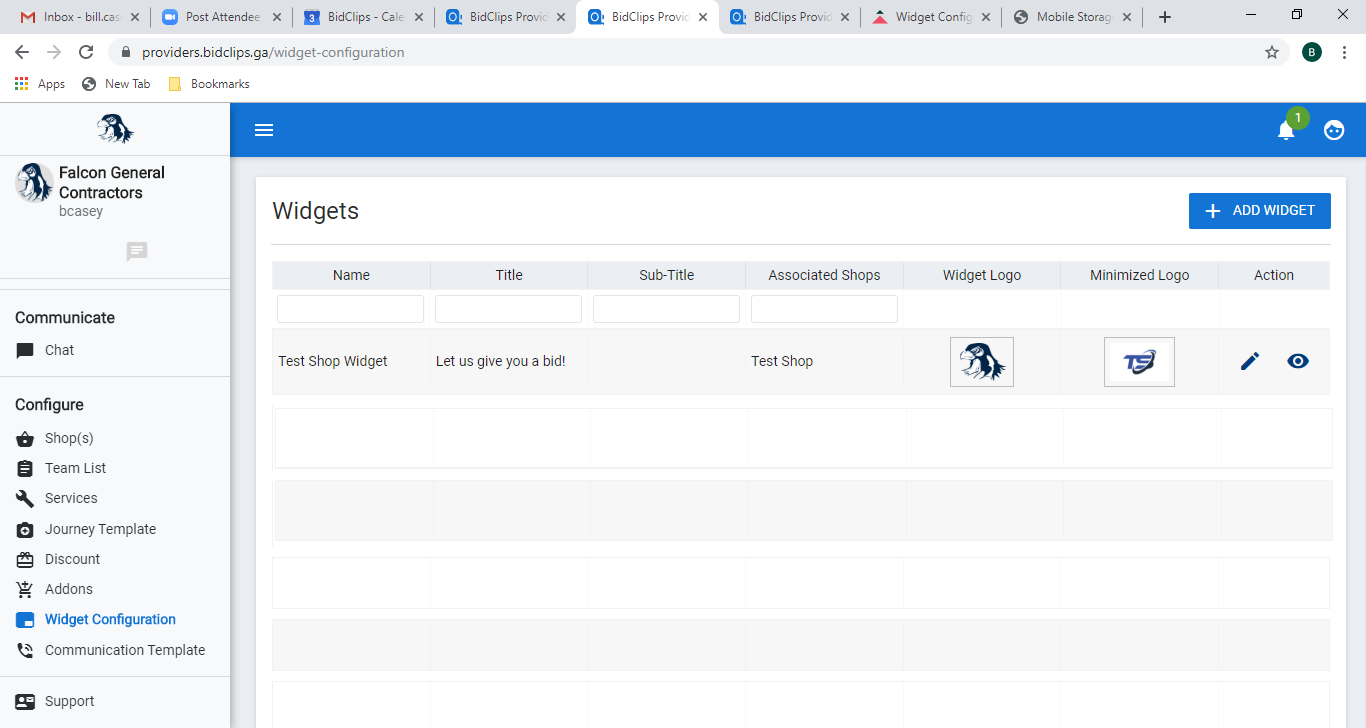
Clicking on the 'Widget Configuration' link will bring you to the 'Widgets' page:
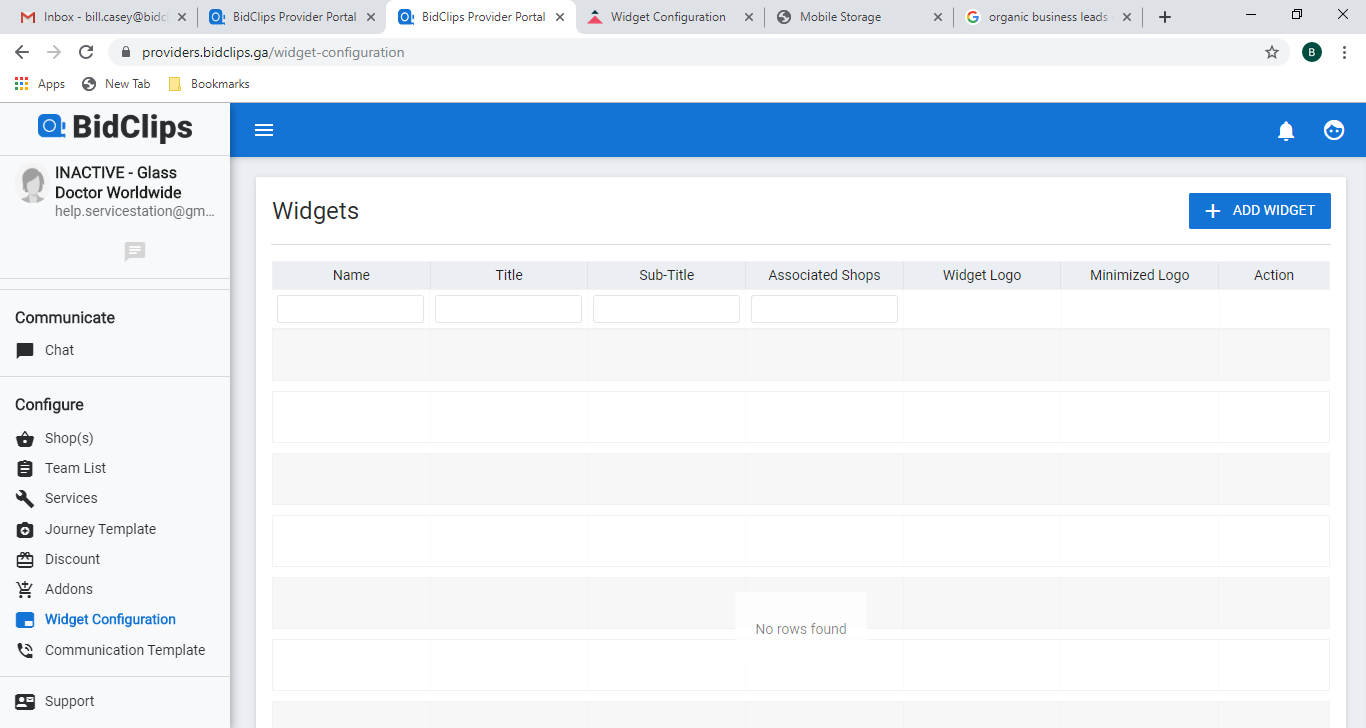
Note: You may have created a widget for your organization with a member of the BidClips support team during your Provider's onboarding process. If you already have a widget and simply want to modify the configuration settings, please skip to the Modify an Existing Widget section of this article.
Click on the '+ ADD WIDGET' button to create a new widget for your organization. You will be redirected to the 'Widget Configuration' page.

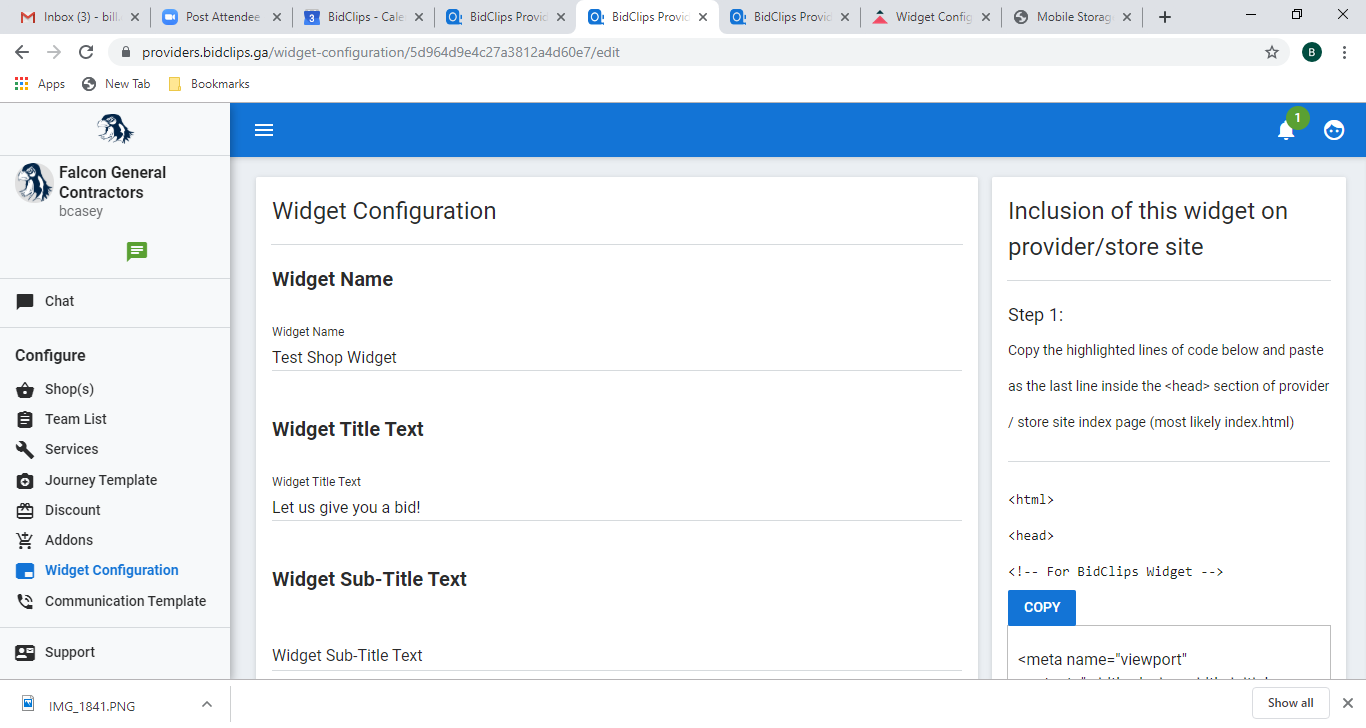
Widget Name
Here you will simply give your widget a name. The name is for internal description purposes only and will not be shown to the customer. This example shows the use of 'Test Shop Widget' as a widget name.
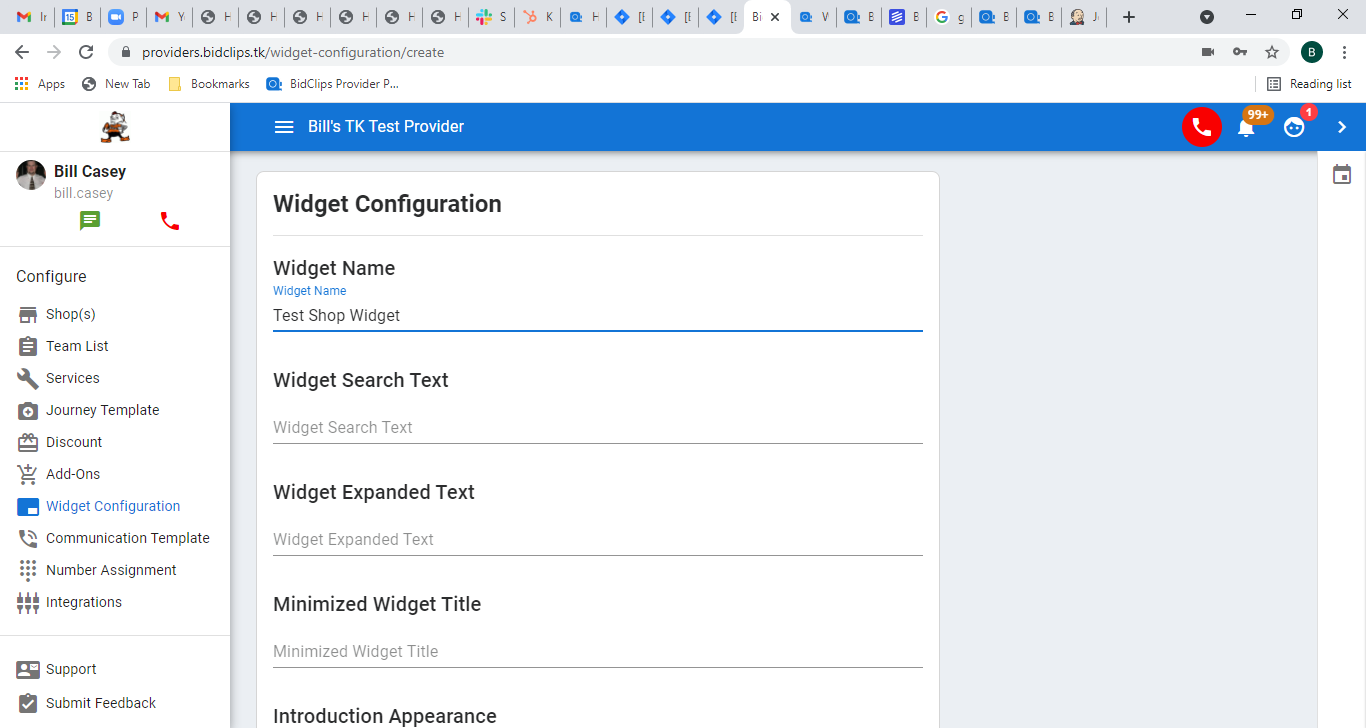
Widget Search Text
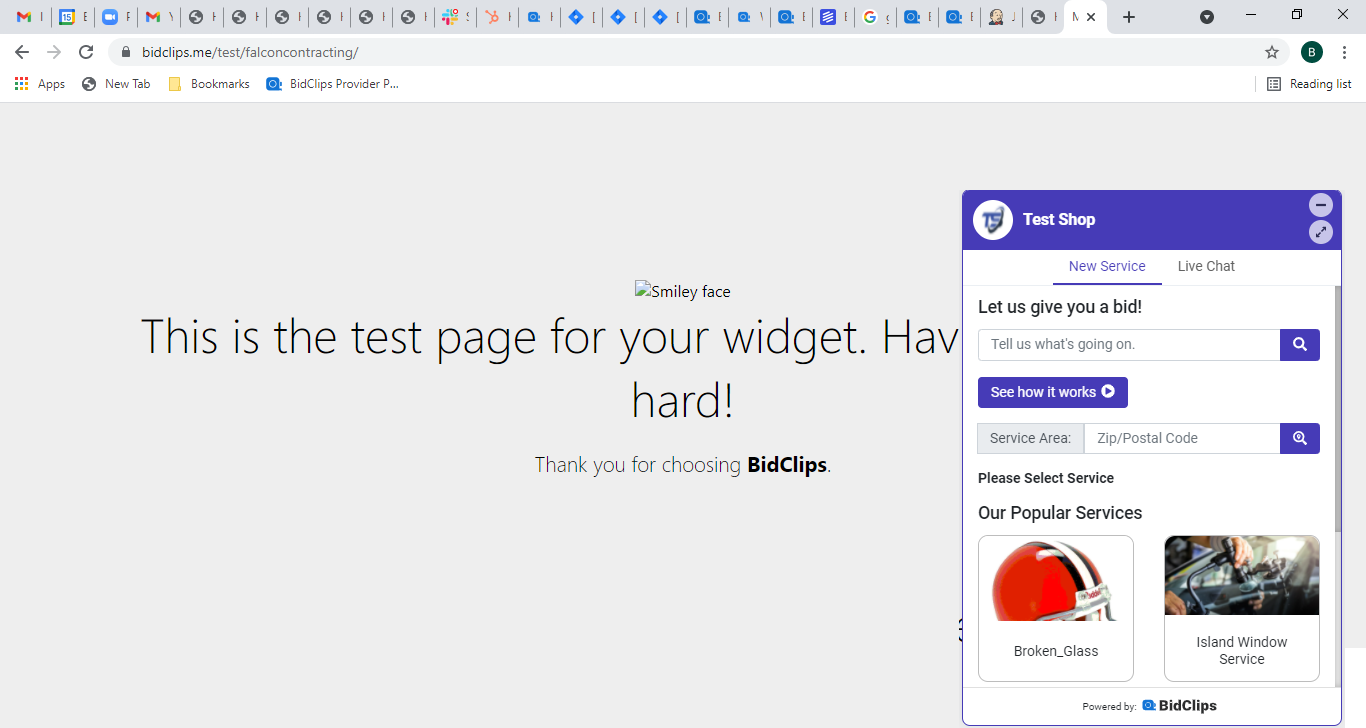
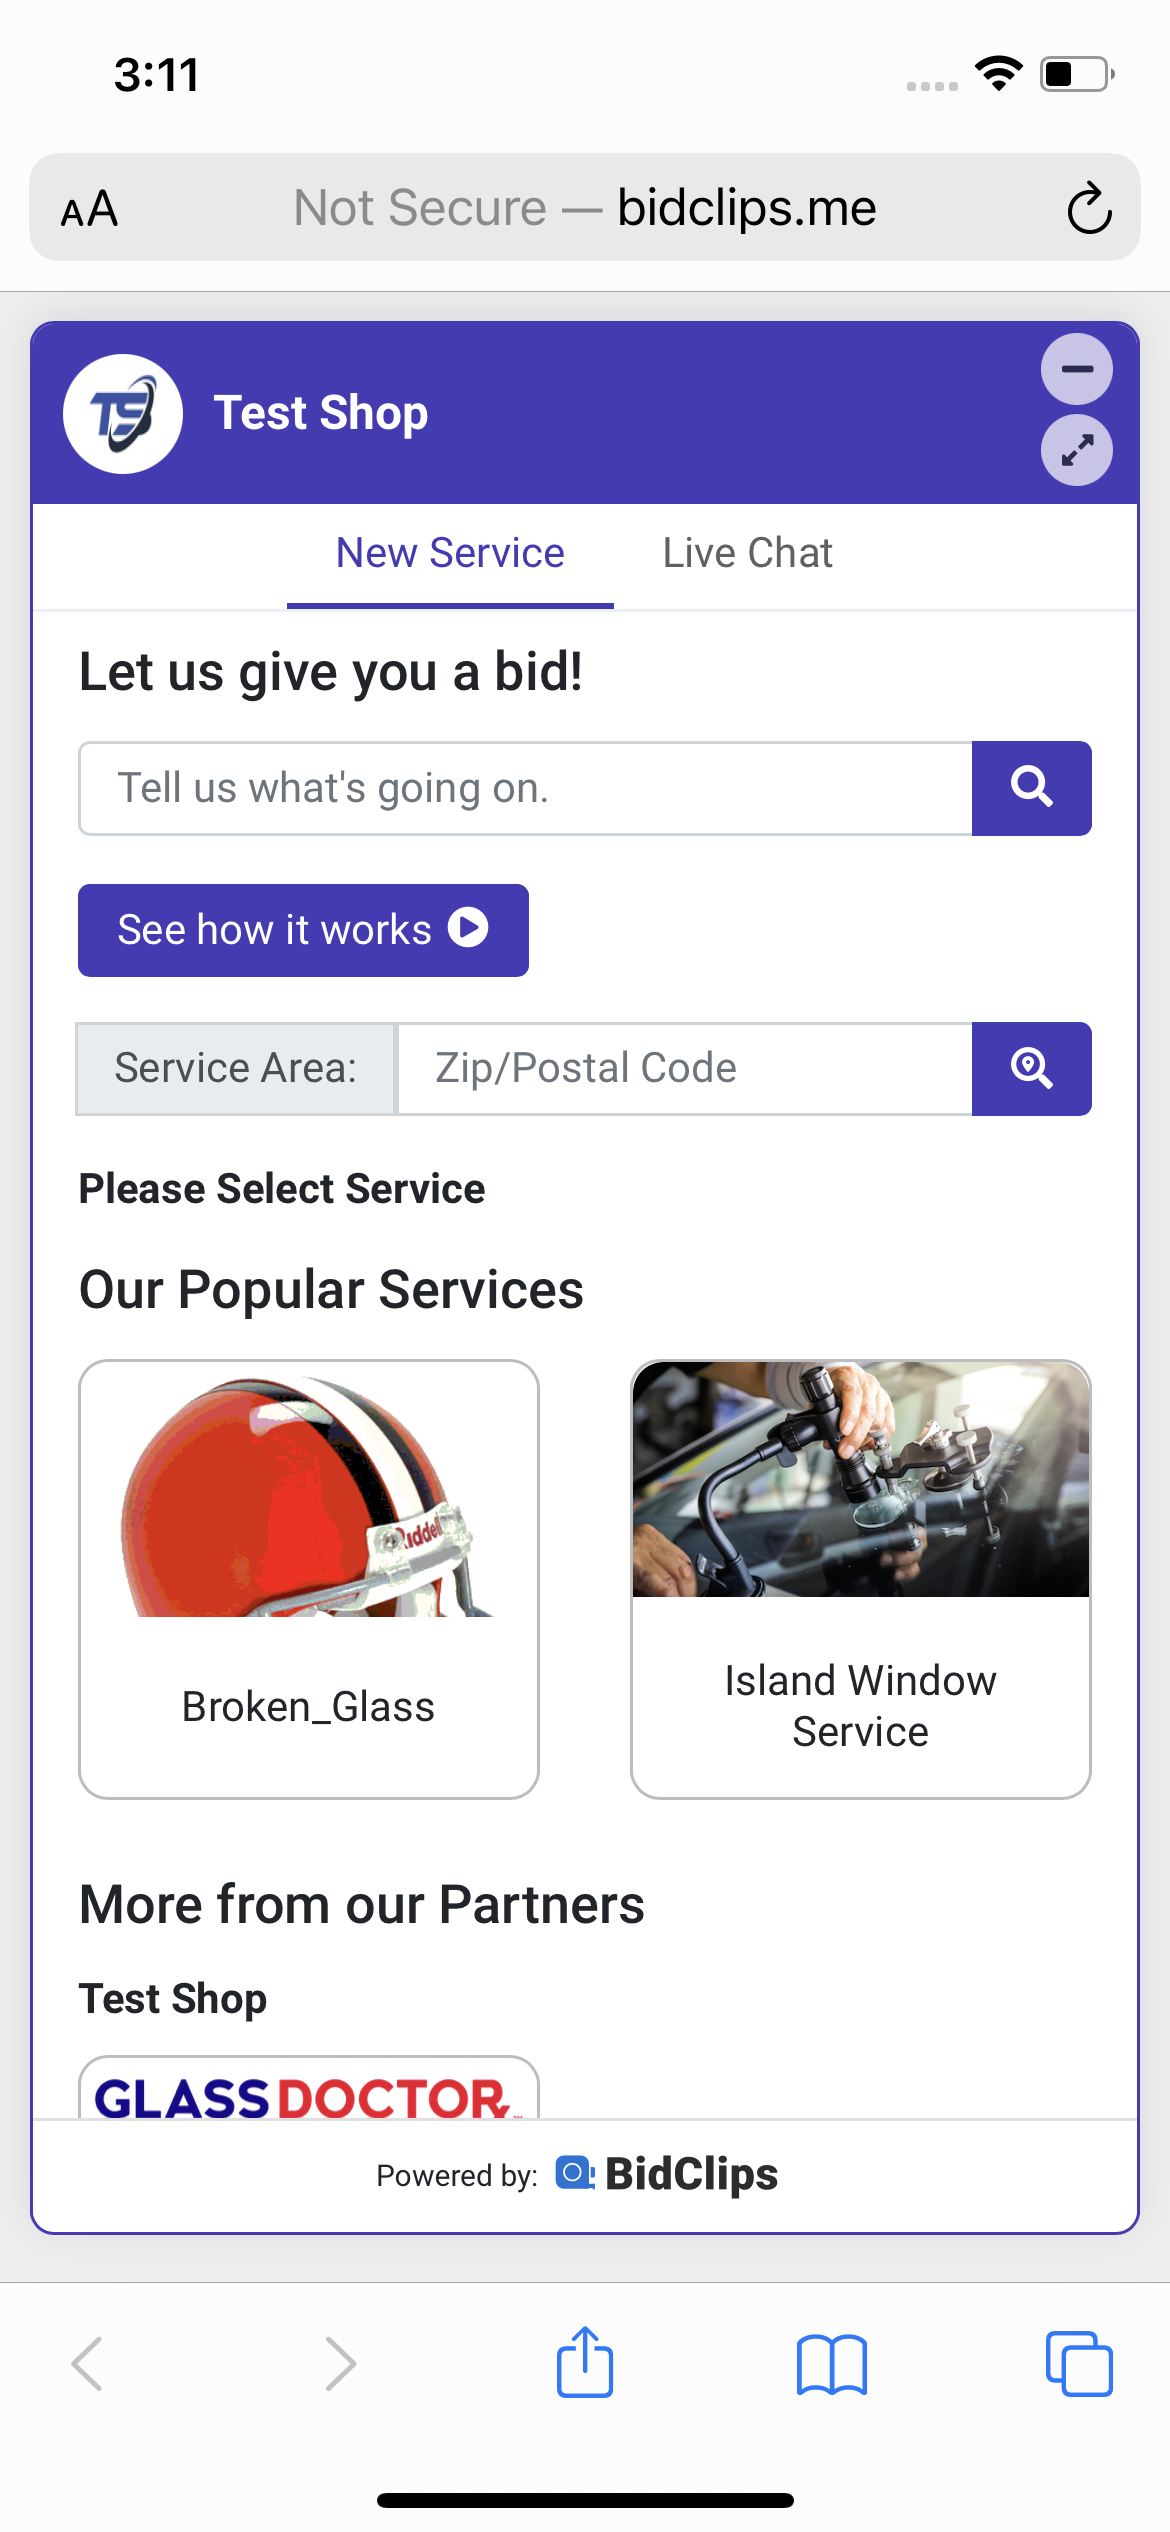
This is the text that will appear to your customers when they open the BidClips widget that is integrated with your main website. Your customers will also see this text when they click on the 'New Service' option from within the widget. This example shows the use of "Let us give you a bid!"
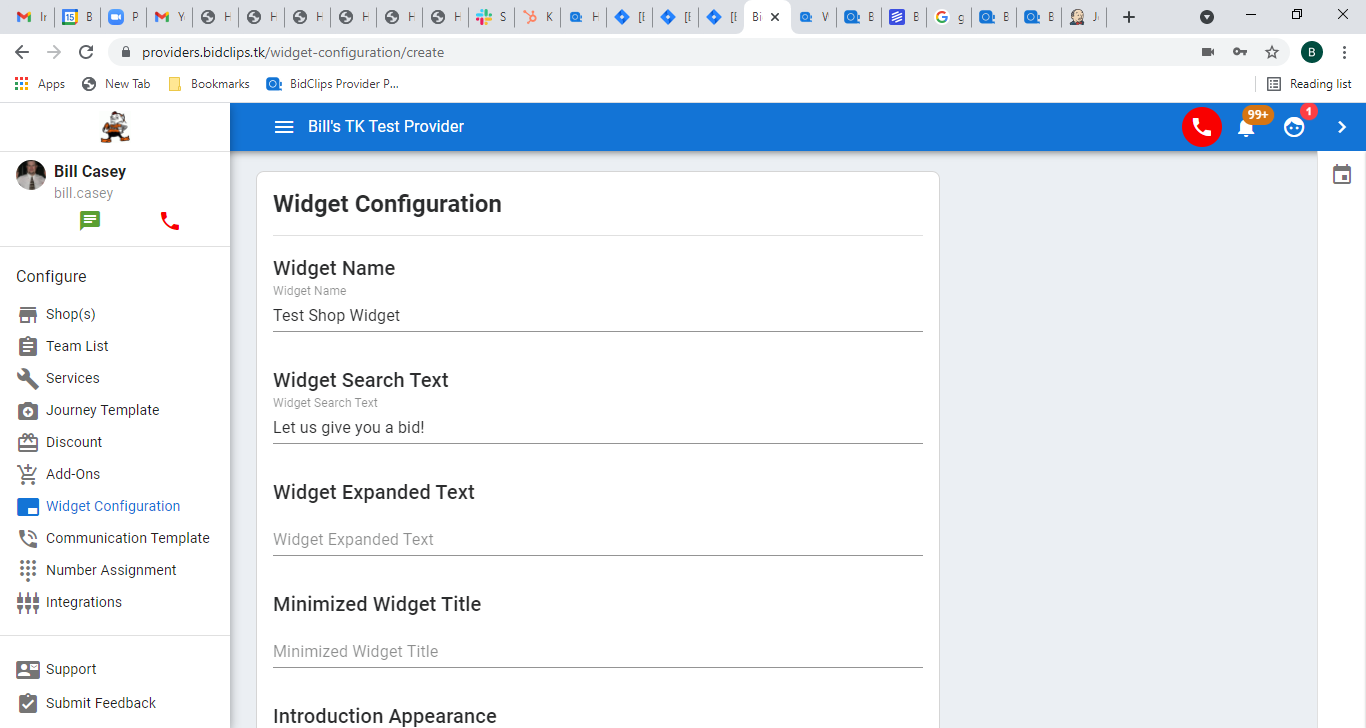
Widget Expanded Text
This is the text that will appear as the title in the header when the widget is expanded. This example shows the use of "Test Shop"

Tip: The Widget Expanded Text value will likely be your shop name, but could be configured to your liking.
Minimized Widget Title
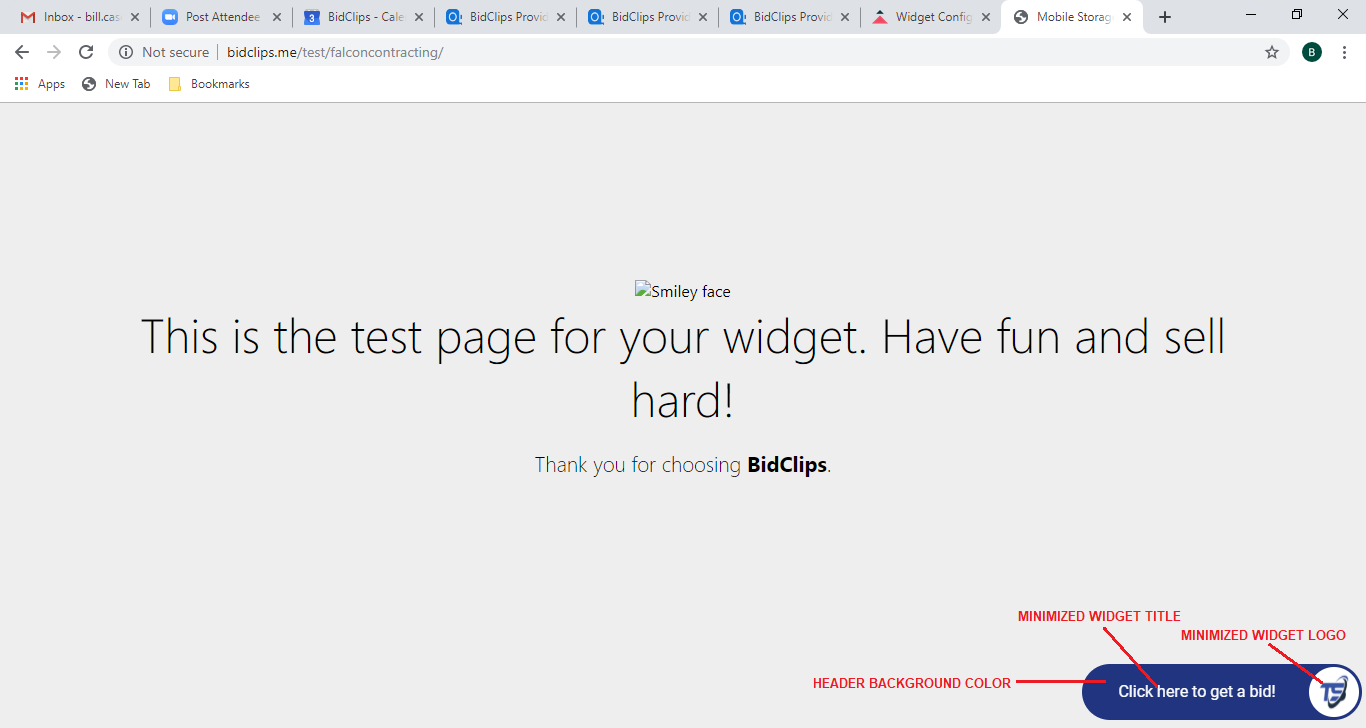
This is the text that will be included in the minimized BidClips widget that is integrated with your main website. This is a customer's first view of your BidClips widget when they visit your website. This example shows the use of "Click here to get a bid!"
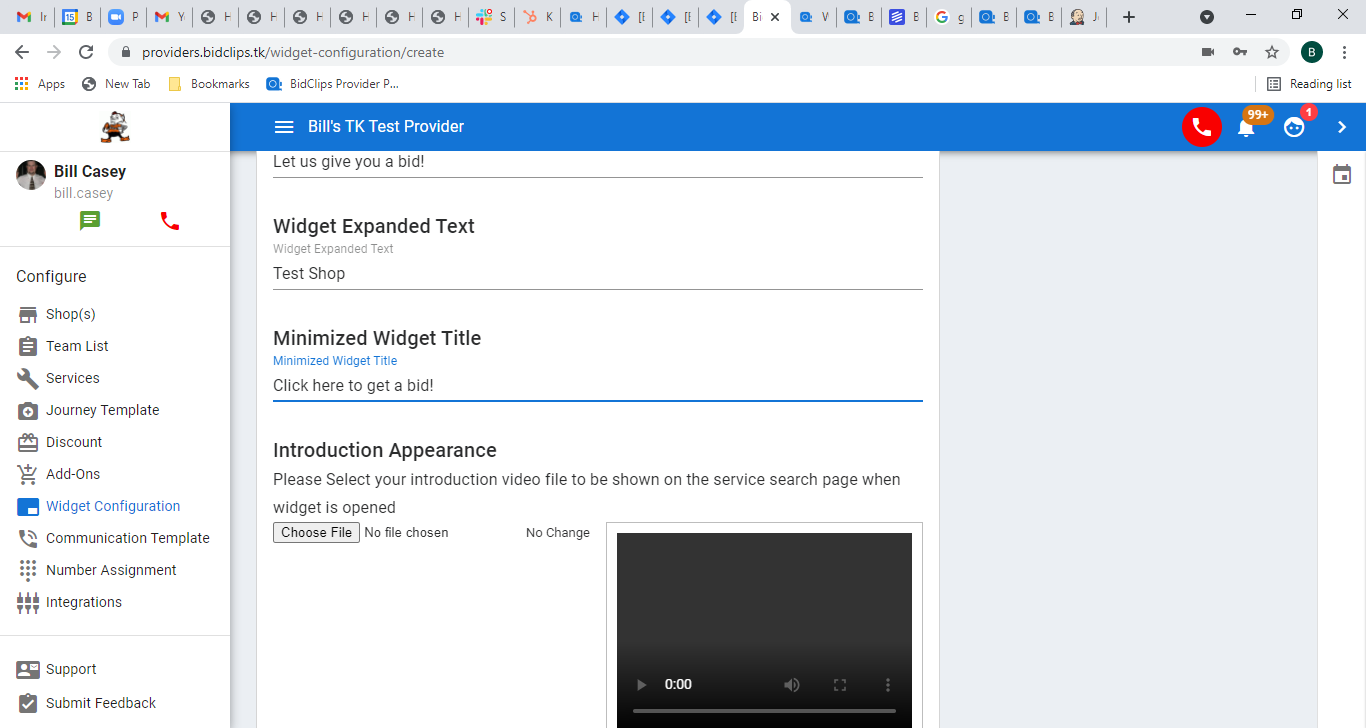
Introduction Appearance
The BidClips widget is created with a 'See how it works' button included. The video file selected here will be shown to your customers if they click on the 'See how it works' button in the widget. To add a video, click on the 'Choose File' button and select a video file from your local device.
Note: The BidClips team already has a short, 30-second video that you can use. If your widget was created during your onboarding process you will likely already be using it. If you would like to use the BidClips video and do not have it, please submit a support request for the BidClips support team.
This example shows that 30-second BidClips video being selected for use.
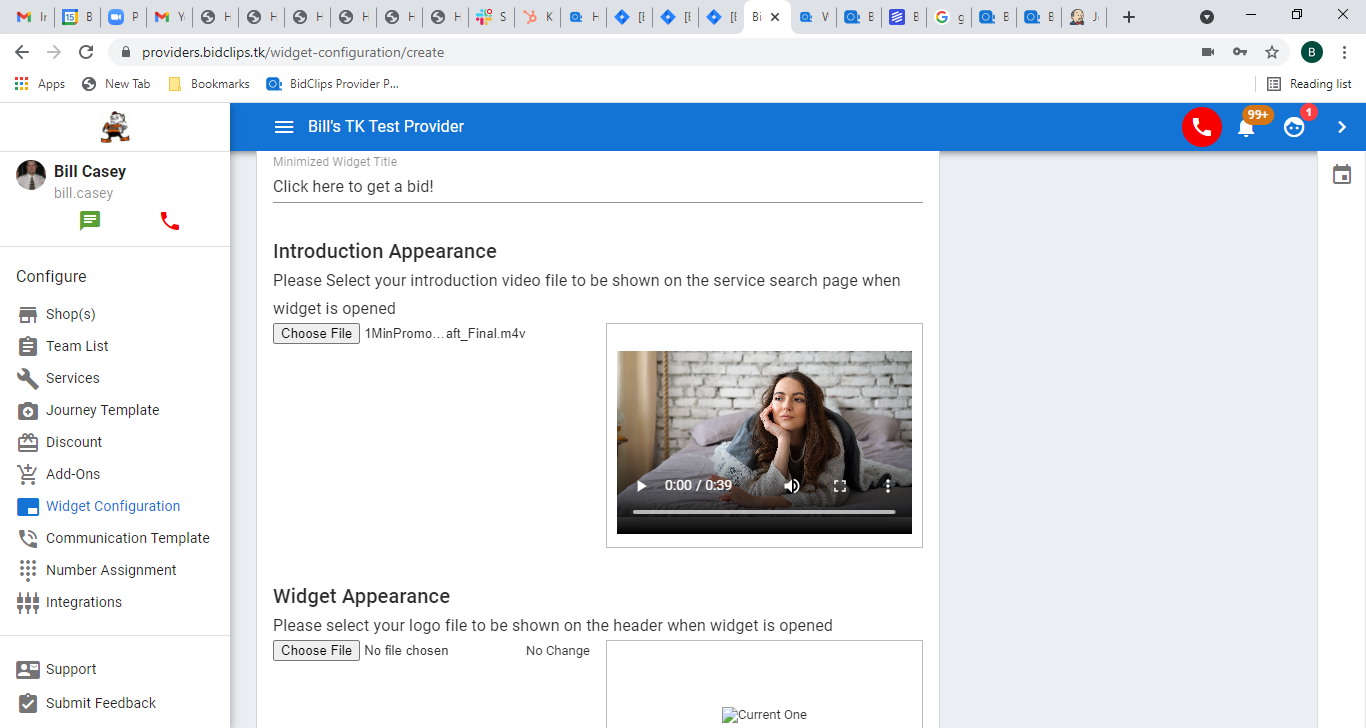
Widget Appearance:
Widget Logo (Opened)
Here you can include a company logo that will be shown to the customer when they open the BidClips widget that is integrated with your website. The customer will also see this logo when they receive communications and quotations from your organization throughout the lead to order process.
To add an image, click on the 'Choose File' button and select an image file from your local device.

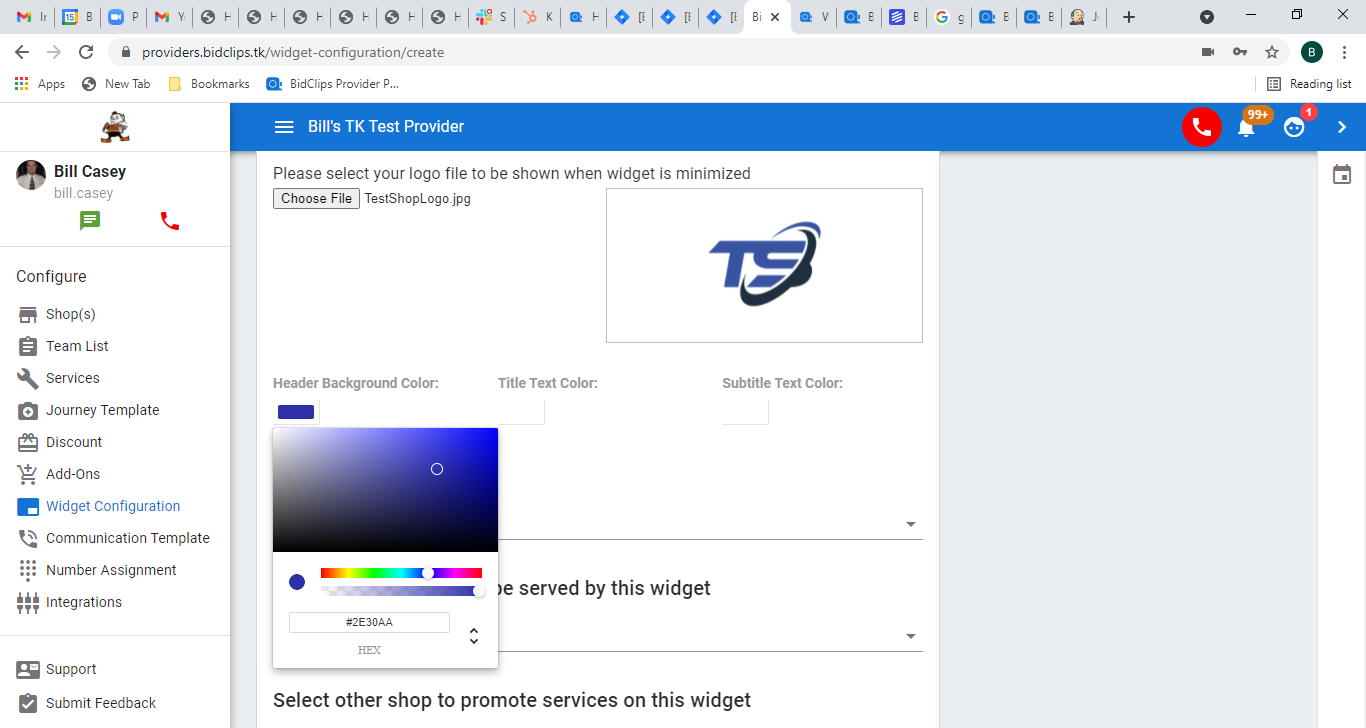
Widget Logo (Minimized)
Here you can include a company logo that will be shown to the customer in the minimized BidClips widget that is integrated with your main website. This logo, along with the minimized text described above, is a customer's first view of your BidClips widget when they visit your website.
To add an image, click on the 'Choose File' button and select an image file from your local device.
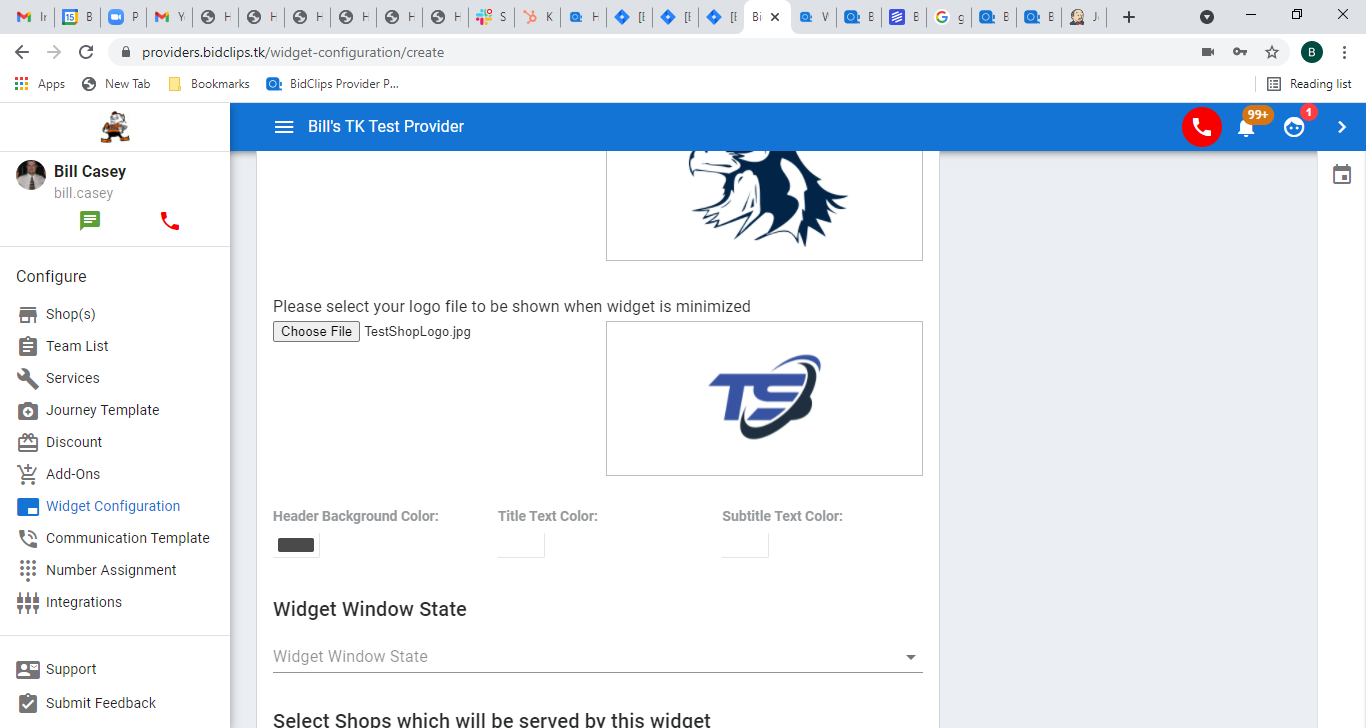
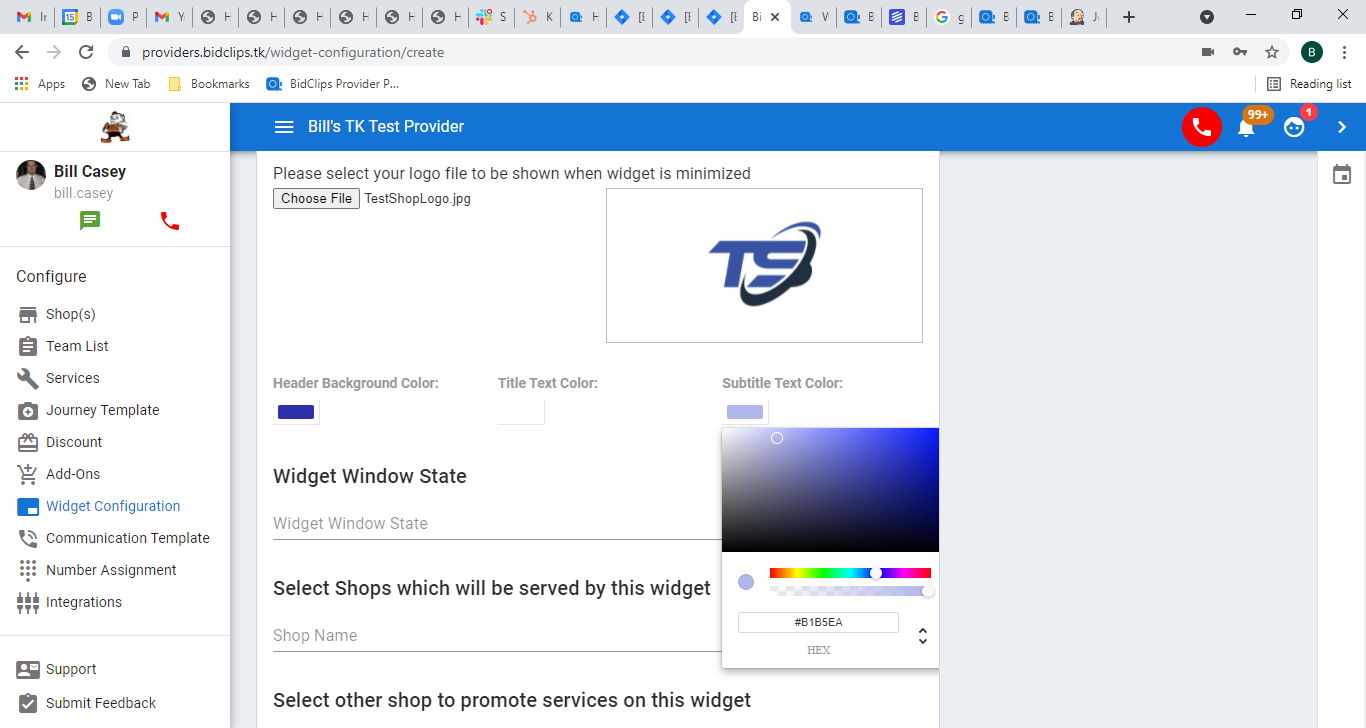
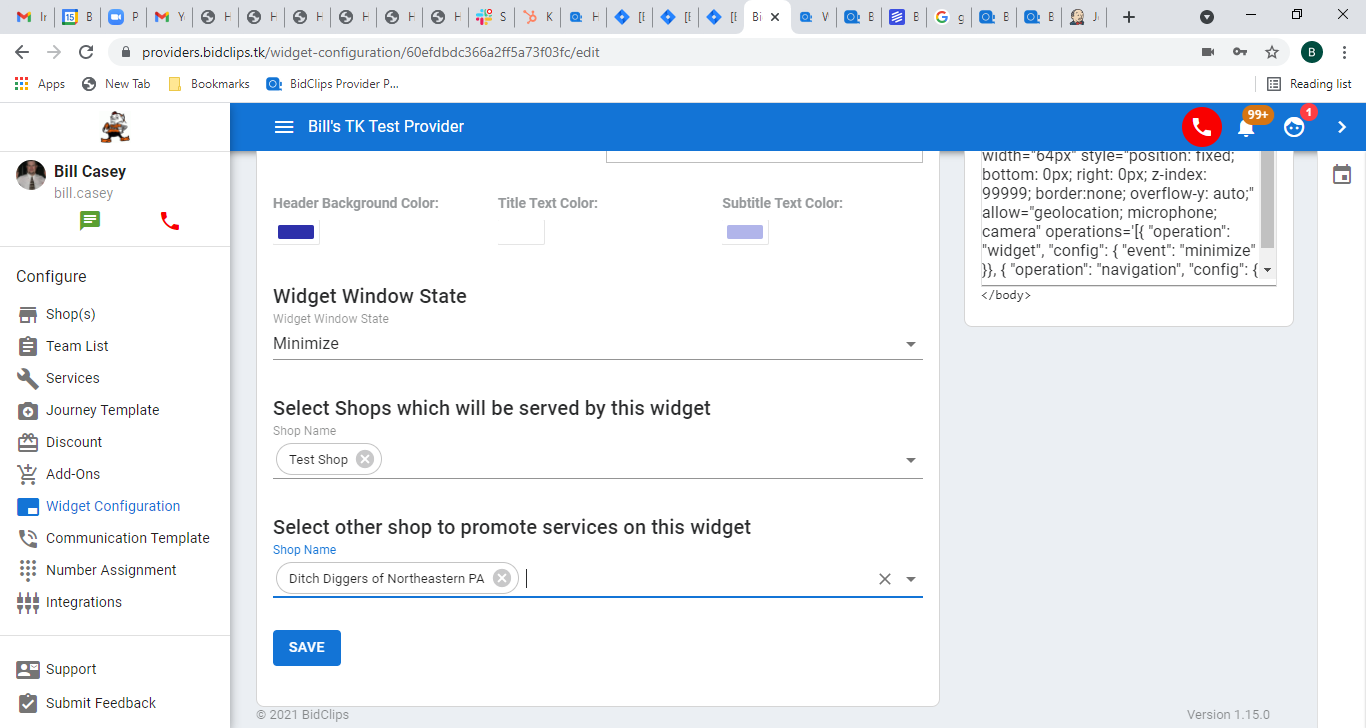
Header Background Color
Click on the 'Header Background Color' button to bring up a color palette and select the color you want from the palette. The color you select will be used for your minimized widget background and the color of your buttons and links in the opened widget. The example shows a header background color change to a dark blue.
Title Text Color
Click on the 'Title Text Color' button to bring up a color palette and select the color you want from the palette. The color you select here will be used for both the text in your header section of an expanded widget and the text in your minimized widget. The example shows keeping the title text color white since the header background color is a dark blue.

Subtitle Color
Click on the 'Subitle Text Color' button to bring up a color palette and select the color you want from the palette. The color you select here will be used as a banner background color within the body of your widget. The example shows a selection of a light blue color that is a good contrast to the dark blue background color.
Tip: You are not required to select a Subtitle Text Color. However, if you do choose to select a color, the BidClips team recommends using a lighter shade of a color in the same palette as the background color. That is, if you use a dark blue selection for the background color, a lighter shade of blue for the banner color will serve as a good contrast.
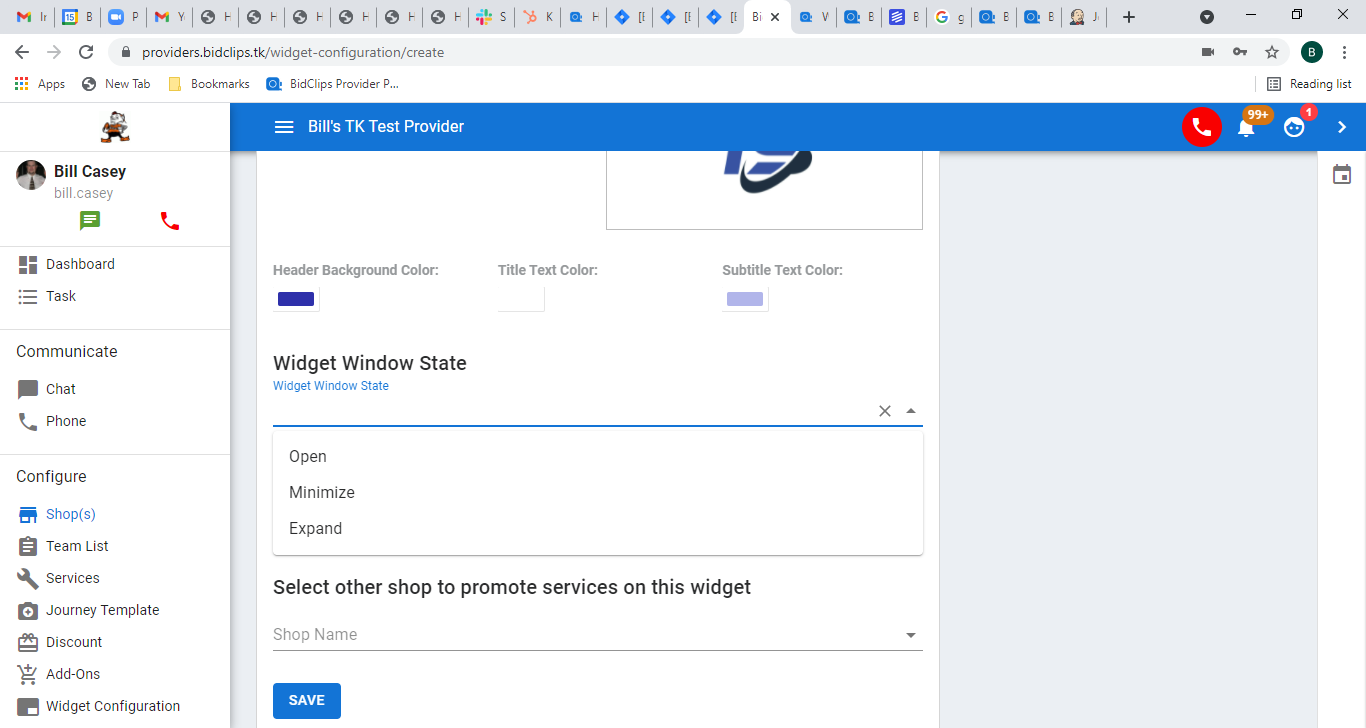
Widget Window State
This setting will allow you to determine whether your widget loads from within your business' main web page in an open (partially expanded in right hand corner of main web page), minimized (minimized in bottom right corner of main web page), or expanded state (expanded full page).
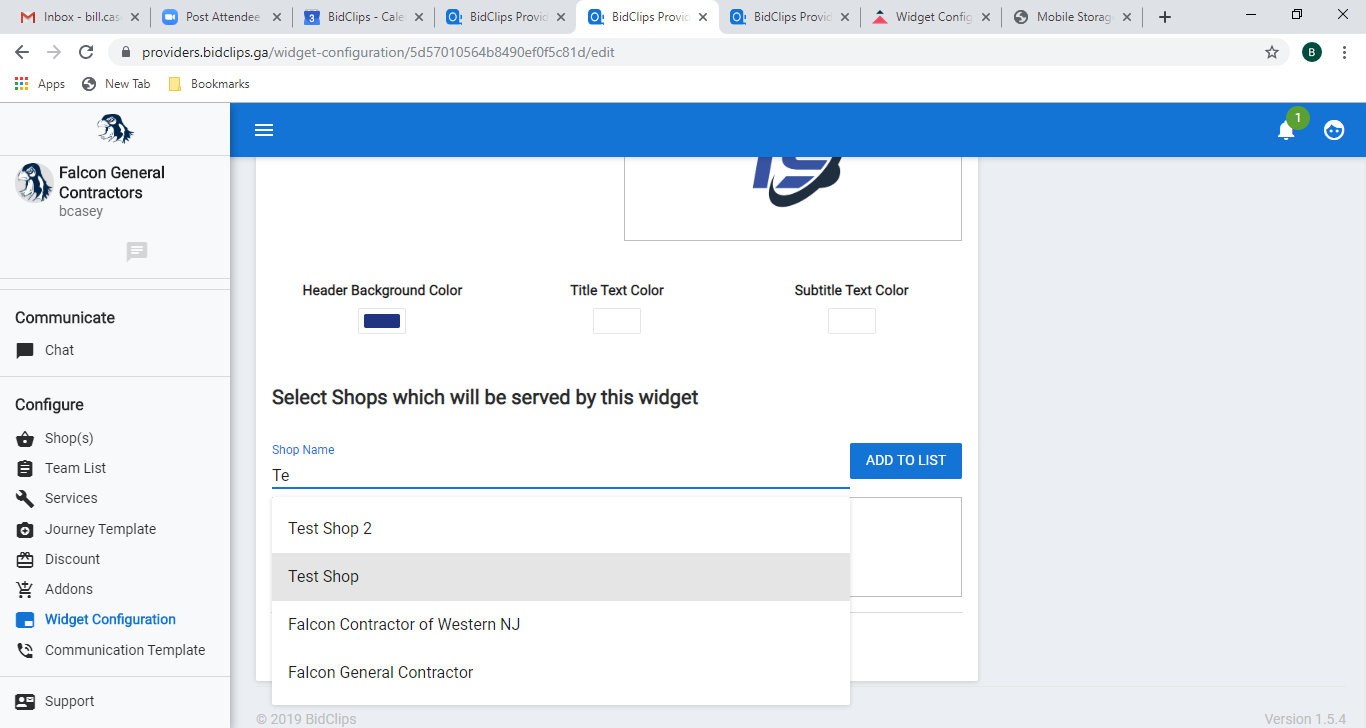
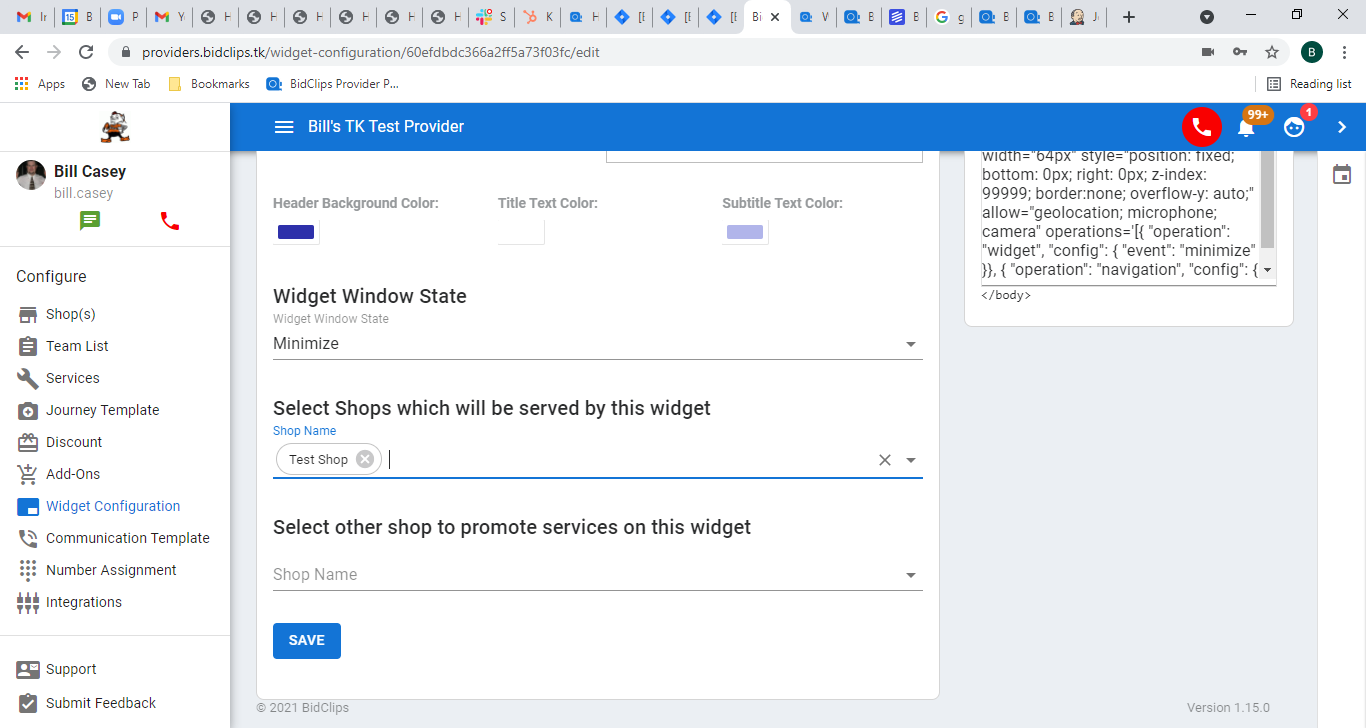
Select Shops which will be served by this widget
You will need to determine which of your shop(s) will use this widget. You can add shop(s) by clicking on the 'Shop Name' field and either select a shop from the drop-down list if it appears or start typing in the name of a shop. When you see the shop you would like to add, select it. This example will show the selection of a shop called Test Shop.
Promoted Shops Serviced by Widget
Should you have multiple shops in your provider portal and are utilizing their own widgets, you can choose to promote the services from those other shops. In this example we will select the 'Ditch Diggers of Northeastern PA' shop to show their promoted services.
Shop's Google Tag Manager
If you would like to integrate a Google Tag Manager account with the BidCips widget, enter your Google Tag Manager Id here (GTM-XXXXXXX). To learn more about integrating your Google Tag Manager account with the BidClips widget, click here.

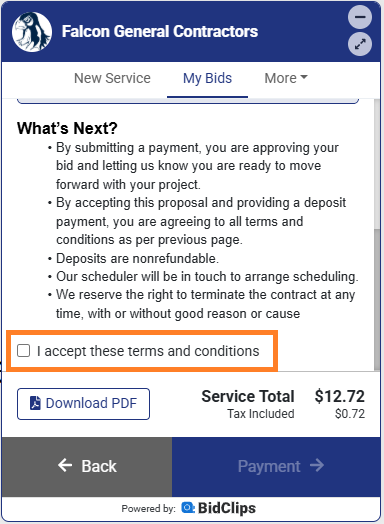
Add Terms and Conditions checkbox
This setting will require your customer to accept your Terms & Conditions prior to accepting a bid/placing a down payment in the BidClips widget. The Terms & Conditions that are displayed to the user are configured in your Shop Service settings.
Resulting Message Displayed to Customer in the BidClips Widget:
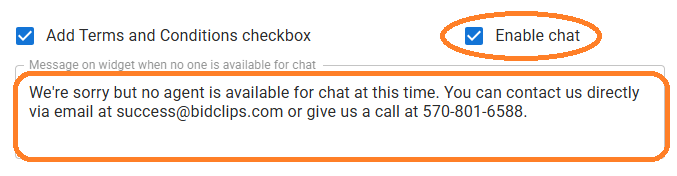
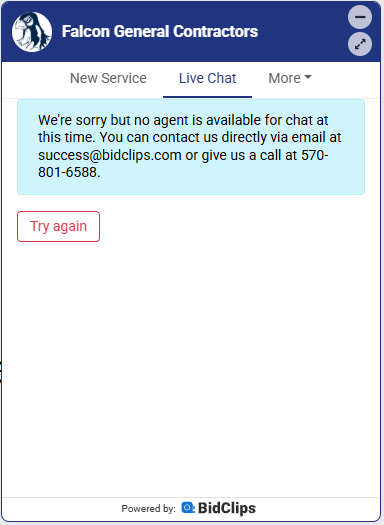
Enable chat
This setting will allow you to turn interactive chat on/off depending on your preference. If you decide to keep interactive chat turned on, you can also configure a message that will be visible to your customers in the BidClips widget should no agent be available for chat in your platform.
Setting from within BidClips platform:
Resulting Message Displayed to Customer in the BidClips Widget:
Custom Carousel Min/Max Buttons Enabled
This setting allows you to enable/disable the minimize and maximize buttons on the carousel version of the BidClips widget. This setting is enabled by default.

Save Your Settings
Important!: Please remember, you must click the 'SAVE' button at the very bottom of the page before leaving. Failure to click the 'SAVE' button before navigating away from the page will result in lost work.
Once you click 'SAVE' you should see the following Widget Created message appear in the upper right hand corner of your screen. You have now successfully saved all desired widget configuration settings in your Provider Portal.

Examples of settings applied to your widget:
Minimized widget on your business' main website:
Opened widget on your website:
Widget on your customer's mobile device:
Integrating the BidClips Widget with your website
You will have likely worked with the BidClips support team on integrating the BidClips widget into your business' main website during your onboarding process. However, the 'Widget Configuration' section of the Provider Portal gives you the information that is needed to perform this task yourself. To see how this is done, click on the 'Widget Configuration' link in the 'Configure' section of the Provider Portal navigation bar that is located on the left side of the screen.
Click on the grid row or the "edit" ( ) icon for the widget you would like to modify.

You will be redirected to the 'Widget Configuration' page.

Note: In order to use the integration steps below, you will need access to your provider's main web page.
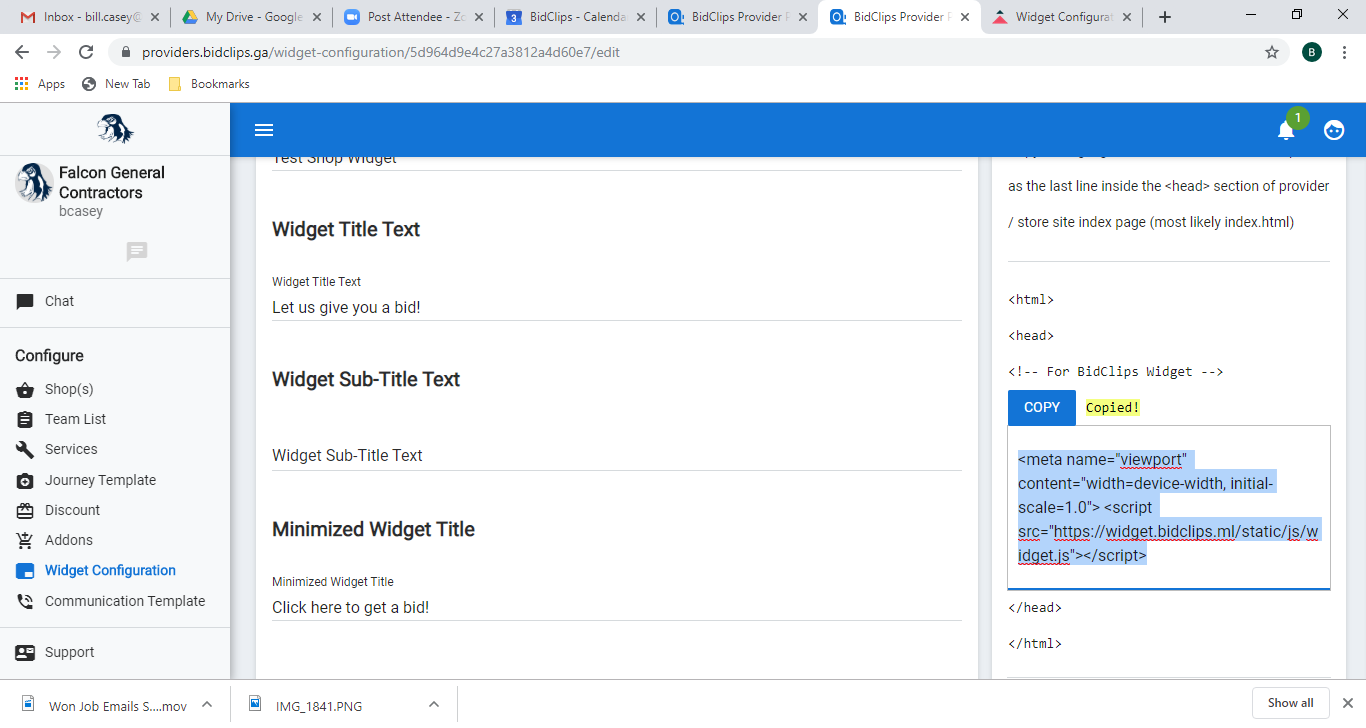
Review Step 1 on the right side of the page and click the 'COPY' button. You will notice that the html code has been copied. This code needs to be added to your provider's main web page (most likely index.html) as the last line in the <head> section.
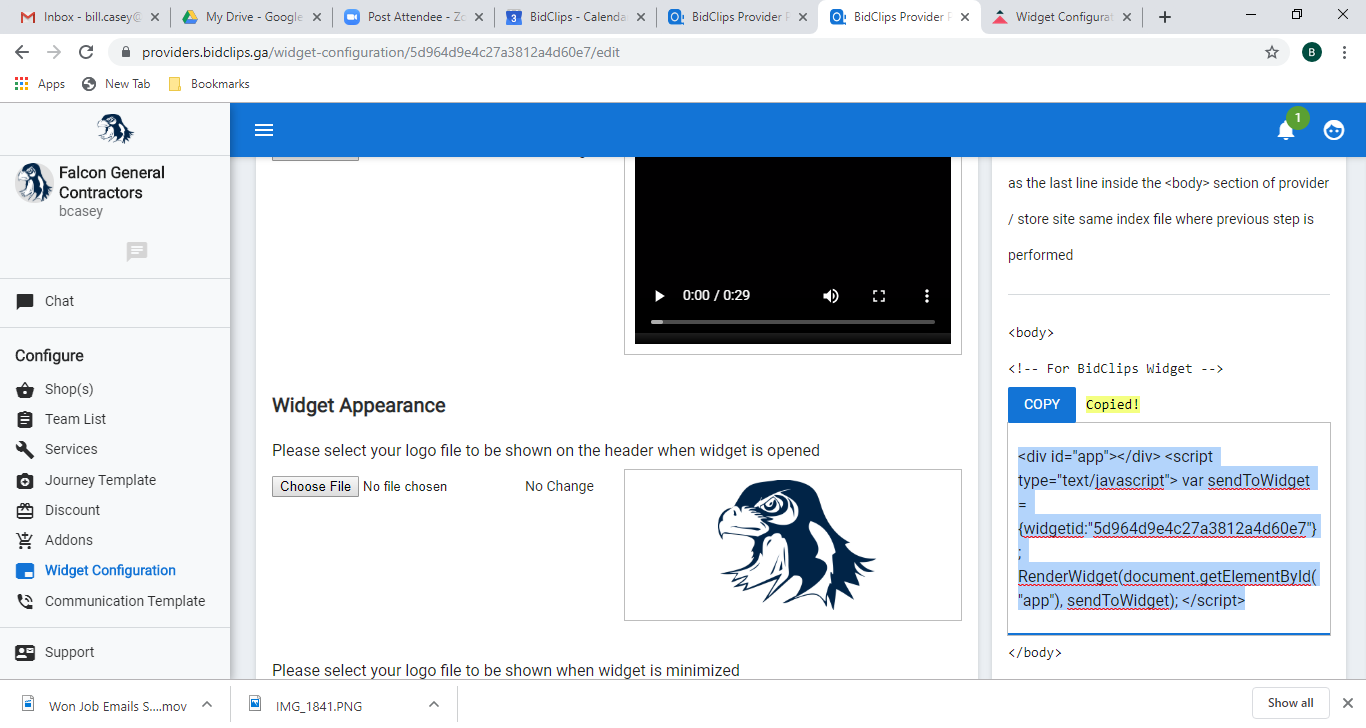
Review Step 2 and click the 'COPY' button. You will notice that the html code has been copied. This code needs to be added to the same web page (most likely index.html) as was performed in Step 1. This code will be added as the last line in the <body> section.
Modifying an Existing Widget Configuration
You can edit an existing widget configuration by clicking on the 'Widget Configuration' link in the 'Configure' section of the Provider Portal navigation bar that is located on the left side of the screen.
Click on the grid row or the 'edit' ( ) icon for the widget you would like to modify.

You will be redirected to the 'Widget Configuration' page.
Click here for detailed information regarding each of the settings you can change.
Click here to see how the settings changed here will ultimately look on your widget once they are applied.
Save Your Settings
Important!: Please remember, you must click the 'SAVE' button at the very bottom of the page before leaving. Failure to click the 'SAVE' button before navigating away from the page will result in lost work.
Once you click 'SAVE' you should see the following Widget Updated message appear in the upper right hand corner of your screen. You have now successfully saved all desired widget configuration settings in your Provider Portal.
