How do I manage multiple contacts within my BidClips portal?
Your customers may request that multiple parties be notified of your service offerings. BidClips gives you the ability to meet the needs of your customers by allowing you to manage multiple contacts within a service request, bid, or job.
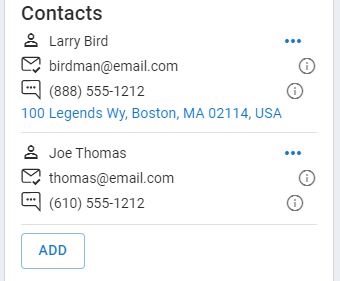
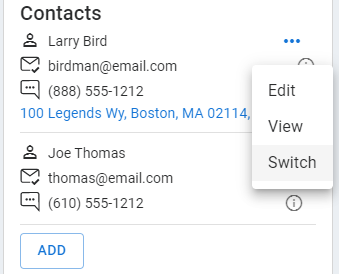
You will notice a Contacts section on the right side of the service request, bid, and job pages. Next to each contact, you will see an ellipses button. You will also notice an 'ADD' button below the list of contacts already associated. You will use these two buttons to manage multiple contacts associated with a particular project.
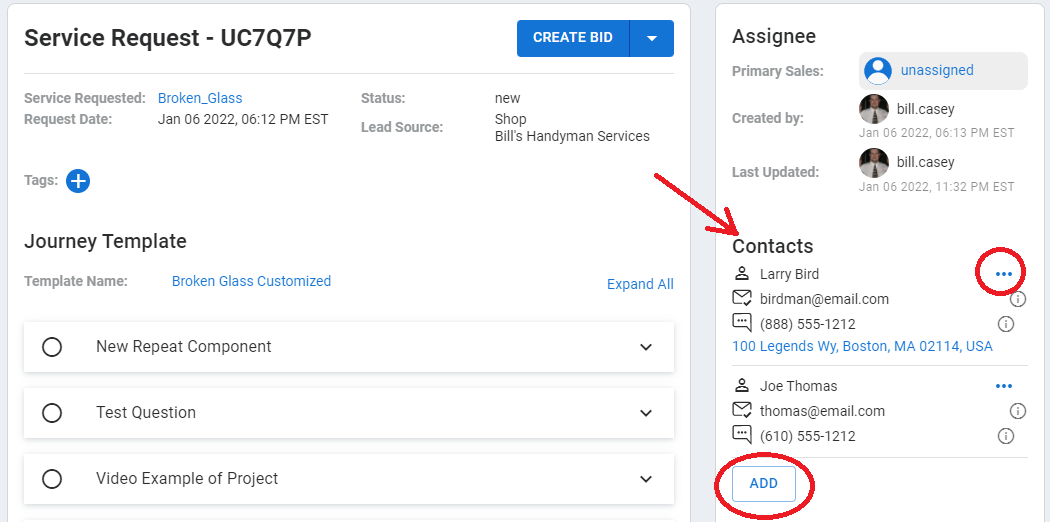
At any stage of the project, you will use the ellipses and 'ADD' buttons to:
- Edit the details for the contacts already associated with the project.
- View summary and detail information for any of those contacts.
- Add an additional contact.
- Remove an existing contact.
- Determine which contact is the primary contact associated with the project.
Edit Contact Details
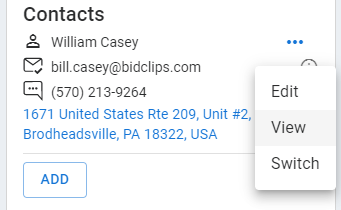
To edit a contact, click the ellipses button and select 'Edit' from the drop-down list.

This will take you to the details of that specific contact.
Click on the 'Edit' button in the upper right corner of the page to perform the edit. To learn more about how to edit a contact, click here.
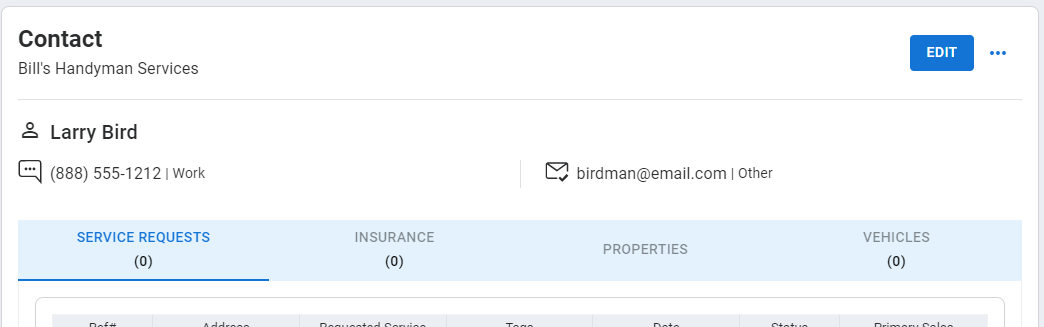
View Contact Detail Information
To view more information about a contact, click the ellipses button and select 'View' from the drop-down list.
This will take you to the details of that specific contact where you can see this contact's phone and email information, communication delivery settings, and prior service request, insurance, property, and vehicle details.
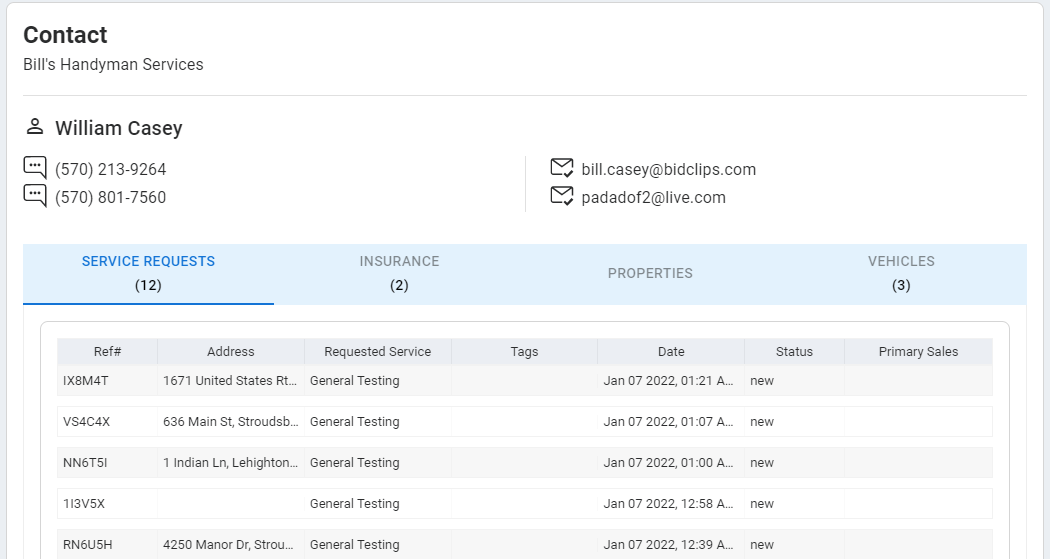
To learn more about viewing summary and detail information for a contact, click here.
Add an Additional Contact
Click the 'ADD' button below the list of contacts that have already been associated.
You will be given the opportunity to add an existing contact or create a new contact that can be added to the service request, bid, or job.
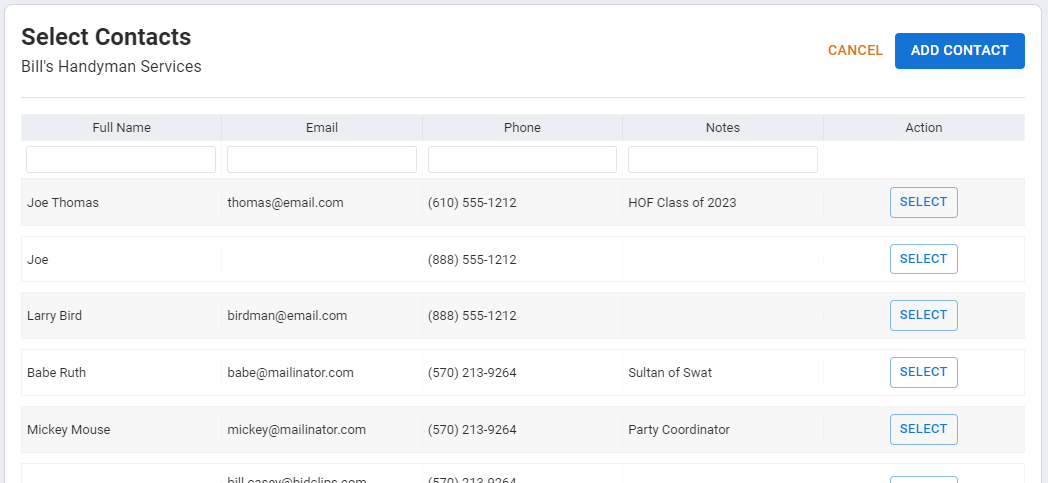
If you would like to include an existing contact, locate the contact and click the 'SELECT' button on the right-hand side of the row.
If you would like to create a new contact, click the 'ADD CONTACT' button in the upper right-hand portion of the page. This will take you to the Contact form page where you can enter your new contact's details. To learn more about creating a contact, click here.
Tip: Remember to use the filter boxes underneath each column heading to help locate existing contacts before creating a new contact.
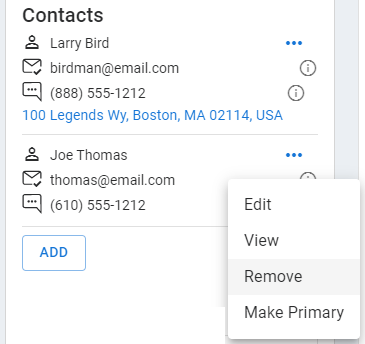
Remove an Existing Contact
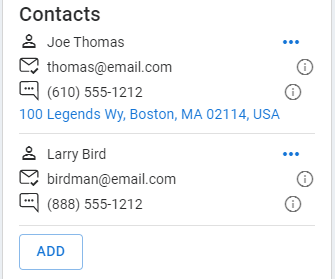
You can remove an existing contact, so long as it is not the primary contact. The primary contact is always the first contact in the list. To remove a contact, click the ellipses button and select 'Remove' from the drop-down list.
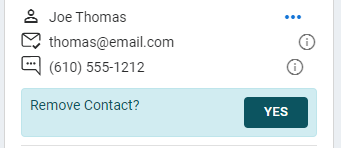
You will be asked if you want to remove the contact before it is officially removed.
Determine Which Contact is Primary
The primary contact is always the first contact in the list. You cannot remove the primary contact, but you can use the switch option to select another existing contact or create a new contact and make it the primary.
To do this click the ellipses button and select 'Switch' from the drop-down list.
You will be given the opportunity to select an existing contact or create a new contact to be the primary contact.
If you would like to switch with an existing contact, locate the contact and click the 'SELECT' button on the right-hand side of the row.
If you would like to create a new contact, click the 'ADD CONTACT' button in the upper right-hand portion of the page. This will take you to the Contact form page where you can enter your new contact's details. To learn more about creating a contact, click here.
Tip: Remember to use the filter boxes underneath each column heading to help locate existing contacts before creating a new contact.
If there are multiple contacts associated with the project, you can select any of the other contacts and make them the primary contact. To do this click the ellipses button and select 'Make Primary' from the drop-down list.

That contact is now the primary contact for the project and will be at the top of the list.
Some things to consider when working with multiple contacts and determining which will be the primary contact:
- The primary contact will be used to sync job and payment information in BidClips external integrations.
- The service request, insurance, property, and vehicle information will be related to the primary contact.