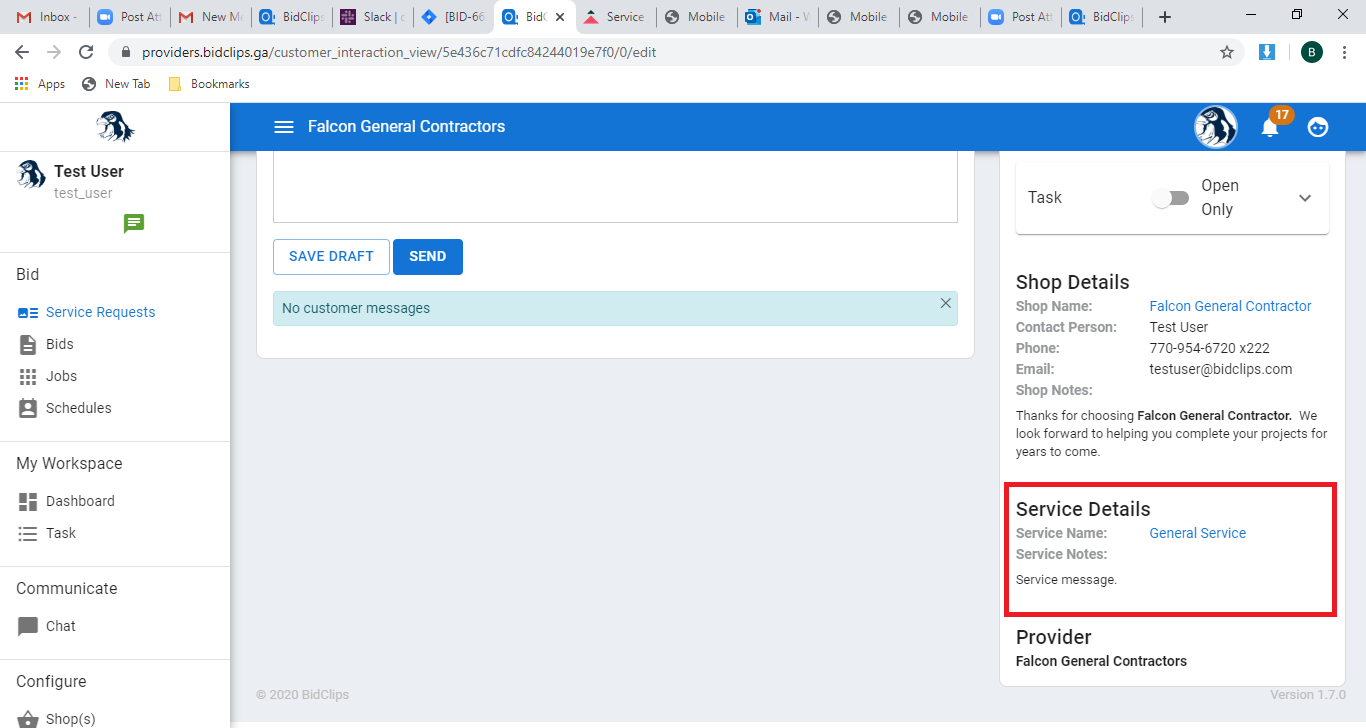
Learn all about Service Requests
A service request is the beginning of your lead-to-order process in BidClips. Service requests can be created either by a member of your organization or by an online customer utilizing the BidClips widget embedded into your organization’s website.
A service request is where you will collect and organize all information from your customer, including journey template answers and customer messaging interactions, that will help you create an accurate bid.
A service request is also where you will collect and organize all internal information that will help keep your sales team organized as the service request is turned into a job.
Accessing the Service Request Page
The Service Requests page will be the page you are directed to when you first log into the BidClips Provider Portal.
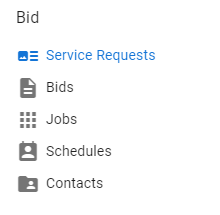
If you need to navigate to the Service Requests page from other sections of the Provider Portal, you can do so by clicking on the 'Service Requests' link from the 'Bid' section of the navigation bar on the left side of the screen:
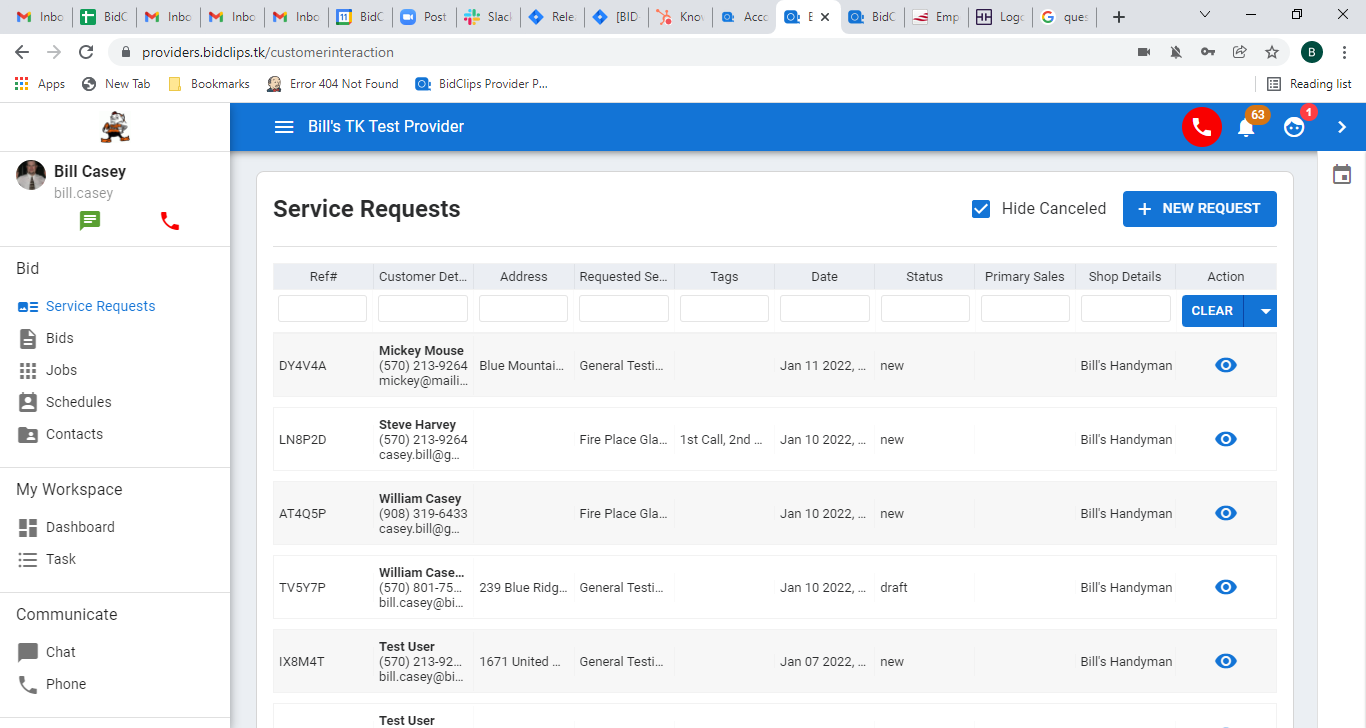
Navigating to the Service Requests page will show you a list of all existing requests. Here you can view and search for existing service requests or create a new service request.
The Service Requests page will display a list of existing requests where you can quickly view certain details including:
- service request reference numbers
- customer details
- service address details
- requested service types
- tags
- date of request
- status of the request
- primary salesperson (if assigned)
- shop for which the service was requested
You will notice that the 'Hide Canceled' checkbox at the top of the page is checked by default on the page. This will prevent all of your canceled service requests from being viewed unless that checkbox is deselected.
We will discuss service request statuses later in the article.
Service Request Details
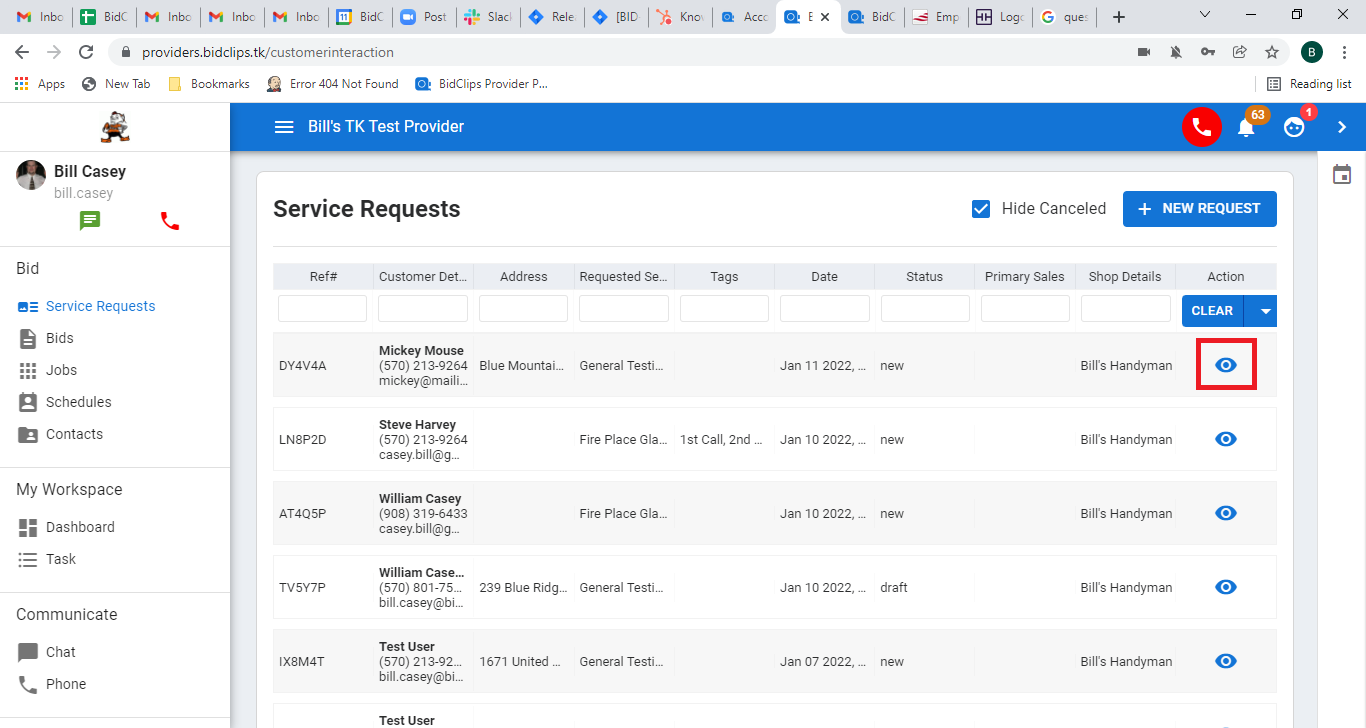
You can view the details for any specific service request in the list by either clicking on the grid row or the 'view'  icon for the service request you would like to inspect.
Service Request Header
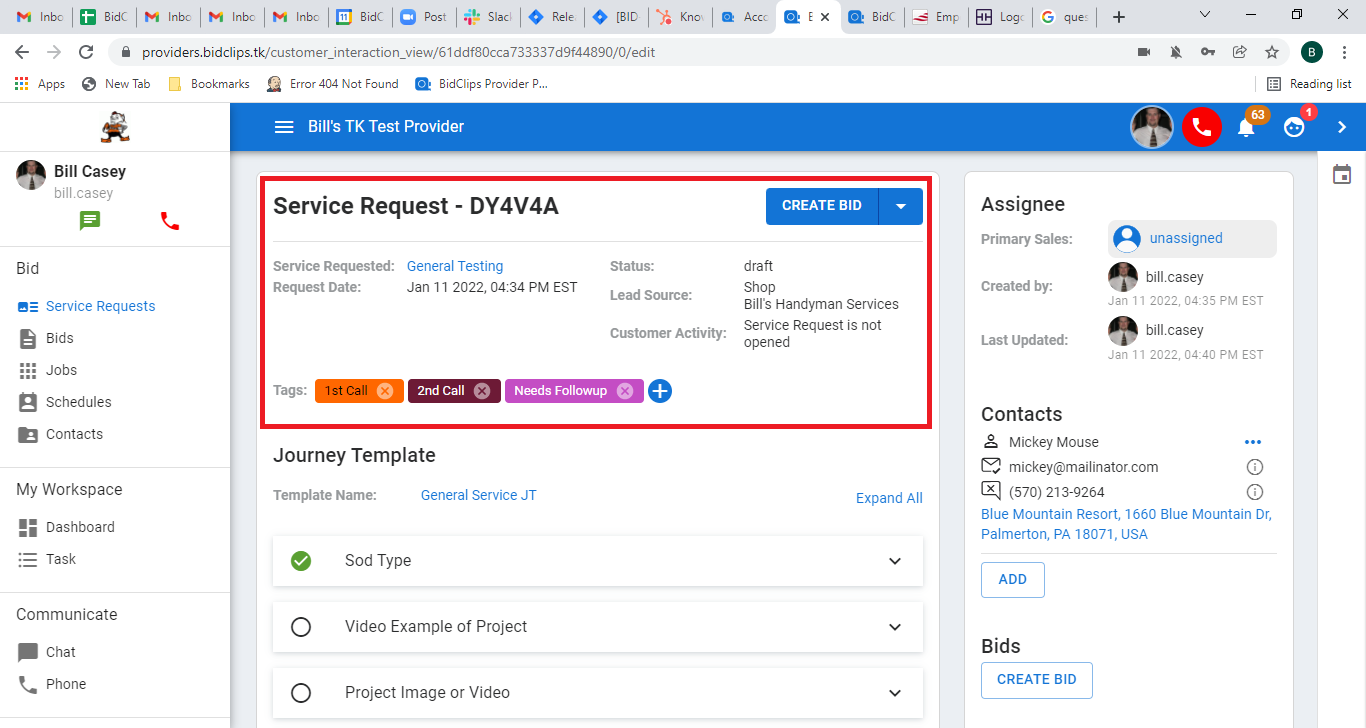
The top of the page displays detailed information pertaining to the specified service request. This header information includes:
- service request number
- the requested services
- request date and time (the shop time zone)
- status
- lead source
- whether your customer has viewed the request
- all tags applied to this request
- service request action button
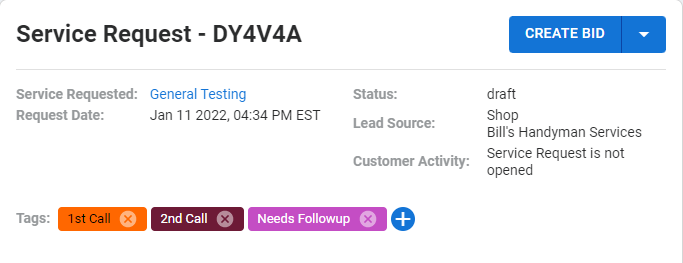
Status
There are six (6) possible statuses for a service request in the BidClips platform: incomplete, new, draft, quoted, won, and canceled. Understanding the different statuses is an important concept when managing your service requests in BidClips. A brief explanation regarding each of these statuses is given below:
- Incomplete: This status is evidenced when a customer started the process of filling out an online service request; provided at least a name along with either a phone number or email address; and did not finish and submit the journey template questionnaire.
- New: A service request will be in new status when it is: first created by a BidClips user, first submitted by an online customer, or updated by a customer after a BidClips user has resent the service request back to the customer for more information.
- Draft: A service request will be in draft status while you are waiting for the customer to fill out the journey template questions and resubmit the request. When you resend a service request to a customer for completion, it will move from incomplete or new status to draft status. The service request will remain in draft status until the customer updates the journey template questions and submits the service request. BidClips will send periodic reminders via email and text message to the customer to remind them that you are still waiting for them to fill out their service request information and submit it to you.
- Quoted: After you have sent at least one bid to a customer, the service request status will move to quoted. The service request will remain in quoted status until a customer accepts a bid, you accept the bid on behalf of a customer, or the service request is canceled for some reason. Similar to the draft status reminders, customers will receive periodic email and text message reminders that they have a bid pending and can reserve service at their earliest convenience.
- Won: When a bid is accepted by an online customer or reserved by a BidClips user the service request will move from quoted to won status.
- Canceled: BidClips gives you the ability to cancel a service request at any time. Typical use cases of this action would be a customer reaching out to you after receiving one of their periodic reminders to let you know they were not interested. In order to cancel a service request, you will need to provide a reason for cancellation and that reason will also be visible in the service request details section. To learn more about how to cancel a service request, click here.
Lead Source
The lead source value will tell you where the service request was initiated. There are three (3) possible lead source values for a BidClips service request: Shop; BidClips Widget, and TPS. A brief explanation regarding each of these values is given below:
- Shop: The service request was created by a member of your organization via the BidClips portal.
- BidClips Widget: The service request was created by an online customer who accessed the BidClips widget that is embedded in your organization's website.
- TPS: This value will only be encountered by Service Station customers and shown when the service request was created by a member of the Service Station team.
Customer Activity
When you have chosen the option to resend a service request to a customer to complete, there will be an associated customer activity section in the header information. This will help you identify whether the customer has opened the request for completion notification and viewed the service request. If the customer has not yet viewed the service you will see a "Service Request is not opened" value. If the customer has viewed the service request you will see an "Opened on" value followed by the date and time (in shop time zone) the customer actually viewed it.
Service Request Action Button
At the very top right corner of the service request details section, you will notice a split button as shown below. This is a button that allows you to perform multiple service request actions.
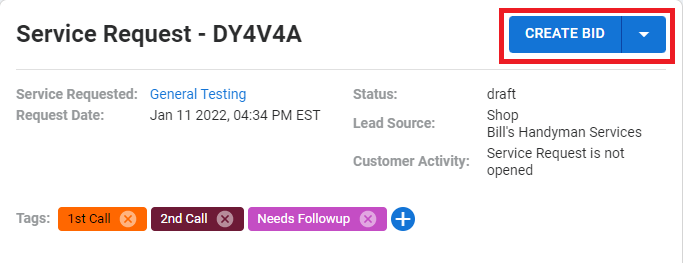
The button will have a default option on the main button depending on the status of the service request. In the example above the default action is "Create Bid". You will see Create Bid as the default option if the service request is in incomplete, new, draft, or quoted status.
Should your service request be in won status, the default option would be "View Job". Finally, if your service request is in canceled status, you will see "Reopen" as the default option.
If you want to perform the default option, you need only to click on the main button with the option title. Should you want to perform an option different from the default, you should click on the drop-down arrow to bring up a list of other options.
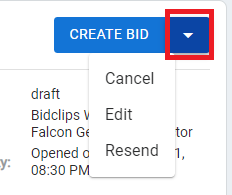
A complete list of possible options you will see are:
- Create Bid: Starts the process of creating a bid for the service request and will eventually bring you to the bid details page.
- Cancel: Starts the process of canceling a service request and will bring up a dialog panel to provide a reason for cancellation.
- Edit: Allows you to update any of the journey template questions for the service request. The journey template section of a service request is described in more detail later in the article.
- Resend: Resend the service request to the customer for completion.
- View Job: Navigate to the job details page for a service request that has been won.
- View Won Bid: Navigate to the bid details page for a service request that has been won.
- Reopen: Reopen a canceled service request.
The options that will be available for you to perform will also depend on the status of the service request at the time you click the split button. A listing of the default and available options for each of the possible service request statuses are described below:
- Incomplete: Create Bid (default), Cancel, Edit, and Resend
- New: Create Bid (default), Cancel, Edit, and Resend
- Draft: Create Bid (default), Cancel, Edit, and Resend
- Quoted: Create Bid (default), Cancel, and Edit
- Won: View Job (default), Cancel, Edit, Create Bid, and View Won Bid
- Canceled: Reopen (default)
Photo Gallery
If any images or videos have been added to the service request, you will see a Photo Gallery section.
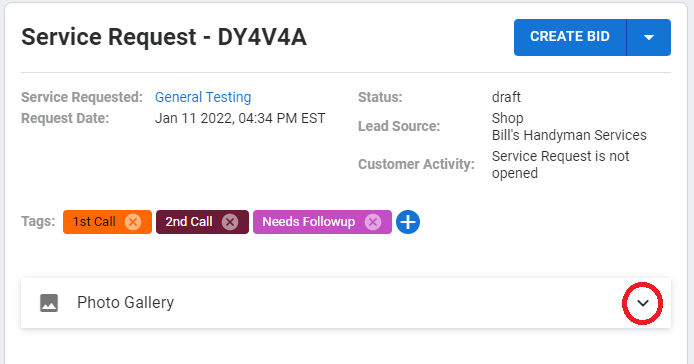
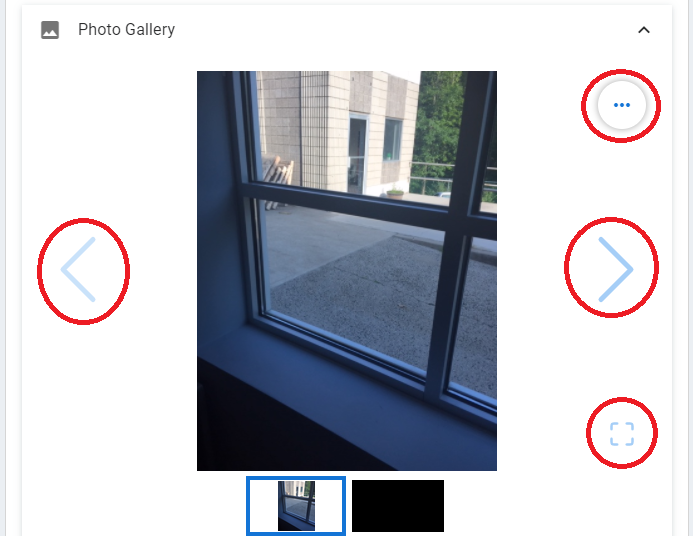
Once the photo gallery section is expanded, by clicking the drop-down arrow, you will be able to view and work with images collected for this service request. Media summarized in this section can come from journey template answers, direct customer messages, or internal notes.
Use the ellipses button to work with the media, the "<" or ">" buttons to scroll through the images/videos, or the full-screen button to view the media in greater detail.
Journey Template
In the Journey Template section of the service request, you will see a list of the journey template questions for the service requested. You can think of a journey template as a form that a shop user or customer fills out when the service request is first created.
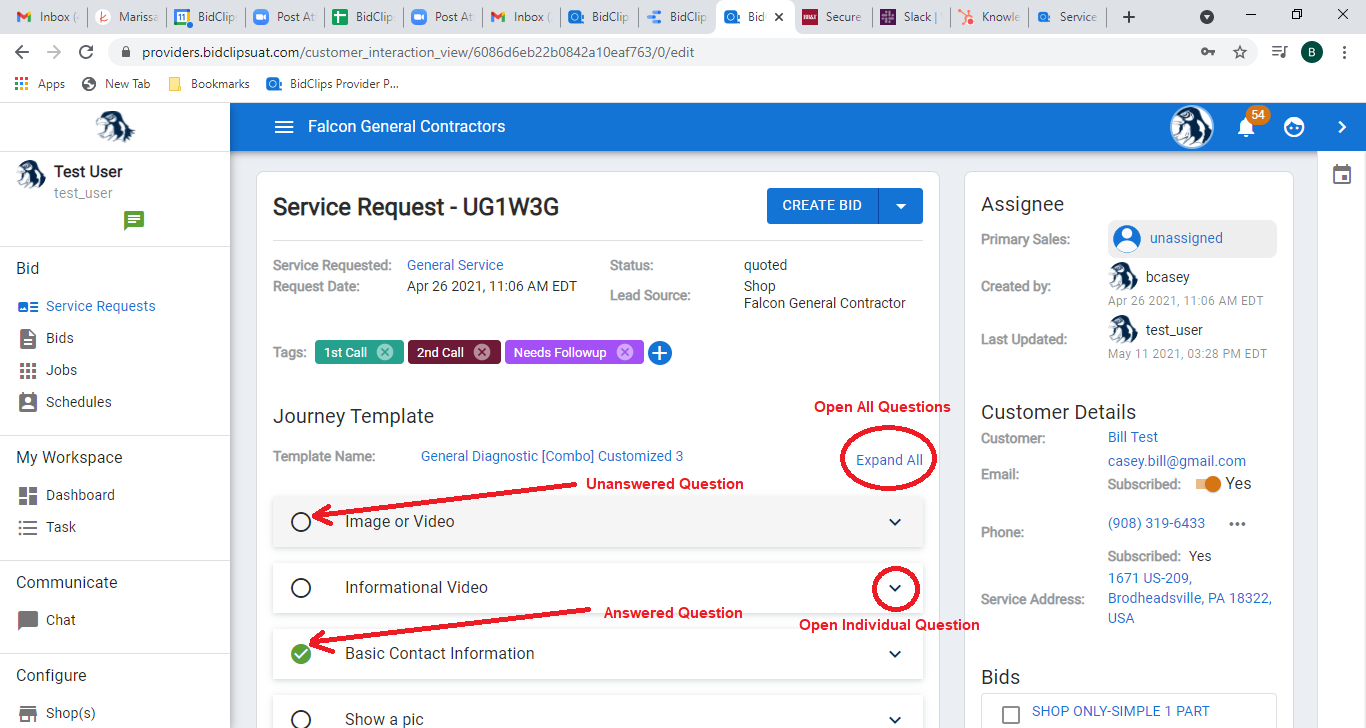
Each journey template or form question will have its own accordion. Unanswered questions will be noted with an open, gray circle. Conversely, answered questions will be marked with a green circle with a checkmark.
You can open the accordion for each of the journey template questions individually to see the answers currently available.
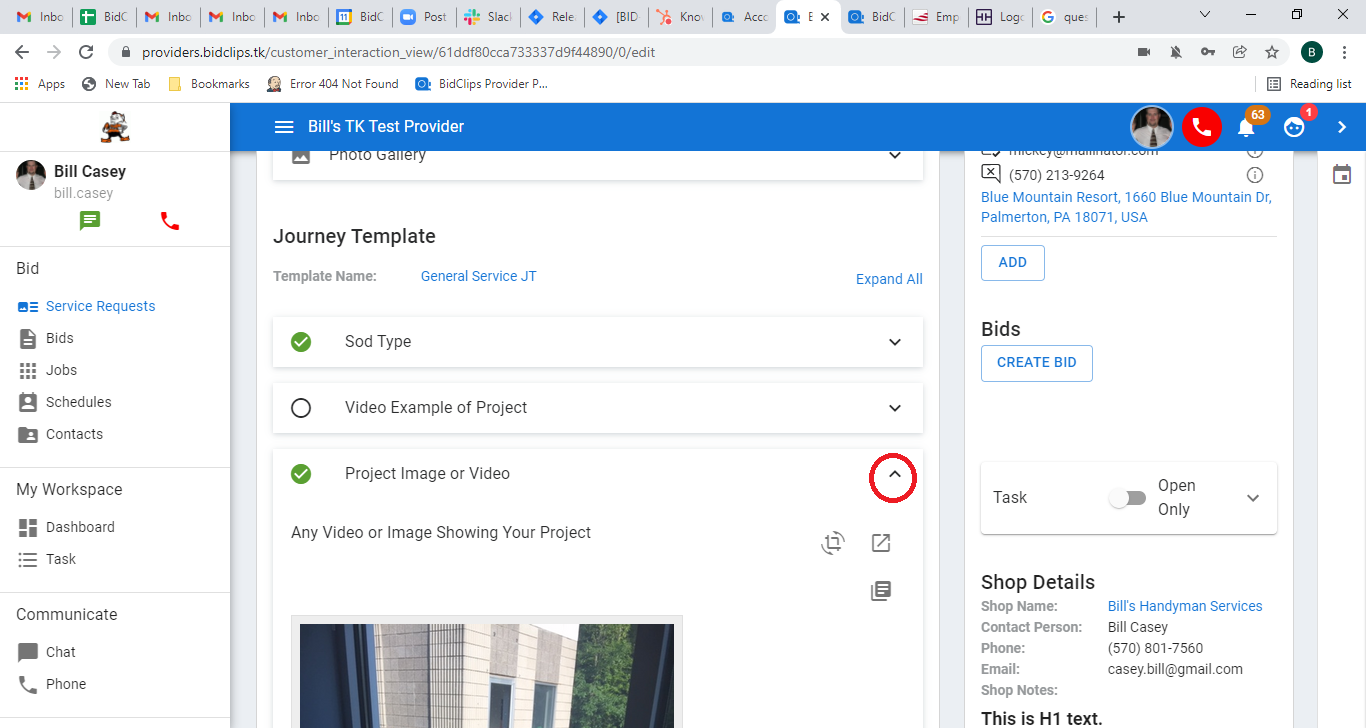
Note: Should the journey template answer be an image or video, you can click on the media object to view it in more detail. Images provided by the customer are also able to be rotated and zoomed in on for more detail.
You can also use the 'Expand All' link to open the entire journey template, or the 'Collapse All' link to close the entire journey template after expanding.
The answers provided to the journey template questions will help you create an accurate bid.
Customer Messaging and Internal Communication
At the very bottom of the Service Requests page, you can access all of your external and internal communications related to the specific service request you are viewing. Clicking on the 'Customer Messages' tab will allow you to manage your external messages.
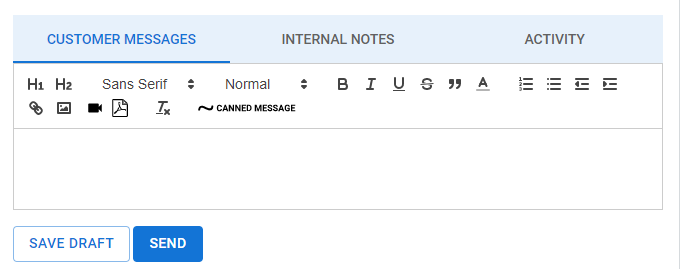
BidClips allows you to send direct messages to your customers. Those direct customer interactions will be retained in the BidClips portal for a centralized log for all of the messaging activity.
In your direct communications with your customers, you can utilize rich-text editing and include web links, images, videos, and pdf objects in the messages.
Your messages can be created on an ad-hoc, freeform basis. BidClips does provide a canned message option to allow you to generate and send common customer messages without the need to type them out each time.
You can apply canned messages by either clicking in the message editor and typing a "~" or clicking the '~ CANNED MESSAGE' button and selecting one of your organization's available canned messages from the list.
Below is an example of how to use a canned message.
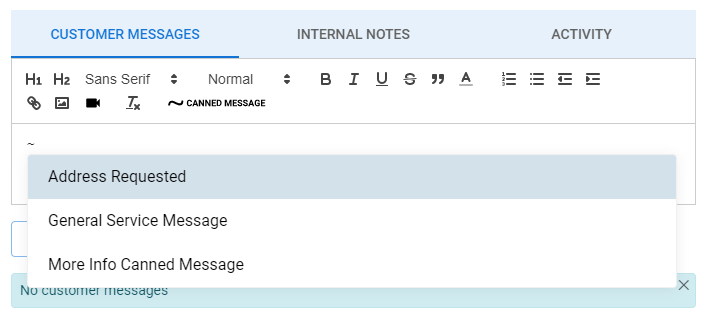
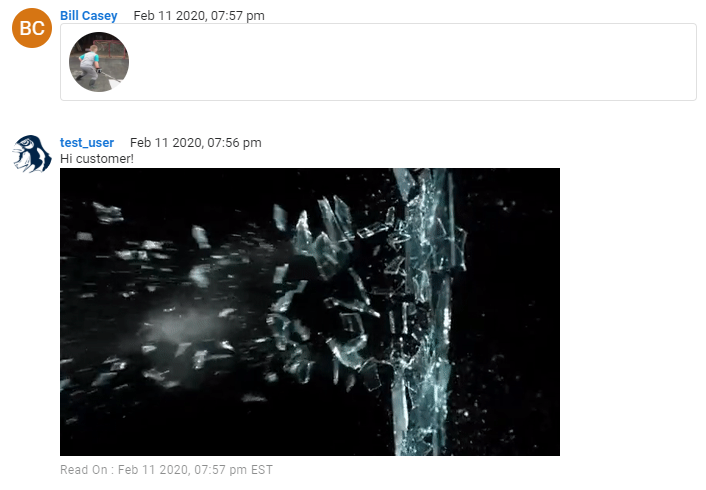
In the Customer Messages tab, you will also see a log of all the messages that have been sent between your sales team and the customer. You will see the customer name displayed on all incoming messages and will be able to see when your customer has/has not viewed your outgoing message(s).
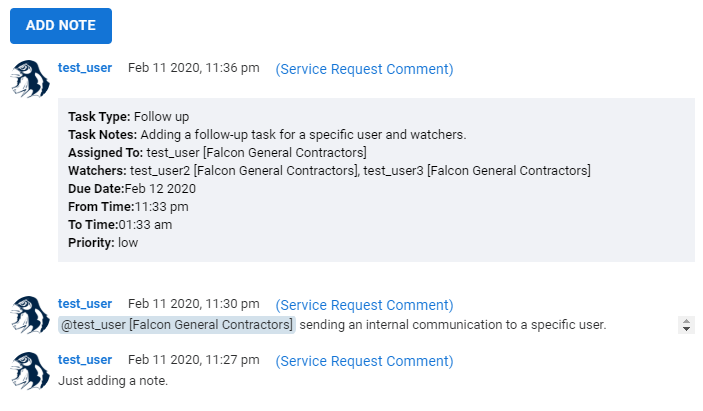
Clicking on the 'Internal Notes' tab will allow you to manage notes, internal communications, and tasks related to this specific service request.
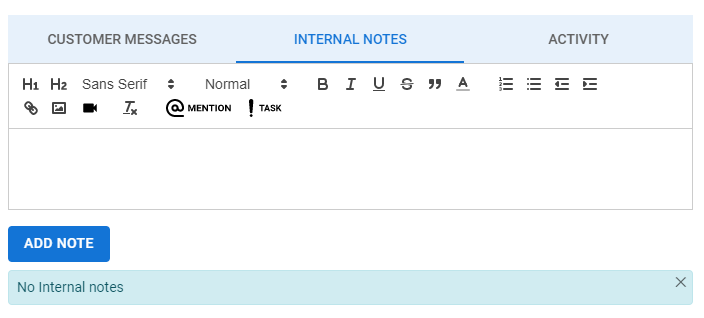
- If you would simply like to create a note for the service request that is unassigned to any specific user, you can click in the text editor and click the 'ADD NOTE' button when you are done.
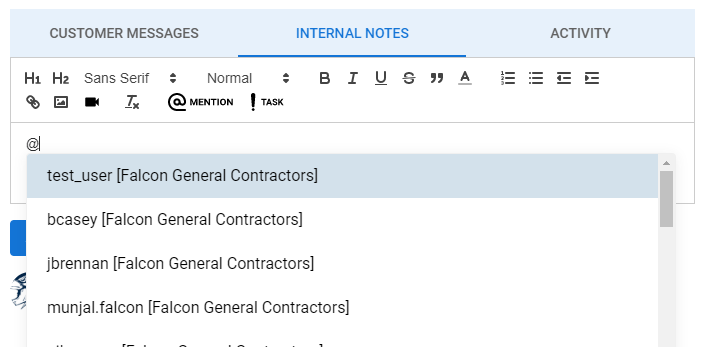
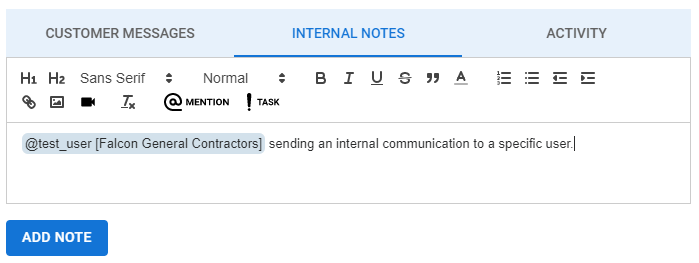
- If you would like to create an internal communication for yourself or another user, you can type "@" in the text editor or click the '@ MENTION' button. You will then see a list of users from which to send the internal communication. Once you have selected a user, you can enter additional text to add in the note. When you are done creating your communication, click the 'ADD NOTE' button.
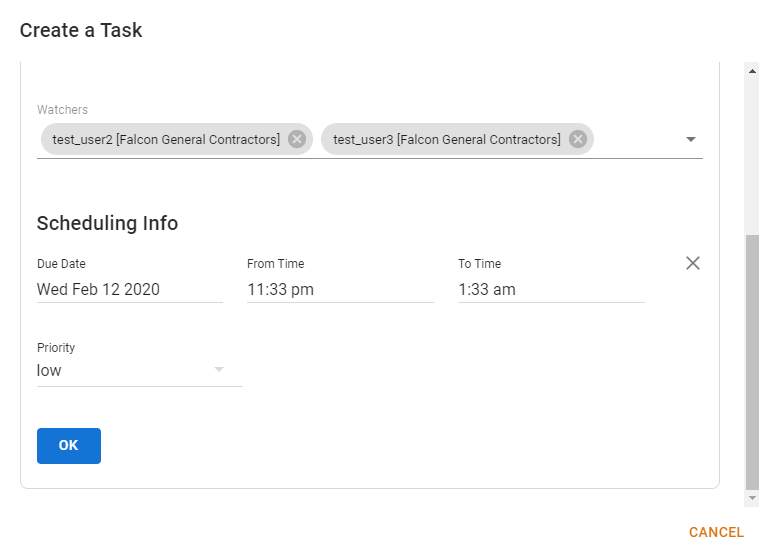
- If you would like to create a new task for yourself or another user, you can type '!" in the text editor or click the '! TASK' button. You will then see a task creation panel appear where you can select a task type, assign a user, add watcher(s), set due date and time information, a priority, and status. Once you have finished creating your task, click the 'ADD NOTE' button.
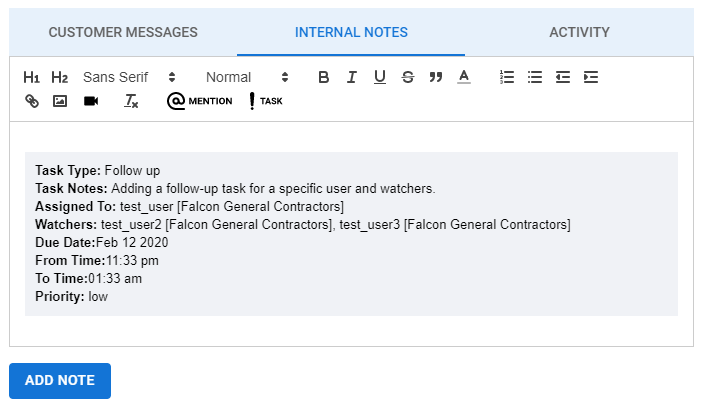
Here you will also see a log of all the internal notes that have been created by you and your sales team for this service request.
Note: If you are a Service Station client, you can also send internal communications and assign tasks to all of the Service Station users in addition to your own team members.
Assignee
The top right side of the service request shows the primary sales associate assigned to the service request.
If a primary sales associate has not been assigned, you will see an "unassigned" value next to the 'Primary Sales' label.
In addition to creating intra-organizational accountability, the designated assignee will be assigned tasks and/or receive email communications during the lead-to-order process.
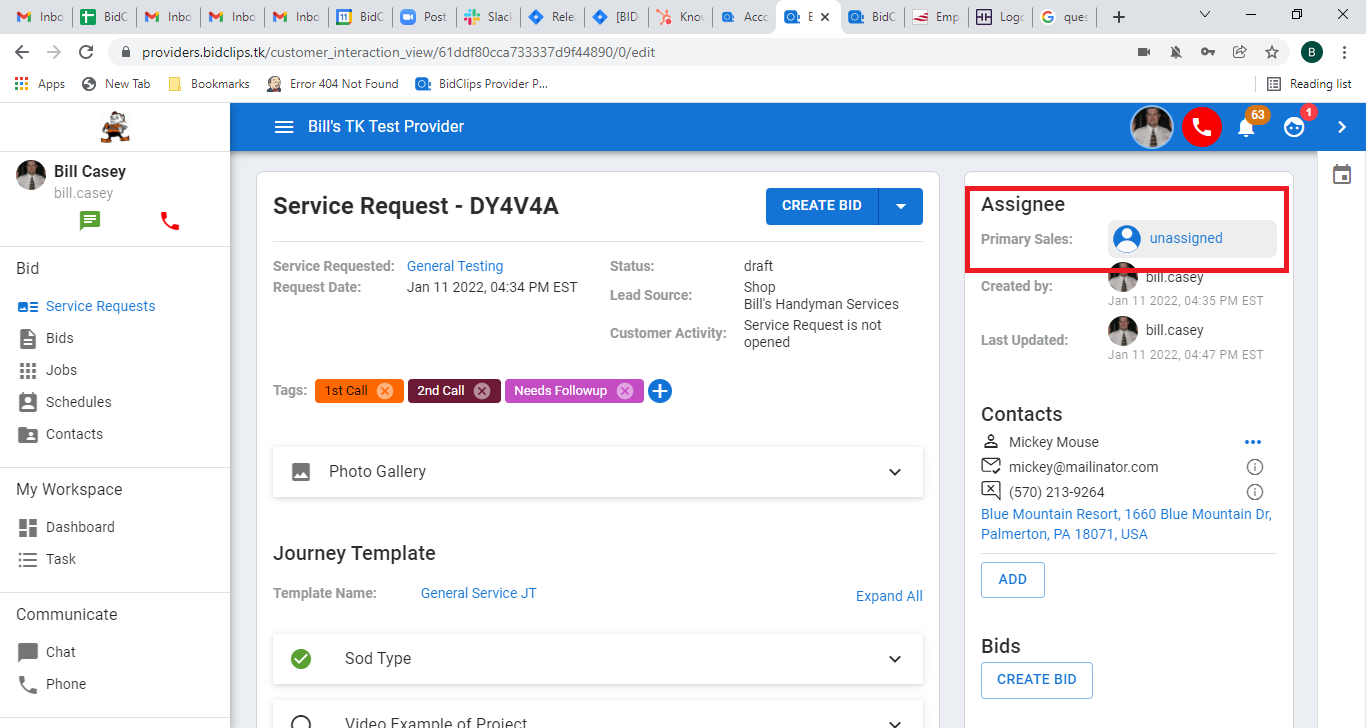
You can change the assignee on the service request by clicking on the unassigned or currently assigned team member link. This will bring up a panel for you to select a team member for the assignment.
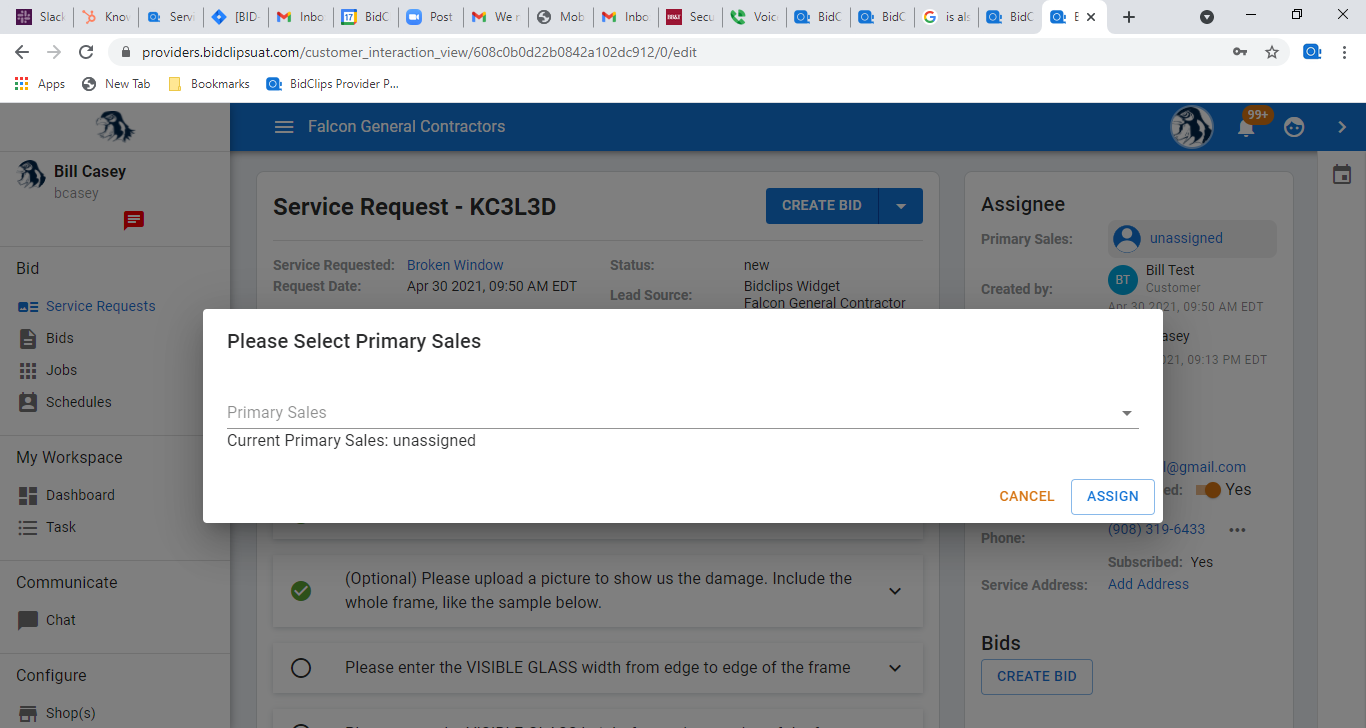
Click in the 'Primary Sales' field, select the desired team member you would like to assign the service request to, and click the 'ASSIGN' button.
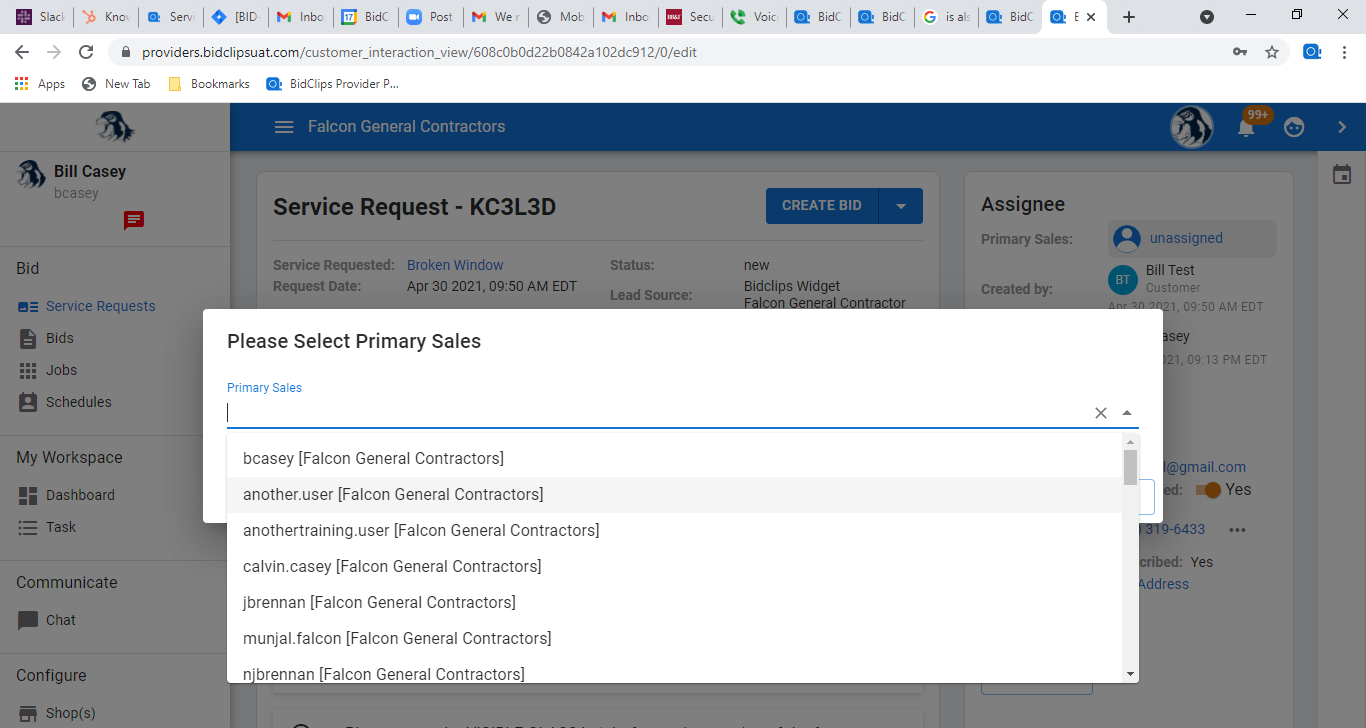
You will notice the primary sales value has changed.
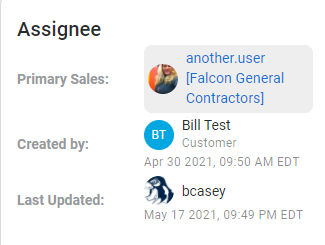
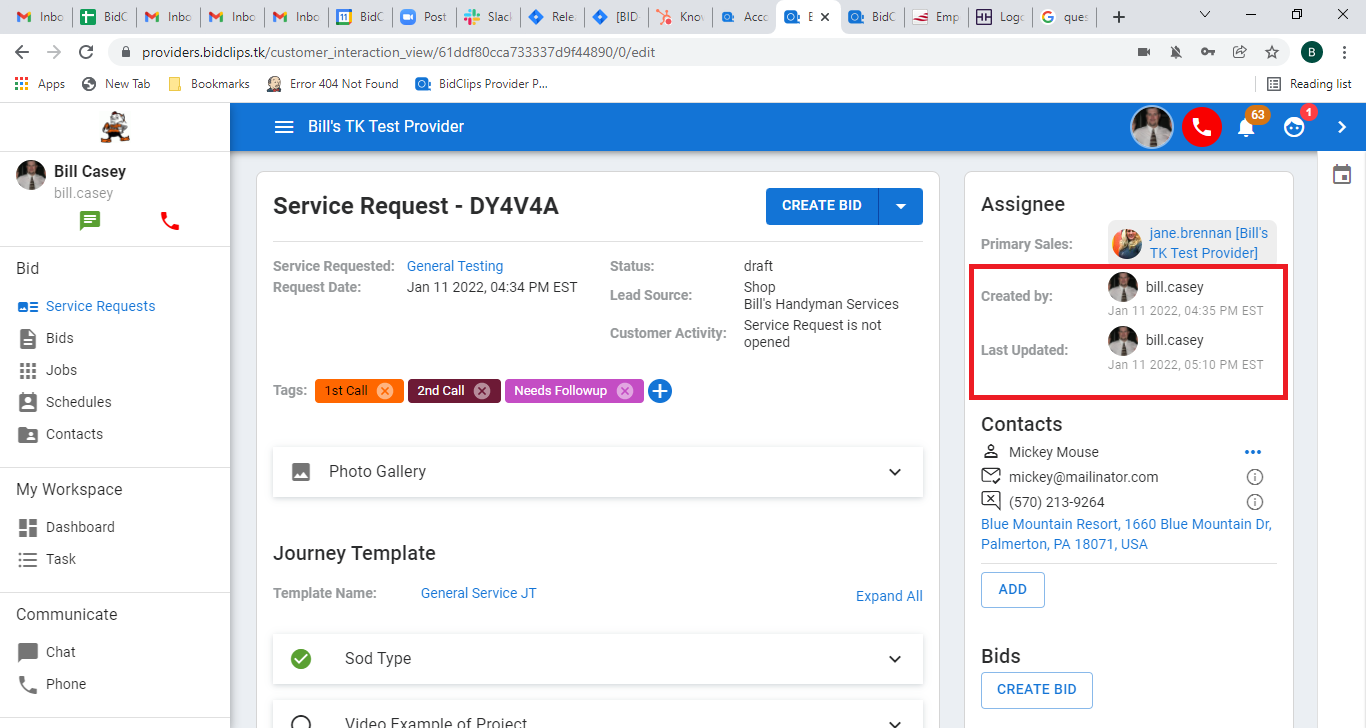
Created/Updated Information
The service request details page will show you who created the service request (which user in your organization if created by shop or customer name if created online) and when it was created. This section will also display when it was last updated and who performed that update.
Contacts
Below the created and updated information, you will see detailed contact information.
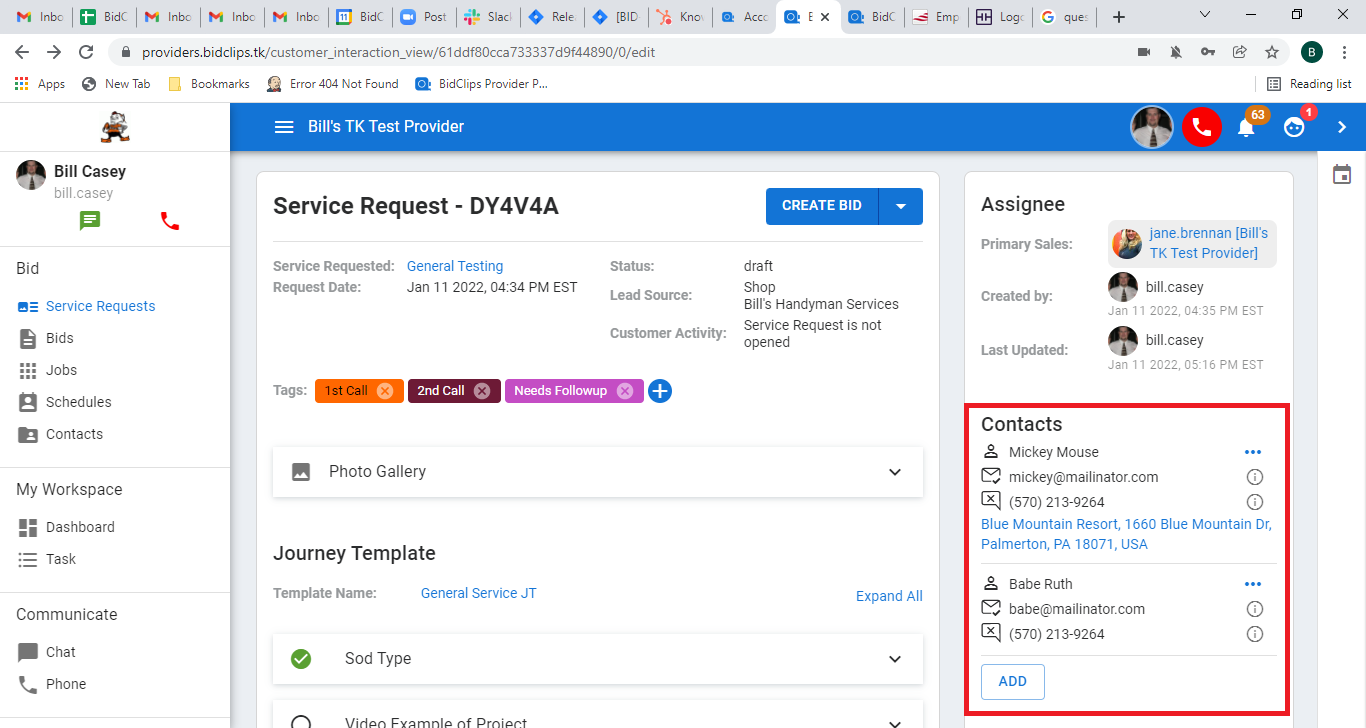
You can have multiple contacts associated with one BidClips service request. Each of the contacts can also have multiple email addresses and/or phone numbers. In this section, you can:
- Use the ellipses button next to each contact to view, edit, or switch contacts.
- Use the information button next to the email address to view all email addresses associated with the contact and the communication preference for each address.
- Use the information button next to the phone number to view all phone numbers associated with the contact and the communication preference for each number.
- Use the 'ADD' button to associate additional contacts to the service request.
- Click on the address link to update the service address associated with this request.
Tip: The first contact listed is the primary contact associated with the request. Every service request must have a primary contact.
To learn more about how to manage your BidClips contacts, continue your reading here.
Bids
In this section, you can click on an existing bid to see the details related to that specific bid, create a new bid, or select multiple bids to send/resend. Here, you will also be able to access activity details for each of the bids that have been created for the service request.
The activity details include: which user has created/sent the bid to the customer, information regarding your customer viewing their bid, and information regarding bid acceptance should the bid have been converted into a job.
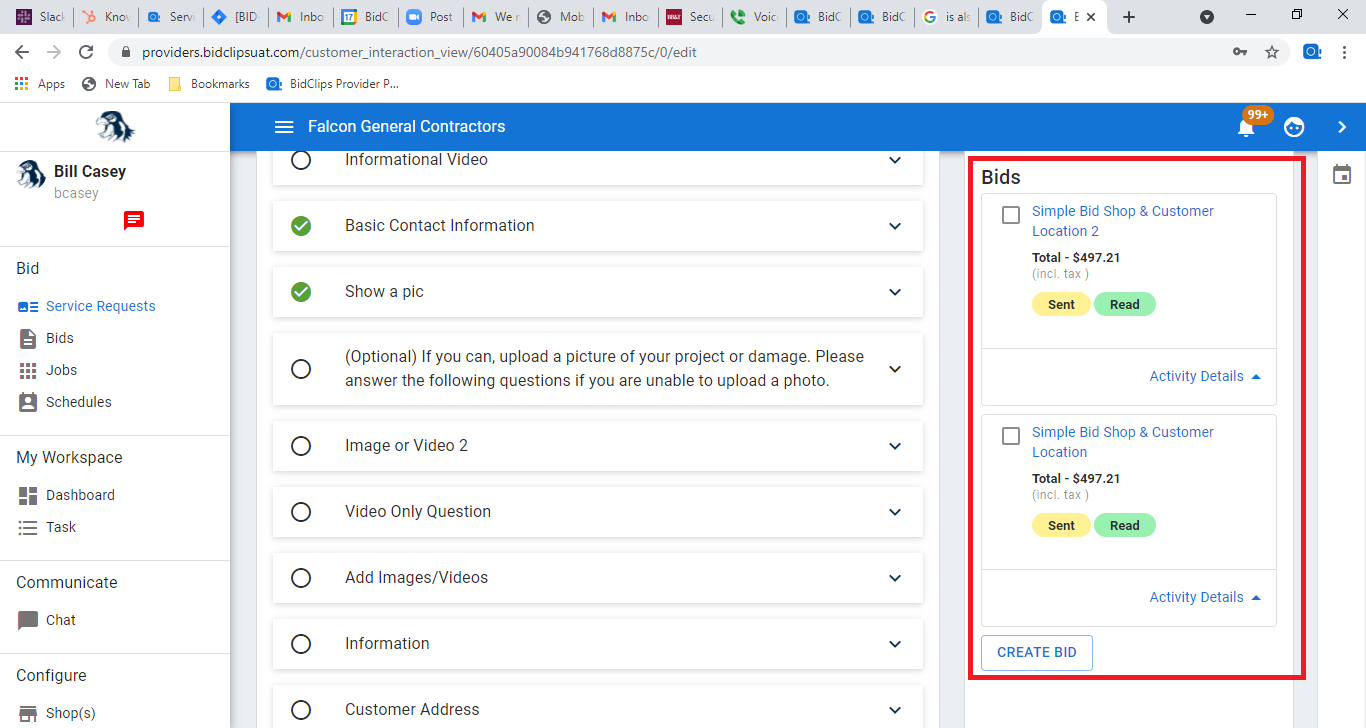
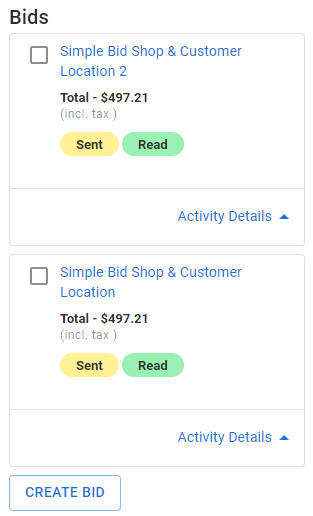
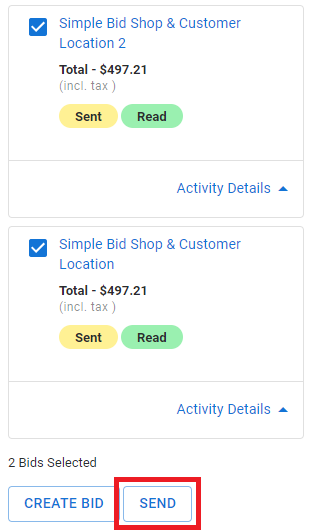
If you want to send multiple bids at once you can click on the checkboxes next to the individual bids, you will notice a "SEND" button appear. Click that button to send the multiple bid options to the customer together.
Insurance
If the journey template for the service being requested contains a possible Insurance component, you will see the 'Insurance' section of the service request.
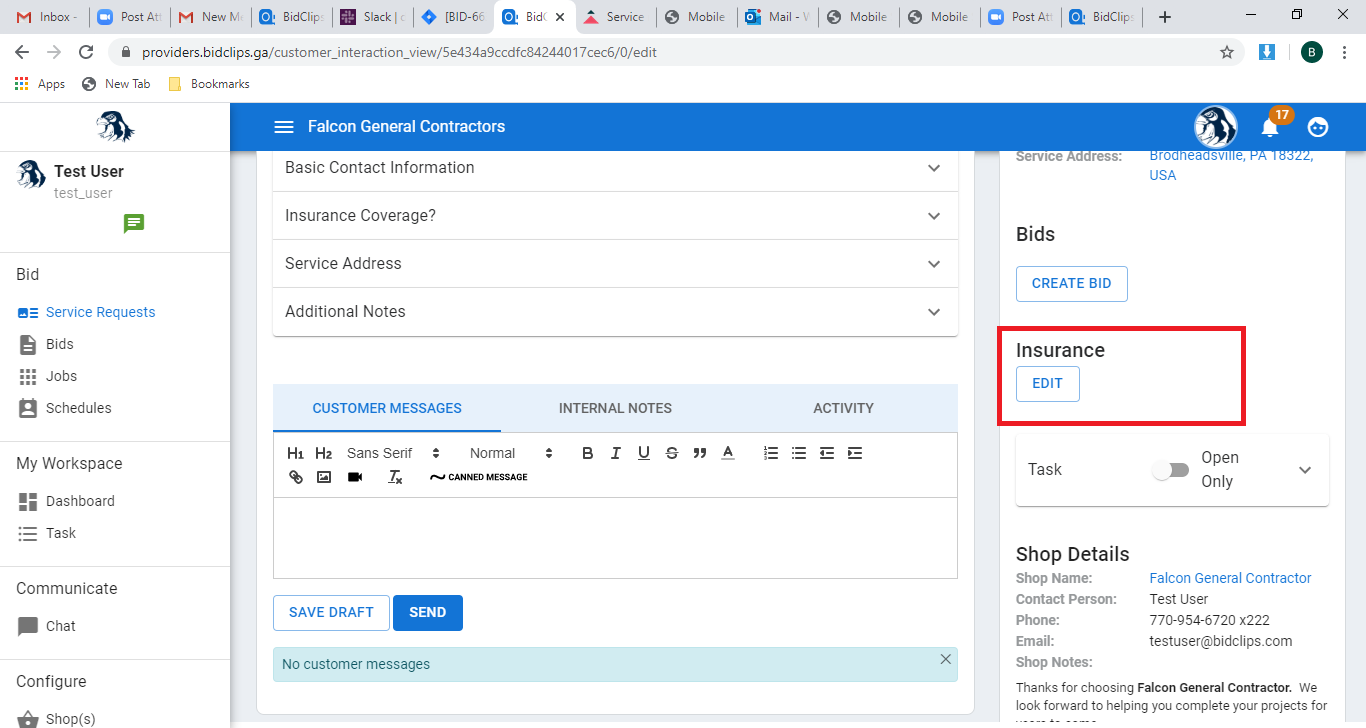
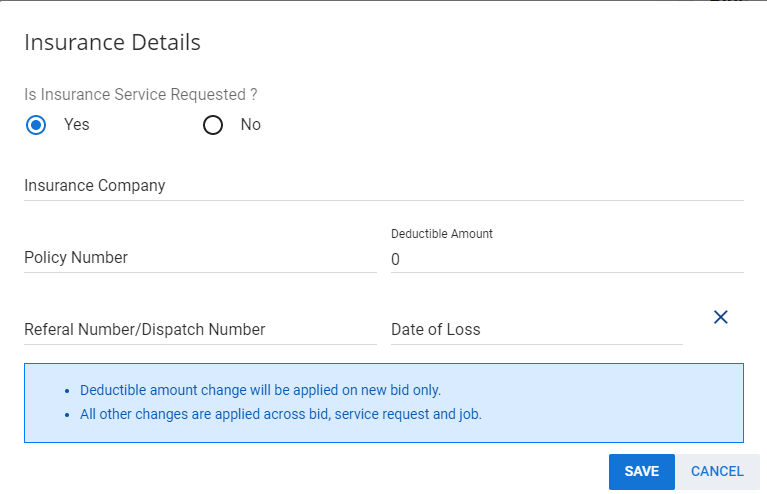
To add insurance information, click the 'EDIT' button which will bring up an 'Insurance Details' panel where you can enter all of the customers' insurance information.
Tasks
Tasks can be associated with Service Requests.
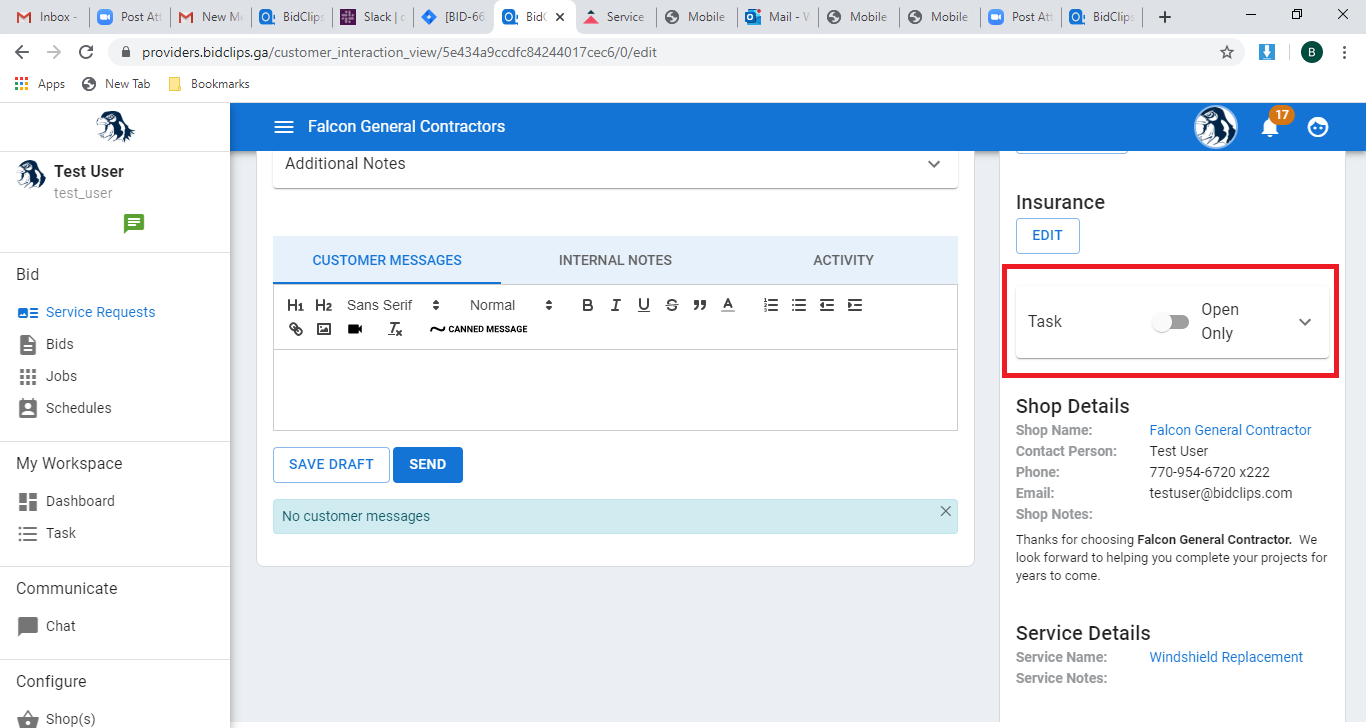
You can view all of the tasks associated with a particular service request in the 'Tasks' section by opening the accordion.
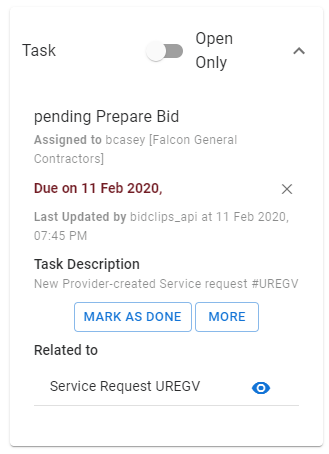
You can use the toggle switch to determine if you want to view all tasks for this service request or only the tasks that are currently open. You can learn more about tasks and how to use them in this article.
Shop Notes
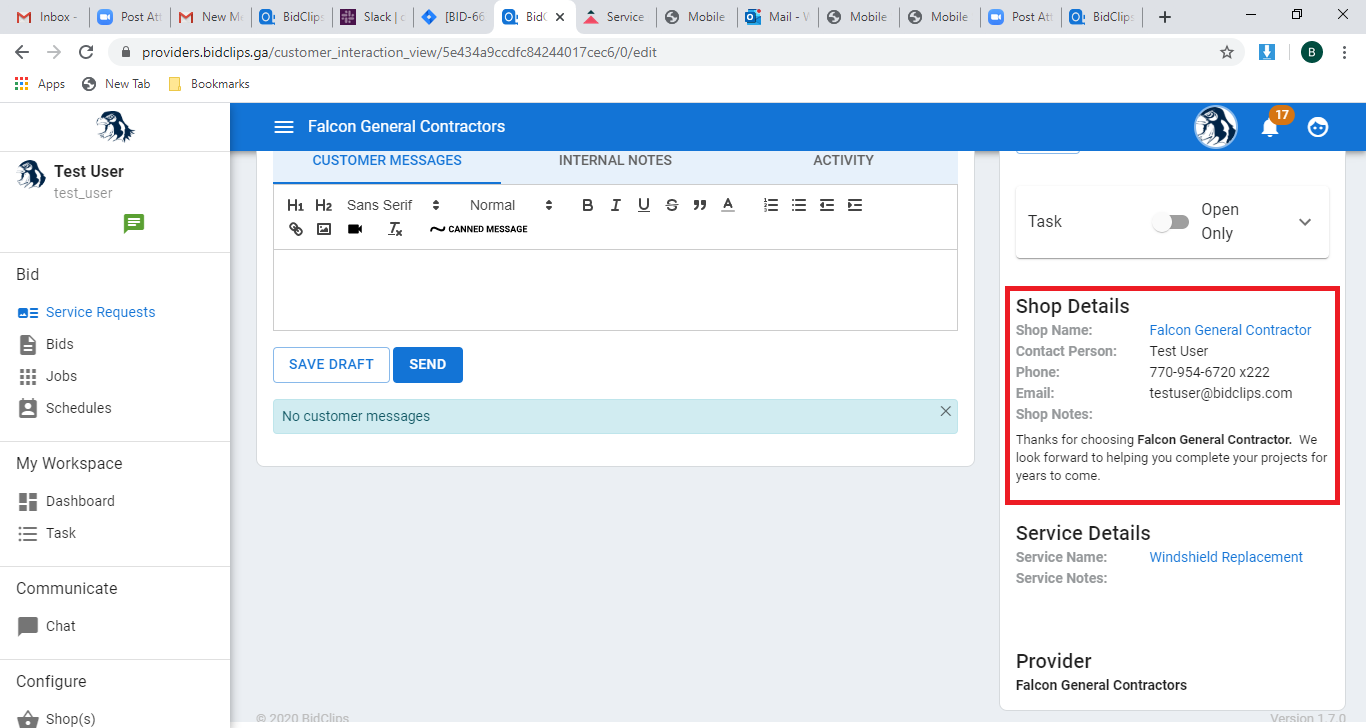
Here you will view notes about the shop. Shop notes are for internal use only and not displayed or sent to the customer.
Shop notes often contain information that is important to your organization and often contain items such as scheduling or holiday details. You can configure the shop notes that are displayed by editing your shop details.
Service Details
The service details section, also for internal use only, can provide important information about the service that is being requested. The notes displayed here can be configured in the shop services portion of the Provider Portal.
